


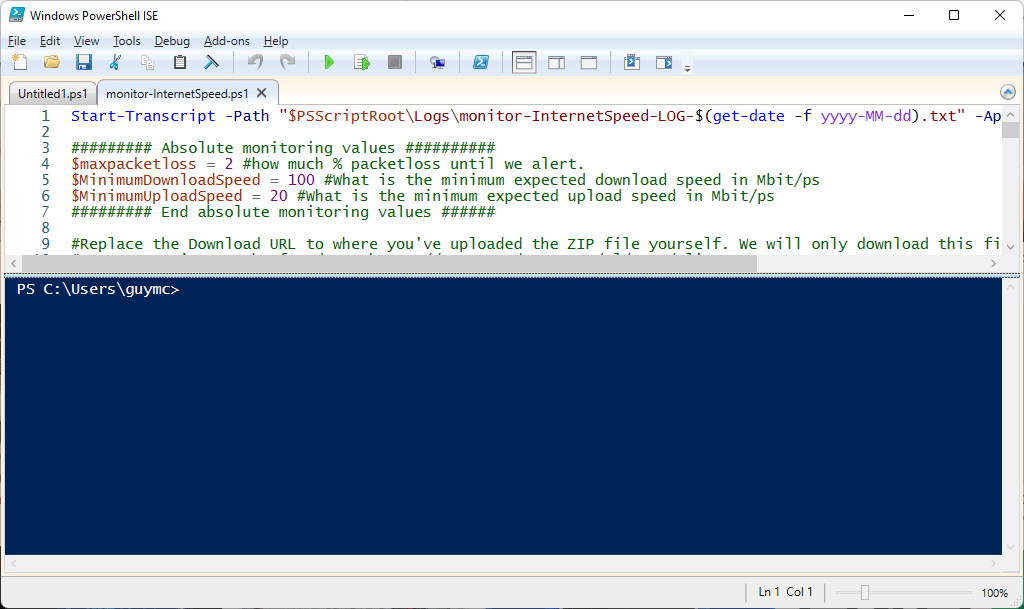
There’s more to PowerShell than just the scripting language. These keyboard shortcuts apply to Microsoft’s Windows PowerShell ISE and PowerShell Console.
Even though PowerShell is spreading to other operating systems—like macOS version 10.12 and newer and even several Linux distributions— these shortcuts may not work on all operating systems or all versions of PowerShell. But even a few will save you minutes, if not hours, putting together your scripts.
Best Keyboard Shortcuts for Windows PowerShell ISE
The PowerShell Integrated Scripting Environment (ISE) is where you can develop and test PowerShell scripts and apps. All versions of Microsoft’s Windows operating system, whether Windows Server, Pro, or Home, include the PowerShell ISE.
Since Windows Powershell ISE is an editing environment, most common Microsoft Office shortcuts apply, like Ctrl + C for copy and Ctrl + V for paste. The shortcuts below are particular to the Powershell ISE.
- Ctrl + Tab and Ctrl + Shift + Tab: Moves the PowerShell ISE’s focus from tab to tab. Ctrl + Tab takes you to the right, and Ctrl + Shift + Tab takes you left.


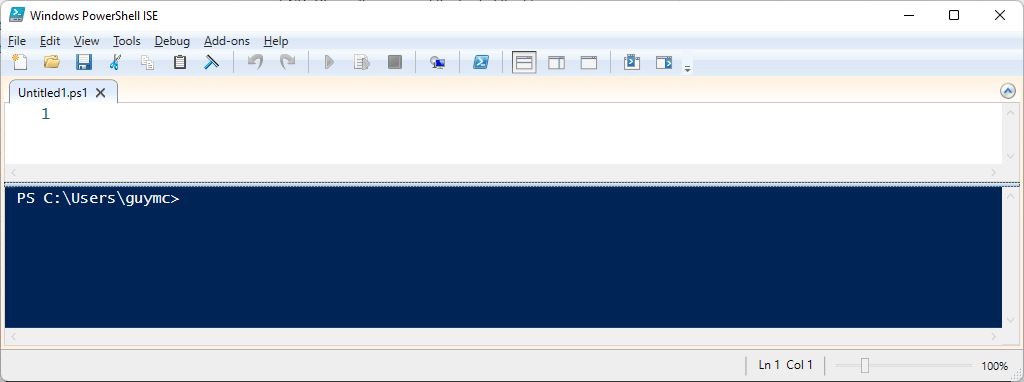
- Ctrl + T: Opens a new PowerShell workspace. You could use this to separate things like app projects utilizing multiple scripts. Notice how our original three scripts are open under the PowerShell 1 workspace. Select PowerShell 2 workspace to work on a different project.

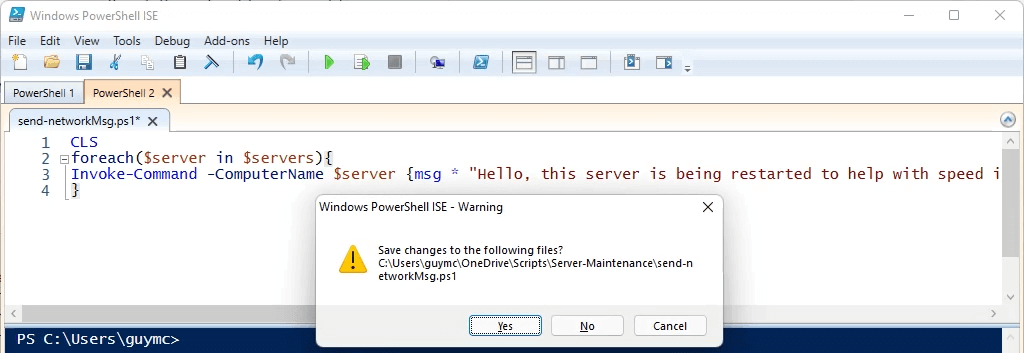
- Ctrl + W: Closes the current PowerShell workspace and all open scripts. If a script isn’t saved yet, a dialog will open to ask if you want to save the changes or not.
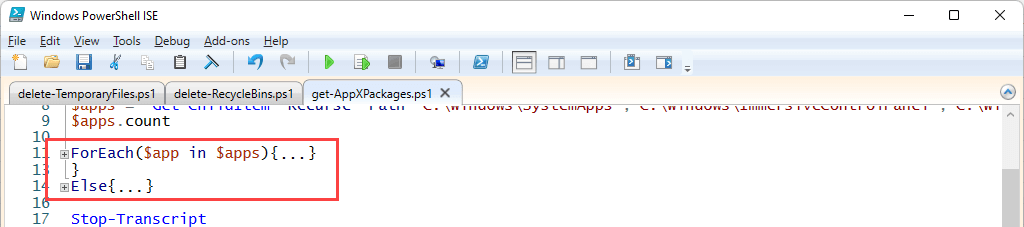
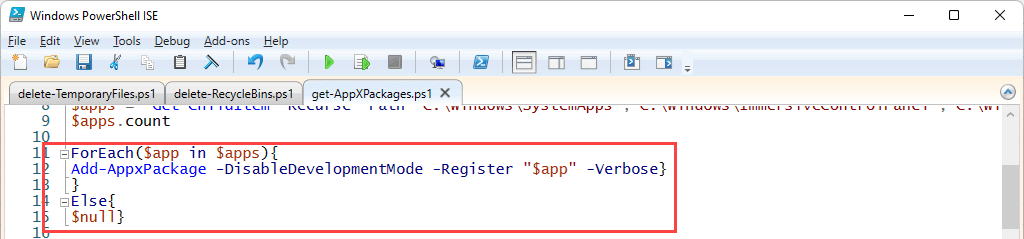
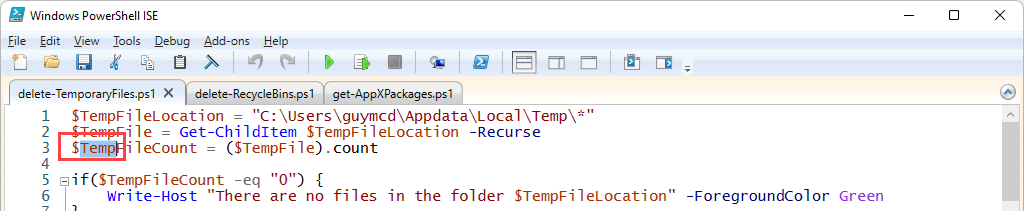
- Ctrl + M: Collapse or expand outlining. Notice the ForEach clause below and the + and – signs next to it. The first image shows the ForEach clause collapsed; the second shows the script expanded.
- Ctrl + F: Find specific text in the script. This keyboard shortcut opens the Find window. You’ll see parameters that you can apply to your search, such as Match Case, Whole word, Search up, Find in selection. You can also use Regular expressions. The search begins where the cursor is placed in the script.

- F3: Finds the next occurrence of the search parameters. You could use the Find Next button in the Find window, but the window gets in the way. Try selecting F3 to jump to the next occurrence. It will have cursor highlighting.
- Shift + F3: What if you go past what you need using F3? Simply use Shift + F3 to find the previous occurrence. It will have cursor highlighting as well.
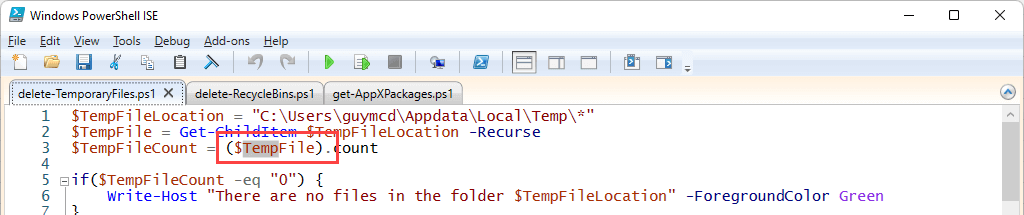
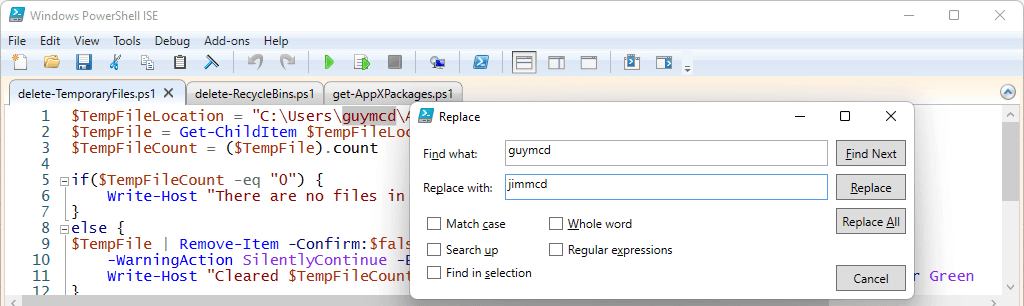
- Ctrl + H: Finds and replaces any text in the script with other text. You can apply the same parameters to this tool as the Find tool.
- Ctrl + J: Opens a snippets selection box. Snippets are small pieces of code with the proper syntax. Double-click to insert a snippet, then add your parameters.
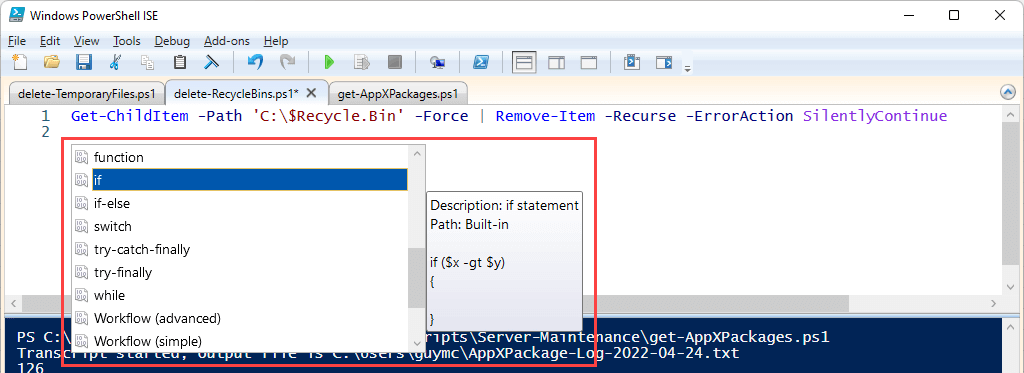
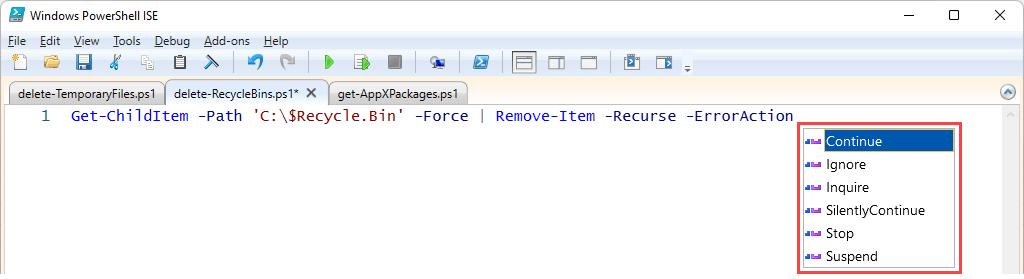
- Ctrl + Space: Similar to showing snippets, this command opens Intellisense. Intellisense presents context-specific options like parameters or comparators. In this case, it shows the possible values of the -ErrorAction parameter for the Remove-Item cmdlet. Click on one to select it.
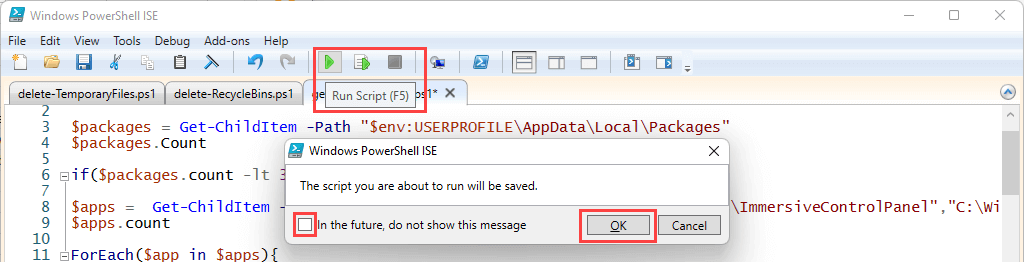
- F5: Runs the entire script and prompts to save it. Check the box next to In the future, do not show this message, and then OK to run and save by pressing F5 in the future. It’s the same as selecting the Run Script button.
- F8: Select a section of the PowerShell script and press F8 to run just that snippet. This helps debug the script one piece at a time. It’s the same as selecting the Run Selection button.

- Ctrl + C or Ctrl + Break: Stops the script while it’s running. If you have some text selected, Ctrl + Break will stop the operation at that point. This is another shortcut helpful for debugging your scripts. Selecting the Stop Operation button has the same effect.

Best Keyboard Shortcuts for the Windows PowerShell Console
If you’ve used the Command Prompt (cmd), you’ll find that the Windows PowerShell Console is just a command prompt tailored for using PowerShell scripts and cmdlets at the command line. The console looks a lot like the old command-line console.

If you’re not crafting automation apps or Windows server management packages, you can use the console to run a few PowerShell commands. However, the PowerShell console has a few more functions and shortcuts. The usual command console shortcuts like the up arrow (^) and down arrow (˅) to recall recent commands also work in the PowerShell console.
- Letter + F8: Can’t remember that cmdlet you used recently, but you know it started with an S? Press S + F8 to list all recently used cmdlets beginning with the letter S. In the image below, see that the first letter is a different color to let us know we just searched on S.
![]()
-
Alt + F7: Clears all the recent commands from the console’s history. It’s like clearing the clipboard. This is helpful when you’ve done a lot in the console, and the up and down arrows are no longer helpful to jump between the needed commands.
-
Shift + Enter: To enter several lines of commands, use Shift + Enter at the end of each line before entering the next one. Then select Enter to run them all in sequence.

- F8: Search through items in the command history that start with what’s at the prompt. In the example below, Get was typed at the command prompt. Selecting F8 again would find the next command that begins with Get if there is one.
![]()
- Ctrl + Space: Works like Intellisense but in the console. In the example, Get-Item was all that was entered. Using Ctrl + Space shows other cmdlets with that beginning and their syntax. You can use the left and right arrows to go between the cmdlets.

- Tab: Works like autocomplete but cycles through the possibilities by pressing it repeatedly. In the first example, there’s only the dash (–) beginning of a parameter. Selecting tab goes through the options until you get the one you want. In this case, it’s -Recurse.
![]()
![]()
You Have the Power of PowerShell Now
When Microsoft released PowerShell in 2006, IT professionals were busy using graphical interfaces and batch files to manage things. Now those methods of automation and configuration are being handled with less work and quicker, thanks to PowerShell. (Source: helpdeskgeek)
Happy learning!
 !
!