(i didn’t find any posts about ViaSocket here so this is one, if you have made your ViaSocket account and you need more info on ViaSocket this post is for you)
ViaSocket is for Building Intelligent automation
Connect 1,583+ Apps, Deploy AI Agents, and Build Custom Workflows—All Without Writing a Single Line of Code!
here is a tutorial for beginner on how to use ViaSocket if you have never used it or any other tool, as it can seem a bit daunting at first. But once you understand the basic concepts, you’ll see how intuitive it is. ViaSocket uses the fundamental principle of a “trigger” and an “action” to create a “flow” that automates your tasks.
Here is a step-by-step guide to building your first workflow in ViaSocket.
Step 1: Sign Up and Access the Flow Builder
First, you’ll need to create an account on viasocket.com. The process is quick and simple. Once you’re in, you’ll be taken to your main dashboard.
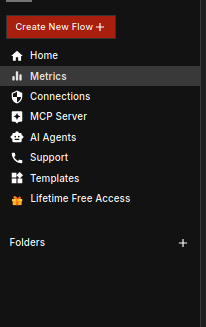
To start building, look for a button that says “Create New Flow” or a similar prompt. Clicking this will open the Flow Editor, which is your main workspace for building automation.

Step 2: Define Your Trigger
Every automation starts with a trigger. This is the event that you want to monitor in one of your apps. It’s the “if” part of your “if this, then that” statement.
-
Select a Trigger App: In the Flow Editor, the first step is to choose your trigger application. ViaSocket has a vast library of integrations, so you can search for the app you need, such as Google Sheets, Gmail, Slack, or Shopify.
-
Choose a Trigger Event: After selecting the app, you’ll need to specify the exact event that will kick off the flow. Examples of trigger events include:
-
Google Sheets: “New or updated spreadsheet row”
-
Gmail: “New email received”
-
Slack: “New message in a channel”
-
Shopify: “New order created”
-
-
Connect Your Account: ViaSocket will then prompt you to connect your account for that app. Follow the on-screen instructions to authorize the connection.
-
Test the Trigger: Once connected, ViaSocket allows you to run a quick test to pull in sample data. This is a crucial step as it confirms your connection is working and provides you with the data structure you’ll need for the next steps.
Step 3: Add an Action
The action is what you want to happen automatically once the trigger event occurs. This is the “that” part of your “if this, then that” statement. A flow can have a single action or multiple actions in a sequence.
-
Select an Action App: Click on the “+ Add Step” or “Select Action” button to add the next part of your flow. Search for and select the app where you want the action to take place.
-
Choose an Action Event: Just like with the trigger, you’ll select a specific action you want to perform. Examples of action events include:
-
Slack: “Send a channel message”
-
Gmail: “Send an email”
-
Google Sheets: “Add a new row”
-
HubSpot: “Create a new contact”
-
-
Map the Data: This is where you connect the information from your trigger to your action. ViaSocket’s interface makes this very easy. You can drag and drop fields from the trigger’s sample data to the corresponding fields in your action. For example, if your trigger is a new contact form submission, you can map the “Email” field from the form data to the “Recipient’s Email Address” field in your “Send an email” action.
-
Configure and Test: Fill in any other required details for the action (like the message body or subject line for an email) and then test the action. This step ensures that the data is being sent and processed correctly.
Step 4: Publish Your Flow
Once you have configured and tested your trigger and action (and any subsequent steps), you are ready to make the flow live.
-
Name Your Flow: Give your flow a descriptive name so you can easily find and manage it later.
-
Turn it On: Look for a button like “Set Live” or “Publish.” Clicking this will activate your workflow.
From now on, ViaSocket will automatically monitor for your trigger event. When it happens, your automation will run, saving you the time and effort of doing it manually.
Pro-Tips for Advanced Users
-
Multi-Step Workflows: Don’t stop at just one action! You can create complex, multi-step workflows. For example, a new lead from your website could trigger a flow that not only adds them to your CRM but also sends a welcome email and creates a follow-up task for your sales team.
-
Conditional Logic: Use ViaSocket’s filters to build smarter workflows. You can add conditions so that actions only run if certain criteria are met (e.g., “only send a Slack message if the form submission came from a specific company”).
-
AI Assistance: If you’re unsure how to start, try the AI-powered assistant. You can describe the workflow you want to build in plain English, and the AI will generate the initial flow for you to customize.
By following these simple steps, you can start leveraging the power of ViaSocket to automate your business and reclaim your time.
**The Feature I Appreciate Most is the AI Assistance:
**
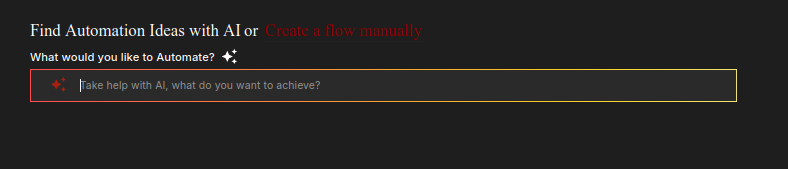
A powerful feature in ViaSocket is the “Find Automation Ideas with AI” tool, which helps you discover new ways to streamline your work. Instead of manually brainstorming where you can apply automation, you can simply describe your business processes in plain language (like using chatGPT). The AI analyzes your description and suggests relevant, pre-built workflow templates that you can customize.
This is particularly useful for people who are new to automation and may not know what’s possible. It helps you unlock the full potential of the platform by showing you connections and automations you hadn’t considered. For example, you can tell the AI, “I want to automate my lead generation process,” and it will provide several options, like a workflow that automatically adds new contacts from a form to your CRM and sends a personalized welcome email. It’s like having a dedicated automation consultant built right into the platform.
website: https://viasocket.com .
 !
!