


When you call someone and they don’t pick it up, at least you know they didn’t respond to it. When it comes to emails, though, you don’t get a notification if someone has actually read your email. You’re completely in the dark until and unless the recipient decides to send you a response and reply to your email.
If you use Outlook as your email client, there’s actually a feature that can help you deal with the situations like above. The read receipt in Outlook lets you actually find out if someone opened the email that you sent them.

The feature first needs to be configured before you can use it for your emails.
What Is a Delivery Receipt In Outlook
Outlook actually lets you request for two types of receipts: read receipts and delivery receipts. Both are two different things and we explain how they work here.
A delivery receipt is a receipt that is generated when your email has been delivered. It confirms that your email was sent to the recipient and they should have it in their inbox.
What Is a Read Receipt In Outlook?
A read receipt, on the other hand, is a receipt generated when your email has actually been opened by the recipient. For as long as your email remains unread or unopened in their inbox, this receipt isn’t generated.
So you can be pretty sure that someone has had a look at your email when you receive this receipt.
However, keep in mind that not all the email providers and applications support read receipts in Outlook. For those who don’t support it, you will not receive any receipts for your emails in Outlook.
Request a Read Receipt For a Single Email In Outlook For Desktop
Outlook lets you set up read receipts for either all of your outgoing emails or the chosen ones. If you don’t need a receipt for each and every one of your emails, you can set it up only for the ones you want.
- Launch the Outlook app on your computer.
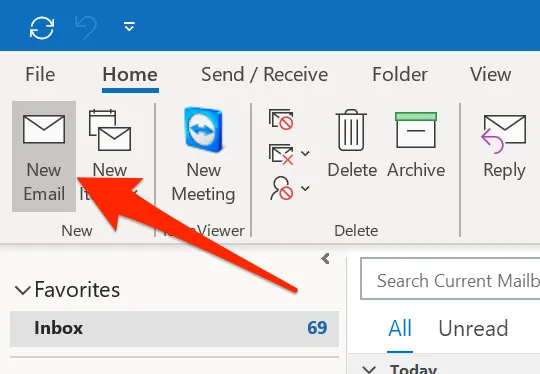
- Click on the New Email option to compose a new email if you don’t already have one open or saved in the drafts.
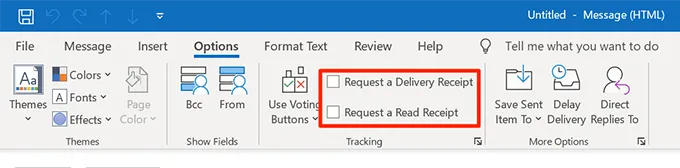
- On the new email window, you’ll have several tabs at the top. You want to find the one that says Options and click on it.
- Inside the Options tab, there are several sections and one of these is Tracking . You’ll find two options here that you can tick-mark and untick.
Tickmark the Request a Read Receipt option if you want to receive a receipt when this email of yours has been opened by the recipient.
Optionally, you can tick-mark the Request a Delivery Receipt option to get notified when your email is delivered.
- You can then go about writing your email as you would normally.
Request a Read Receipt For All Outgoing Emails In Outlook
Those of you who need a read-receipt for each of your outgoing emails, the above method may not be ideal for you. A better solution would be to use one of the options in Outlook settings that lets you enable read receipts for all the Outlook emails that you send.
That way, you won’t have to tick-mark any options each time you write a new email. All of your outgoing emails will become trackable then.
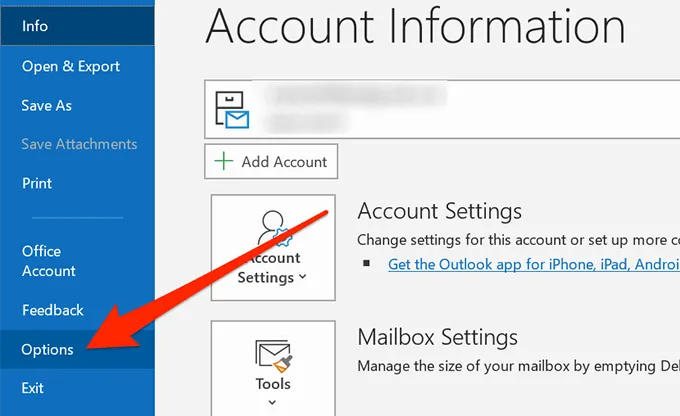
- Launch Outlook on your computer and click on the File tab at the top.
- Look for the option that says Options in the left sidebar and click on it.
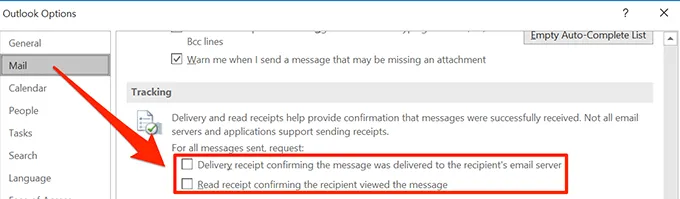
- Select Mail from the left sidebar on the settings menu.
- You’ll see several sections on the right hand-side pane. Scroll down until you find the one that says Tracking .
Inside the section, you’ll find a checkbox that says Read receipt confirming the recipient viewed the message . Tick-mark the box to enable the option. Then click on OK at the bottom.
From now on, your Outlook will request a read receipt for all of your outgoing emails.
Manage Incoming Read Receipt Requests In Outlook For Desktop
Just like how you send emails with a request for a read receipt in Outlook, there may be people who would also want to know if you’ve read the emails they sent you. You can actually manually define what Outlook should do when it encounters an email with the request for a read receipt.
- Launch Outlook on your computer, click on the File tab at the top, and click on Options in the left sidebar.
- Select Mail from the left sidebar to open your email settings.
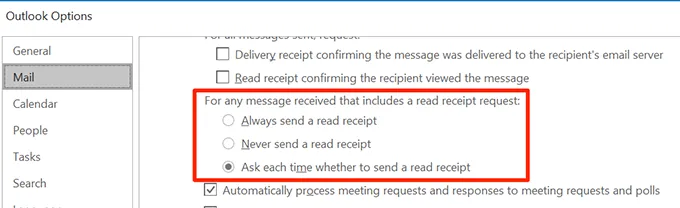
- Scroll down to the Tracking section and look towards the subsection that says For any message received that includes a read receipt request .
Under the section, you’ll find three options which are all self-explanatory. You can enable any one of these options and click on OK at the bottom save the changes.
Manage Incoming Read Receipt Requests In Outlook For Web
If you use the Outlook Web version, you too have the option to decide what to do with the emails that have a read receipt request. There’s an option in the settings that lets you configure the feature.
- Access the Outlook Web version in any of your browsers.
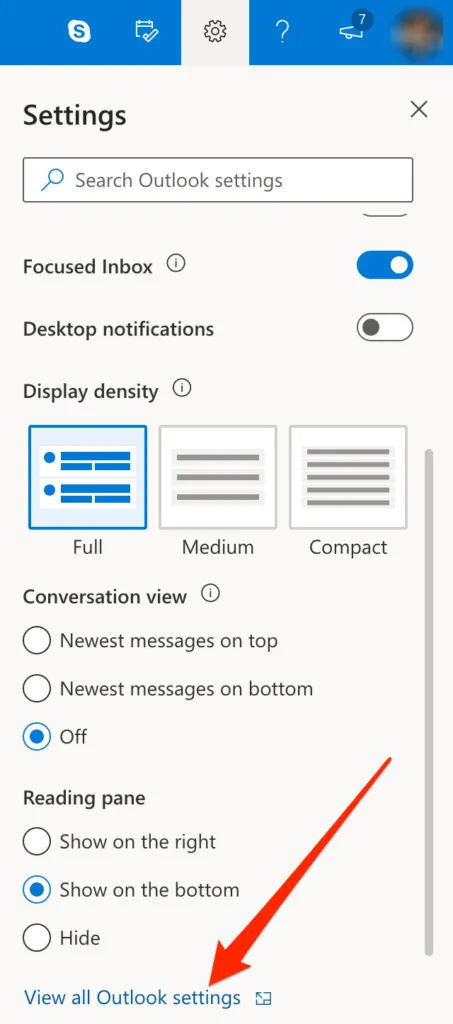
- Click on the settings icon at the top-right corner and select View all Outlook settings .
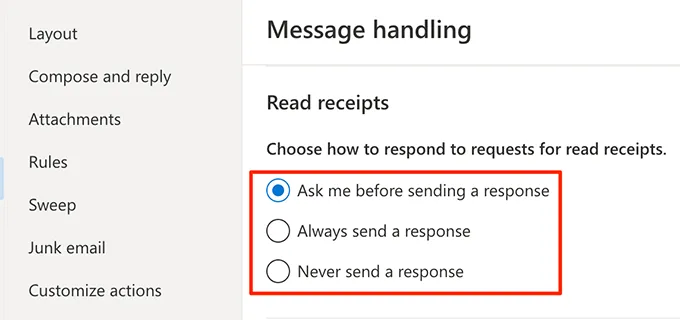
- On the newly opened screen, select the option that reads Message handling . It has several other email handling options as well.

- Scroll down to the Read receipts section and you’ll find three options that let you define how read receipts should be dealt with. These are exactly the same options you found in the Outlook for desktop version.
Select any one option from the list and click on Save at the bottom.
Read receipts in Outlook is an extremely useful feature as it lets you find out if your email was actually read or if nobody bothered to even open it.
 !
!