


What Is a Clean Boot?
A clean boot is a diagnostic approach that involves disabling non-essential services in Windows and starting the system with a minimal set of essential startup programs and drivers. This way, you can determine and isolate what app or program is causing the issues you’re experiencing while using your PC.
Performing a clean boot is akin to starting Windows in Safe Mode. A clean boot gives you more control over which programs and services run at startup. It also helps isolate the elements of the normal boot process that are causing performance problems without deleting your personal files. Safe Mode, on the other hand, is recommended when your PC has issues related to software, hardware or drivers.
When Should You Perform a Clean Boot in Windows 10?
A clean boot is useful in the following instances:
- When your computer doesn’t start normally
- If you receive errors at startup that you can’t identify
- When an official Windows Update won’t install properly
- When you’re experiencing frequent app crashes
To diagnose the problem, perform a clean boot and then enable one service at a time (followed by a reboot) until you find the service that is causing your issue.
How to Clean Boot in Windows 10
Before performing a clean boot, you must be signed in as an administrator on your PC to access the settings mentioned below. If you don’t have an administrator account.
Follow the steps below in order to perform a clean boot in Windows 10.
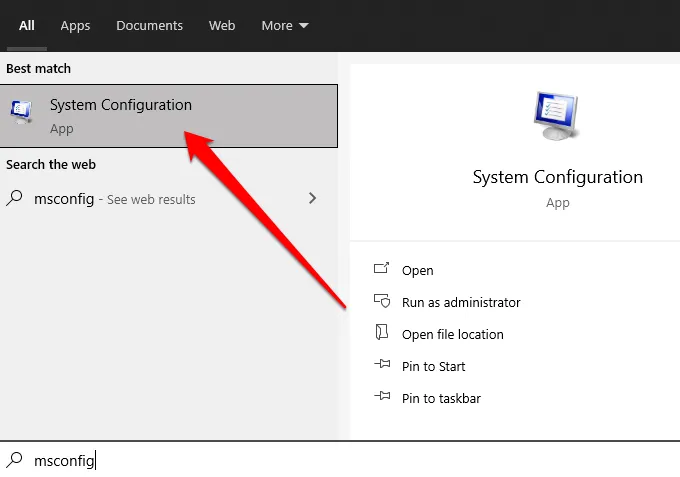
- Type msconfig in the search box and select System Configuration.
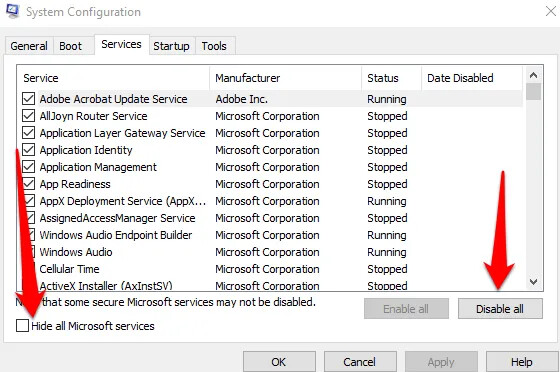
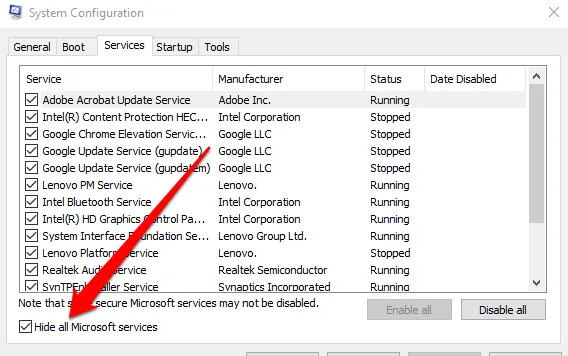
- Select Hide all Microsoft Services under the Services tab and select Disable all.
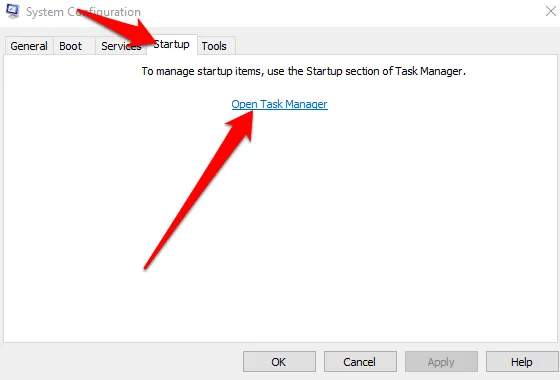
- Next, select Open Task Manager on the Startup tab.
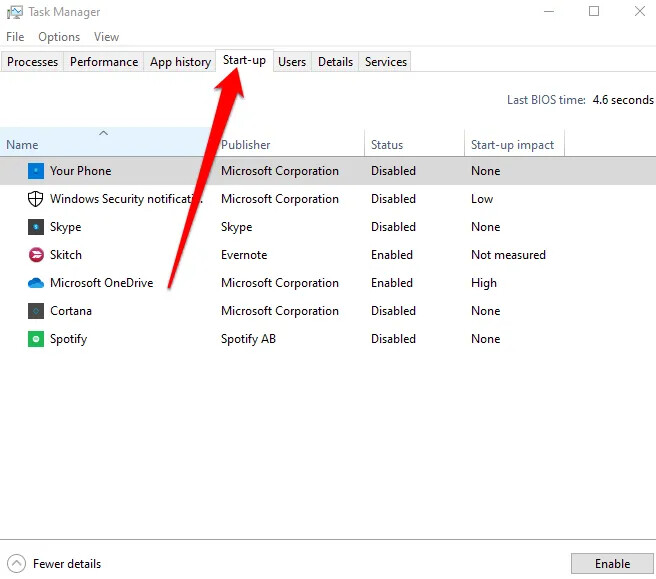
- Right-click each startup item under Startup in Task Manager, select Disable and exit the Task Manager.
Next, select OK on the Startup tab and restart your computer. Once your PC restarts, it will be in a clean boot environment.
How to Reset Your PC to Start Normally After a Clean Boot
Once you’re done with the clean boot process and have found the cause of the problem, you can reset your PC to get it back to running normally.
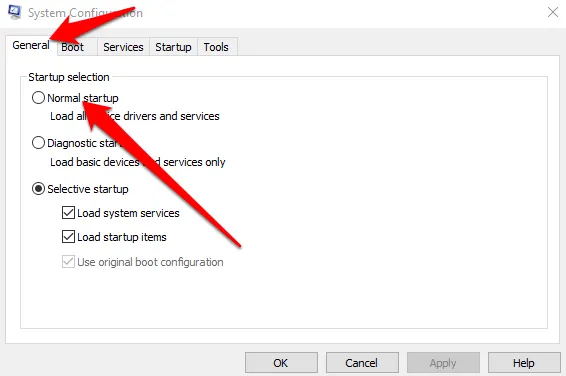
- Open System Configuration by typing msconfig in the search box on the taskbar. You can also right-click Start > Run, type msconfig and press Enter.
- Select Normal Startup on the General tab.
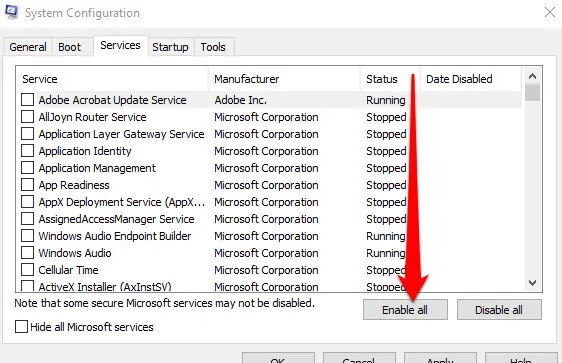
- Next, select Services and then uncheck the box next to Hide all Microsoft services.
- Select Enable all.
- Next, select Startup > Open Task Manager.
- RIght-click each startup program in Task Manager, select Enable and then select OK.
- Select Restart if you’re prompted to restart your PC.
How to Start Windows Installer Service After Performing a Clean Boot in Windows 10
If you clear the Load system services checkbox in the System Configuration utility, the Windows Installer service won’t start. You can start the Windows Installer service manually if you want to use it when system services are not loaded on your PC.
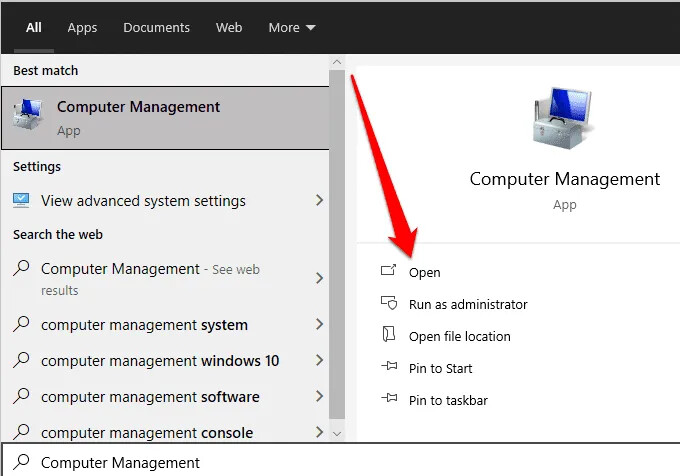
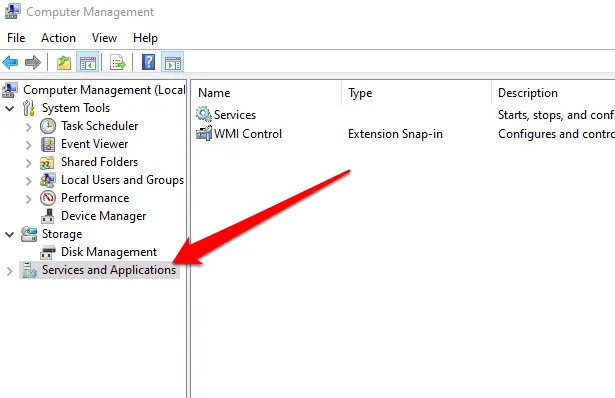
- Type Computer Management in the search box on the taskbar and select Open under Computer Management in the search results.
- Select Services and Applications in the console tree.
- Next, select Services.
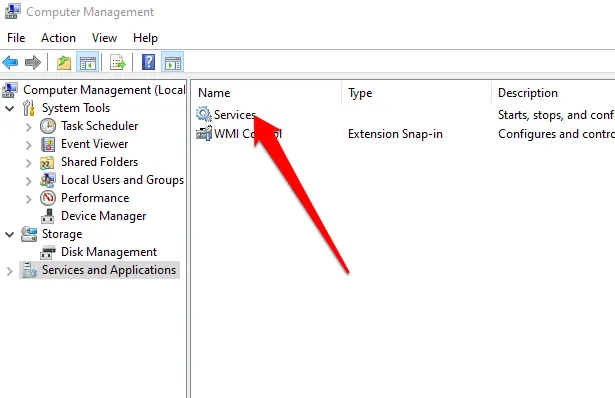
- Right-click on Windows Installer in the details pane and then select Start.

Your computer should restart and function normally again without any issues.
Get Your PC Running Normally Again
Windows 10 is a large, complex operating system with many processes, programs and settings competing for resources. In such a varied environment, you’re bound to run into software conflicts and other problems at startup or when installing apps and updates. Performing a clean boot helps resolve most, if not all such issues so you can use your PC normally again. (Source: onlinetipstricks)
Happy learning!
 !
!