
The Windows kernel allows the operating system to interact with the hardware and system resources of the computer. It runs the code in a protected memory area. For example, malware can load a malicious driver that will allow it to run in kernel mode.
In this tip, we will see how to configure and debug the Windows kernel with WinDBG.
General Configuration
To debug the kernel, you need two machines. In this lab, we will use two virtual machines on VMware. The machines must be on the same network and accessible to each other, you can disable the firewall.
Debugger Machine
On your machine that will be used to debug the other, you must install WinDBG either via the Microsoft Store or here including the SDK and debugging tools.
The second step is to configure the following variable environment:
Name: _NT_SYMBOL_PATH
Value: SRV*c:\Symbols*http://msdl.microsoft.com/download/symbols
Debuggee Machine
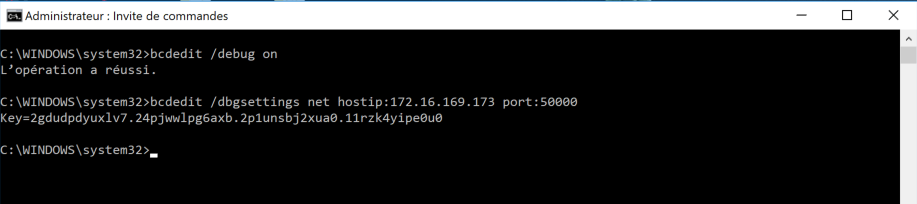
On your debuggee machine, you need to run an elevated cmd and run the following command:
bcdedit /debug on
bcdedit /dbgsettings net hostip:<address_of_your_debugger>port:50000
Once you enter these commands, you should have a key that you will need to copy for WinDBG.
WinDBG Config
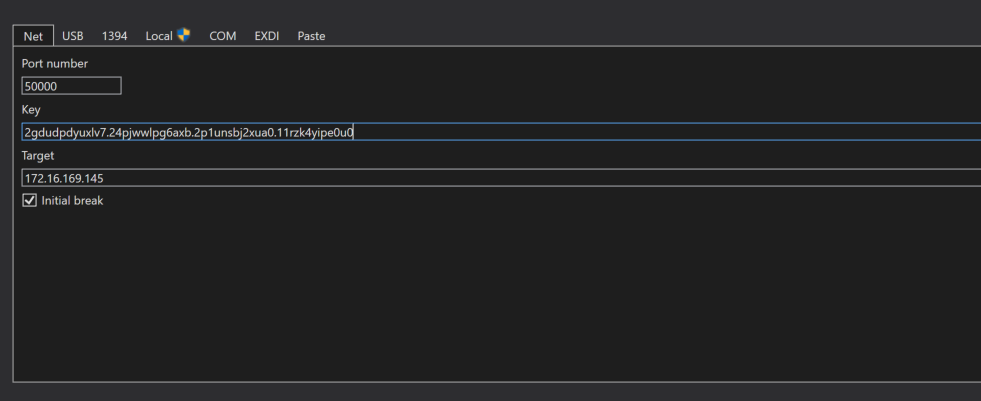
The next step is to configure WinDBG to connect to your remote machine and start debugging. To access the configuration, just press CTRL+K and enter your configuration.
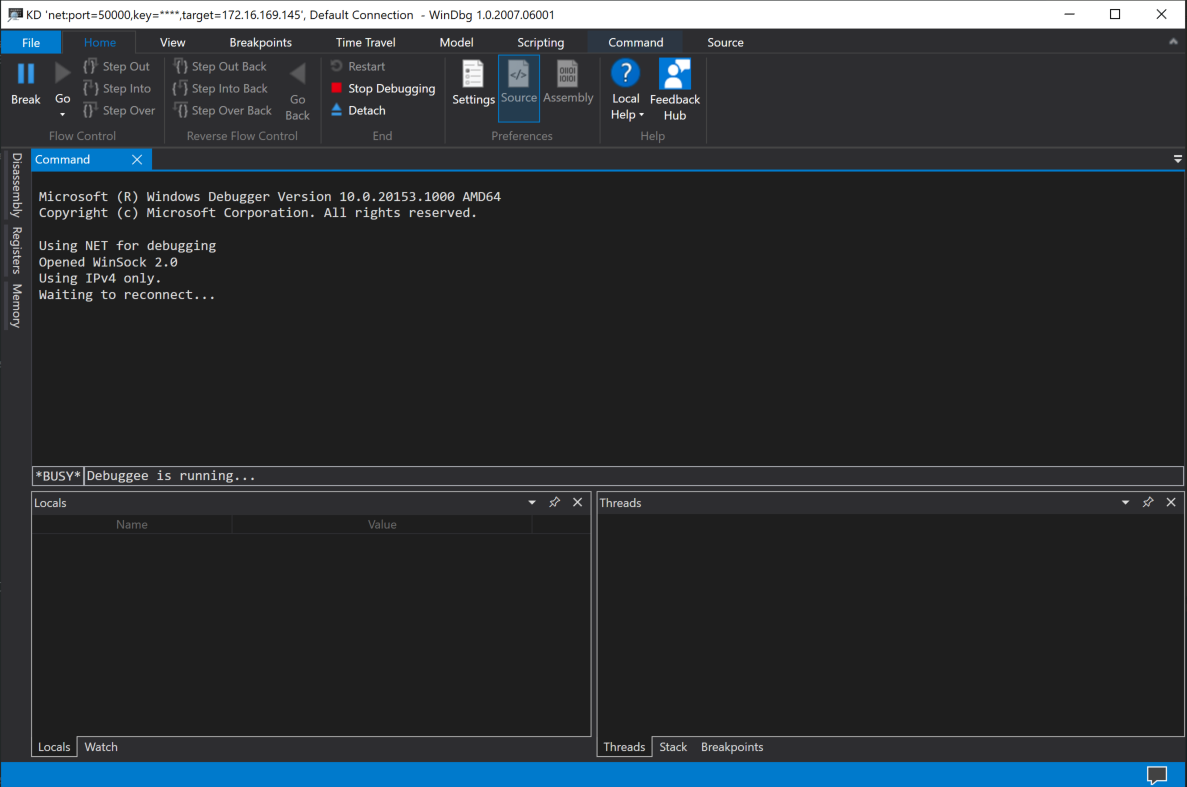
Once everything is fine, you should see your debugger waiting for connection.
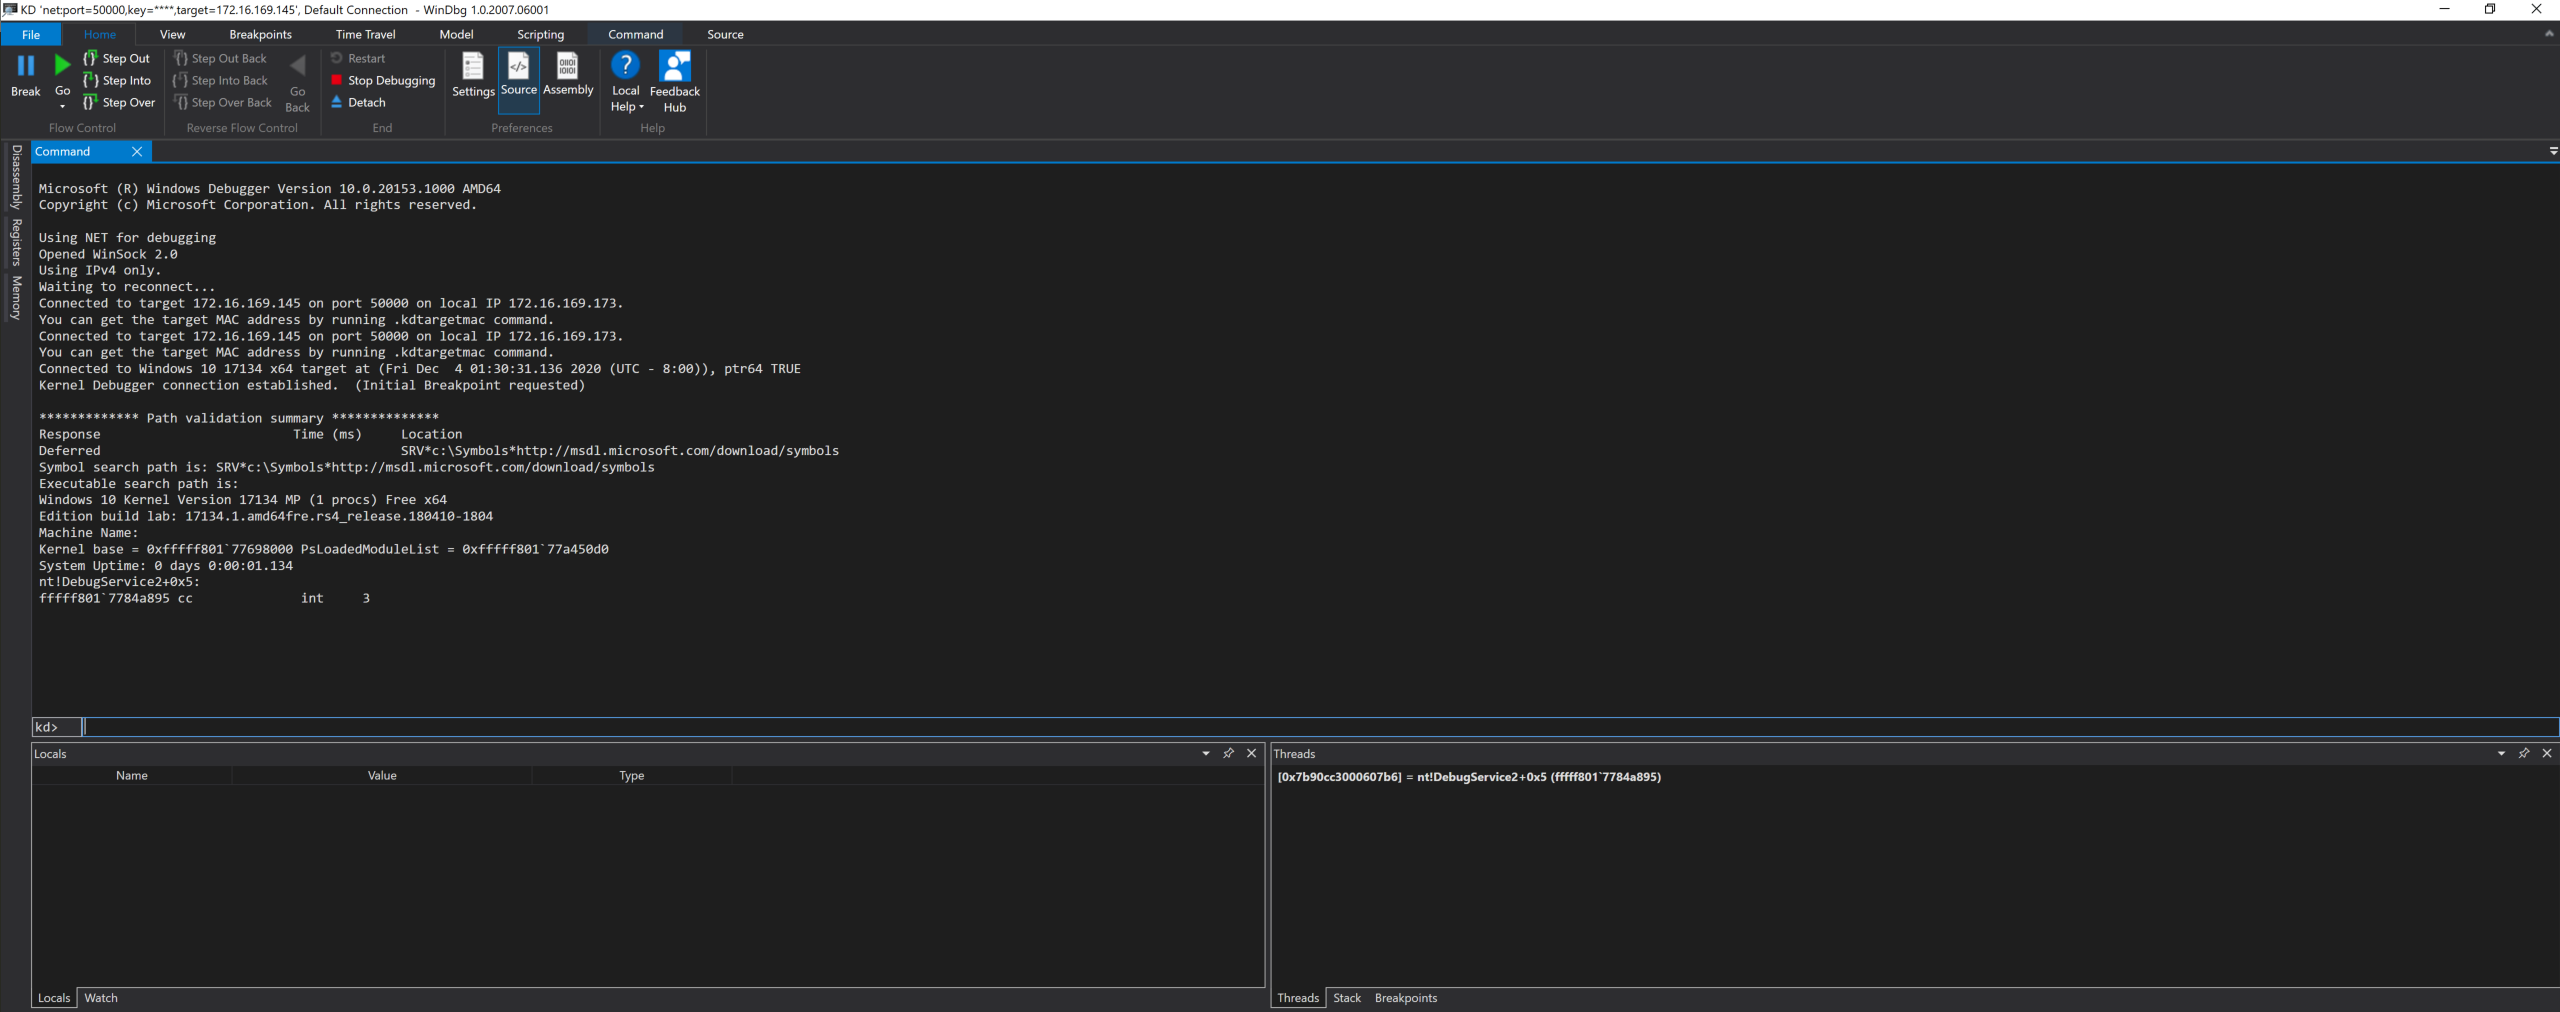
At this point, you should restart your debuggee machine with the following command.
shutdown -r -t 0
You can now start your kernel debugging session:
Windbg Commands
There are some useful commands for use with WinDBG. Here’s a quick list:
.reload (Reload Module)
x (Examine Symbols)
g (Go)
dt (Display Type)
lm (List Loaded Modules)
k (Display Stack Backtrace)
bu (Set Breakpoint)
bl (Breakpoint List)
bc (Breakpoint Clear)
!process
!thread
!devnode
!devstack
!drvobj
!idt
qd (Quit and Detach)
Example:
dt nt!_FILE_OBJECT
dt nt!_DRIVER_OBJECT
x nt!*CreateProcess*
That’s it!
Source: medium
Happy learning!