Are you still accessing ChatGPT through the website, or via 3rd party tools? How about trying something different? You know, you don’t always have to open your browser and navigate to the ChatGPT website. You can actually use ChatGPT directly from your Mac’s Terminal as well.
Setting it up is pretty straightforward. In this tutorial, I’m going to guide you through just that. So, let’s jump right in and get started.
Note: This works for Linux and Windows too.
Step 1. Get an OpenAI API key
First, we need to get a new OpenAI API key. Sign up for an OpenAI account if you don’t have one, else just log in to your account.
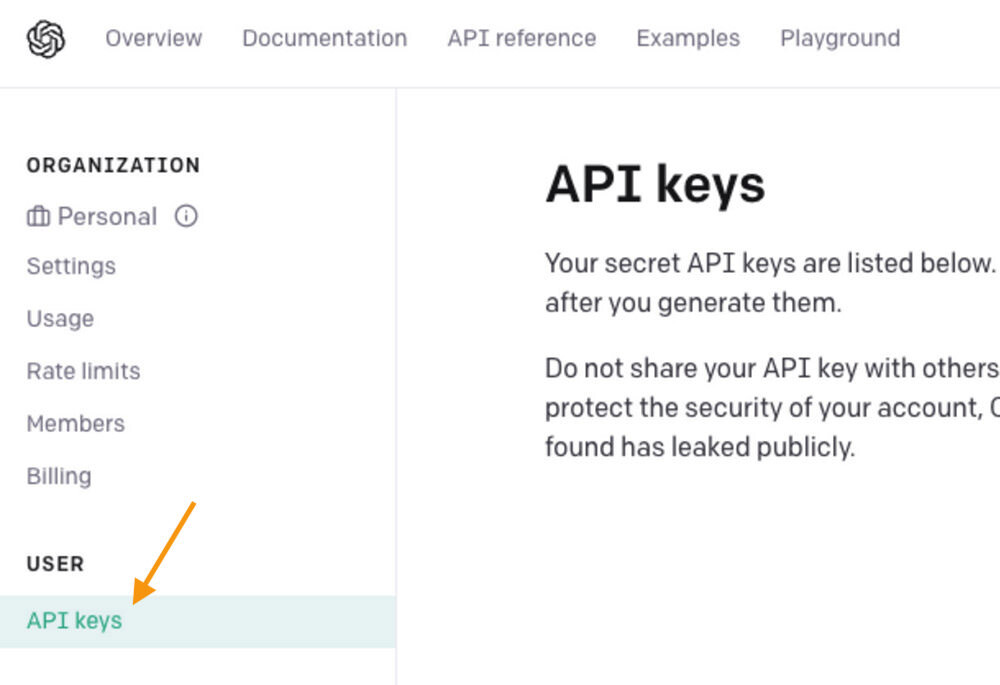
Look for the ‘USER’ section, then click on ‘API keys‘.
Next, create a new secret key by clicking ‘+ Create new secret key ‘.
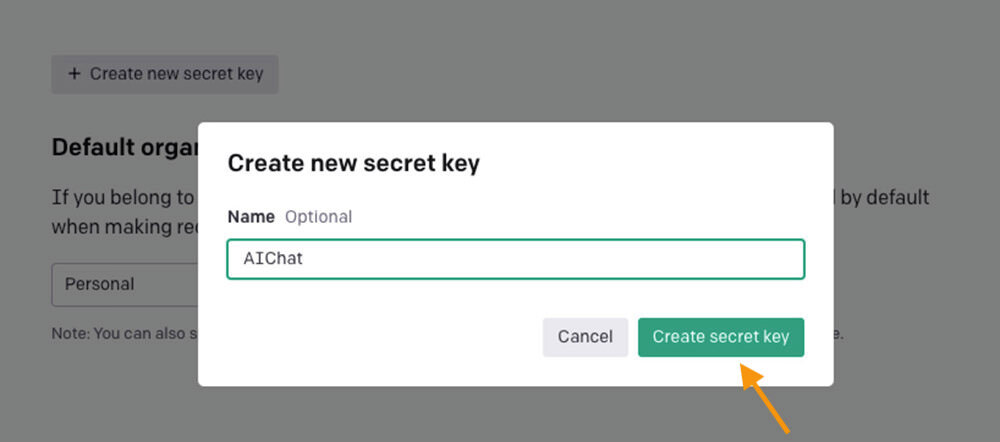
Keep a copy of this API key as we’ll need it later.
Step 2. Install Homebrew
Next, we will need to install Homebrew. Homebrew help makes installing other stuff we need in later stage easy.
To install Homebrew, head over to the Homebrew’s website. There, you’ll find a line of code under the section ‘Install Homebrew‘.

Or, you can also use the following code. Copy it, then go to your Terminal, paste it in, and hit Enter.
/bin/bash -c "$(curl -fsSL https://raw.githubusercontent.com/Homebrew/install/HEAD/install.sh)"
Note: Keep in mind, installing Homebrew may take a bit of time.
After everything is done, type the following command in the Terminal and hit Enter.
brew --version

This will show the version of Homebrew you’ve installed, confirming that the installation is complete.
Step 3. Install AIChat
After obtaining your API key and successfully installing Homebrew, our next step is to install AIChat.
On the same Terminal window, input the following command and hit Enter.
brew install airchat

This will begin the installation of AIChat on your Mac. The installation process should be pretty quick.
Step 4. Configure AIChat
With AIChat now installed, the next step is to configure it. Since we’re assuming this is your first time setting it up, you’ll need to provide the following, in sequence, for the configuration.
- Enter “y” to create a new config file
- Paste in your API key.
- Enter “y” if you don’t want to use Proxy. (You normally won’t need it.)
- Enter “y” if you want to save all chat messages, else, just hit “n”.
An editable version of the config file will be created and it can be found at the following location shall you want to make any changes later:
/Users/<your_username>/Library/Application Support/aichat/config.yaml
And that’s all there is to it. You can now start using ChatGPT right from your Mac’s terminal.
Step 5. Using AIChat
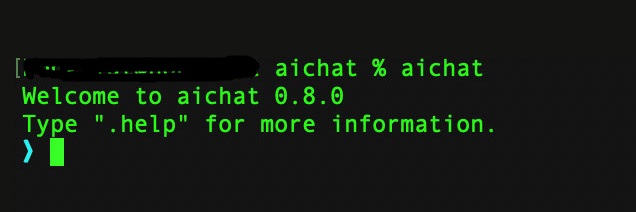
To start using AIChat, simply type in the following in Terminal and hit Enter.
aichat
That’s it! You can now type in your prompts and hit Enter. Wait for the responses just as you would when using ChatGPT online.
Bonus: Further Configuring AIChat
Earlier, I mentioned that a copy of your configuration is saved at this location:
/Users/<your_username>/Library/Application Support/aichat/config.yaml.
When you open that file, you’ll see your API key. However, you can add more configurations to this file. For instance, you can specify a particular ChatGPT model to be used.
Let’s take a look at an example of the various settings you can define in your configuration file.
api_key: "<YOUR SECRET API KEY>"  # Request via https://platform.openai.com/account/api-keys
organization_id: "org-xxx"        # optional, set organization id
model: "gpt-3.5-turbo"            # optional, choose a model
temperature: 1.0                  # optional, see https://platform.openai.com/docs/api-reference/chat/create#chat/create-temperature
save: true                        # optional, If set true, aichat will save chat messages to message.md
highlight: true                   # optional, Set false to turn highlight
proxy: "socks5://127.0.0.1:1080"  # optional, set proxy server. e.g. http://127.0.0.1:8080 or socks5://127.0.0.1:1080
conversation_first: false         # optional, If set true, start a conversation immediately upon repl
light_theme: false                # optional, If set true, use light theme
connect_timeout: 10               # optional, Set a timeout in seconds for connect to gpt.
FAQs
To help enhance your experience using AIChat on your Mac’s terminal, here’s some additional information you might find useful.
1. How to start AIChat?
To start AIChat, type in the following in Termimal and hit Enter.
aichat
2. How to quit AIChat?
To quit AIChat, type in the follow in Terminal and hit Enter
.exit
How to stop AIChat from generating response?
If you need to immediately stop the response that ChatGPT is providing, use the following shortcut key:
Control + C
3. One-off request, vs. Conversation aware.
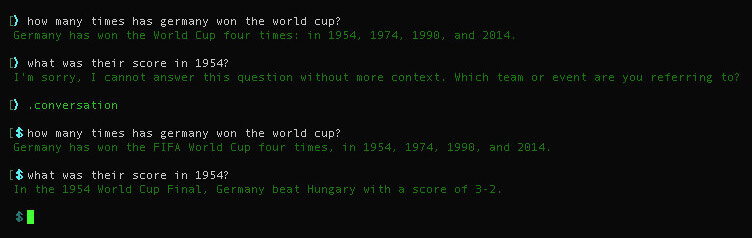
Just like regular ChatGPT, AIChat isn’t able to handle follow-up questions. So, if you ask it, ‘how many times has Germany won the World Cup?‘, it will give you an answer.
However, if you follow-up asking, ‘what was their score in 1954?‘, it won’t be able to provide a relevant response.

If you want to ask questions that are part of a conversation, or follow-up questions, just enter the following command and hit Enter.
.conversation
Then type in your questions, one at a time.
4. How to quit conversation mode?
To quit conversation mode, use this command:
.clear conversation
5. How to change ChatGPT model?
You can change it right in the Terminal itself. If you have access to GPT-4, simply type in the following command and hit Enter.
.model gpt-4.
Ending
Aichat’ has more capabilities than you might initially see. You can type .info or .help to discover more features. Also, you can visit the AIChat’s GitHub page for more detailed information. (Source: hongkiat)
Happy learning!
 !
!