The CPU or Central Processing Unit is responsible for all the core mathematics your computer has to perform to work. Although there are other processors in your computer, such as a Graphics Processing Unit for visuals, none of them have the general-purpose flexibility of a CPU.
The last thing you want is for your CPU to fall over right in the middle of something important. Whether it’s an intense online gaming session or an important video render that a client is waiting for, it’s crucial to know that your CPU can take the heat. That’s where CPU stress tests come into the picture.
What Is a CPU Stress Test?
A CPU stress test is a software program that’s specifically designed to give your CPU incredibly hard problems to solve. It gives the CPU so many of these tough math problems that its full attention is taken up. The end result is a test of the very maximum work your CPU can do.
Most real-world jobs, even those that use 100% of your CPU, don’t do it in this brutal, sustained way. You might be wondering why anyone would want to torture a poor CPU this way, but it’s actually an important part of various aspects of computer building and maintenance.
Why Stress Test Your CPU?
CPU stress tests are designed to push your CPU to its absolute limit and then check whether it can handle such a heavy workload. CPUs generate heat when they work and need to stay beneath a certain temperature. If they get too hot they can start making mistakes, or even become permanently broken. If there’s anything the CPU depends on or some subcomponent of the CPU that’s not doing well, a stress test will often reveal those problems in the form of crashes or a hanging computer.
Generally there are two real-world scenarios where stress testing is common. The first is to test a computer build after putting it all together. Some boutique PC building companies will have a “burn in” period, where the newly-built computer is continuously stressed for 24 hours. The reasoning here is that if any components in the computer are faulty, they’ll fail during the burn-in period.
The second reason to run a stress test is as a way to validate CPU overclocking. Overlocking deserves to be looked at on it’s own and we have many articles on the subject. The short version is that an overclocked CPU has been set to a higher speed than the factory recommendation.
Every time you overclock your CPU, you should stress test it to make sure that it doesn’t overheat or is unstable somehow. Stress testing is also useful even without overclocking to test a new cooling system. Now the question is: Which stress testing tools should you use?
The Best CPU Stress Test Tools
There are plenty of applications out there which can help you light a fire under your CPU. Some are highly-specialized and might be suitable if your computer is built for the type of CPU tasks they cater to. For the vast majority of people however, there are two general-purpose apps that have stood the test of time.
Prime95
Prime95 is one of the toastiest pieces of software you can run on a computer. The real purpose of Prime95 is to look for the largest prime number. That is, a number that can only be divided by one and itself. You can choose to opt out of this research project when you first run the program and you should do that if you’re only using it for stress testing.
When the program starts in stress testing mode, you get to make a few choices regarding the specific punishment.
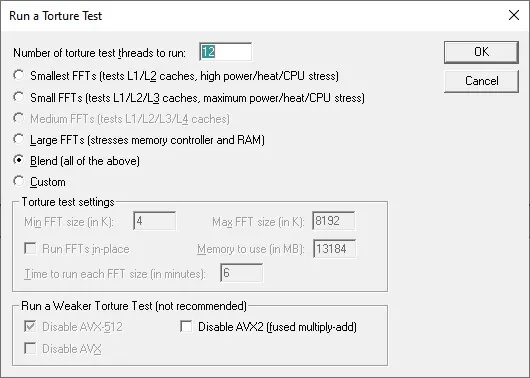
The “blend” option is best for general system testing, but as you can see some of the other options target specific components. So if you want to focus on RAM, for example, you can.
The number of threads will be filled in automatically, but it should be equal to the number of cores in your system or double that amount if your CPU features HyperThreading. Since our computer here has six cores with HyperThreading, we need 12 “workers” as they’re referred to in the app. Once you’re happy with these settings, just press OK and you should see this.
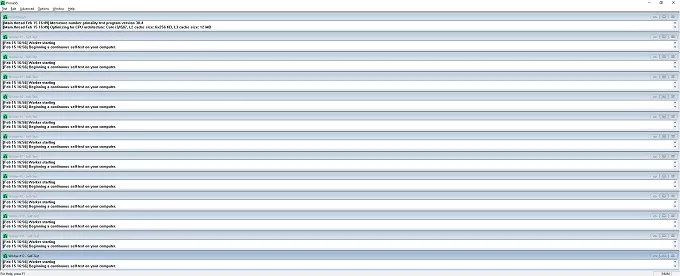
Your computer is now running the CPU at full throttle and you’ll hear the fans spin up momentarily to deal with the extra heat. Once you’ve run the CPU stress test for your desired time period (and there were no errors) you can press Test > Stop to give your poor CPU a break.
HeavyLoad
Unlike Prime95, HeavyLoad isn’t a repurposed scientific tool. Instead it’s an app that was built from the ground up to stress test computers. One of the best things about this program is that you can choose to stress your GPU and CPU at the same time. This is important if you want to check total system stability and are planning to use the computer for tasks that are heavy on both types of processor.
You can toggle which components should be stressed with the handy buttons on the toolbar. If you’re good with the default CPU+GPU option, just press the play button and the torture will commence.
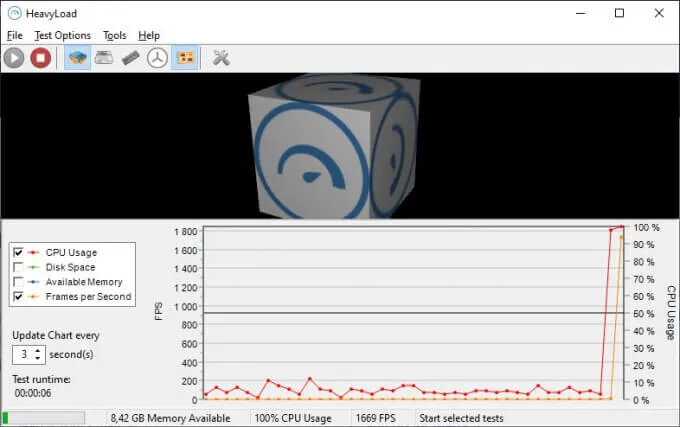
HeavyLoad doesn’t create the sort of deathly heat in a CPU that Prime95 does, but it does represent a more realistic maximum load. Prime95 is the gold standard for torture testing, but few it any real-world software is going to hit your CPU right in the math with so much force. If it survives a HeavyLoad session, then it’s probably going to be fine for something like a video game.
CoreTemp for Temperature and System Info
One of the key reasons to do a stress test is to see if your CPU is overheating or not. CoreTemp is a well-respected tool that provides you with crucial information about your hardware. For example, it shows you the real-time clock speed of your CPU as well as its technical data.
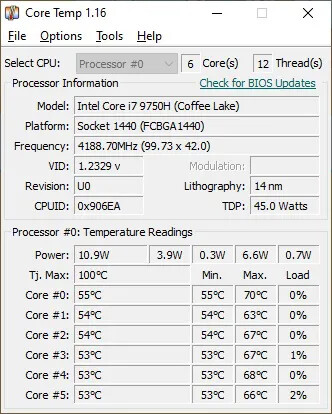
Of course, the main reason to use CoreTemp is the live temperature readout. Each one of your CPU cores get their own individual temperature monitors. When you run a stress test, you’ll see those temperatures climb. If your CPU reaches its maximum rated temperature, it will either throttle it’s speed to reduce heat or for the system to shut down as a means of protection.
In CoreTemp you can see all of this happen in real time, which is invaluable if you want to know whether unstable voltage, throttling or excessive heat is responsible for bad CPU behavior.
Choosing the Right Stress Test Methodology
It’s easy enough to hit the button that starts a stress test, but there’s more to it than that! First of all, you need to run the CPU stress test for long enough that the result is valid. Generally speaking, surviving the test for 24 hours is a sure sign the system won’t fall over under load.
However, if you’re overclocking and trying to find the sweet spot for frequency, voltage and fan speeds you can’t have 24 hours between each adjustment. In that case you’d run the stress test long enough for the CPU temperature to stabilize. This happens quickly on air cooling, but can take a while on liquid cooling. In which case giving it 15-30 minutes is a reasonable idea.
It’s also worth noting that just because a system falls over under Prime95, doesn’t mean it won’t run video games with 100% reliability. If you aren’t overclocking and your system fails Prime95, this usually means improving your cooling setup or checking that all cooling components are working correctly.
Just remember the most important rule: The stress test is for your CPU, not you! (Source: onlinetechtips)
Happy learning!
 !
!