Whether you’re creating a new website or just need a refresh of an existing one, WordPress themes make it quick and easy to add character to your site.
WordPress themes are templates and stylesheets created by web designers and developers that are available to download directly to your site. They cut out the difficult parts of website design, like coding, so you can get your site up quickly and focus on creating engaging content.
Both WordPress and third-party sources offer a myriad of both free and premium themes for you to download. The only work you’ll need to do it to install it.
Here’s a complete guide to installing a WordPress theme on your website.
How To Install A WordPress Theme
There are a few different ways to install a WordPress theme on your website: theme directory, upload method, or file transfer protocol (FTP). The theme directory and upload method are simpler, but installing via FTP is best for larger themes, custom themes, or when the WordPress dashboard is not accessible.
Install WordPress Themes Using the Theme Directory
Installing a WordPress theme can improve the look and performance of your website. The theme directory on WordPress allows you to search for and install a free theme for WordPress.
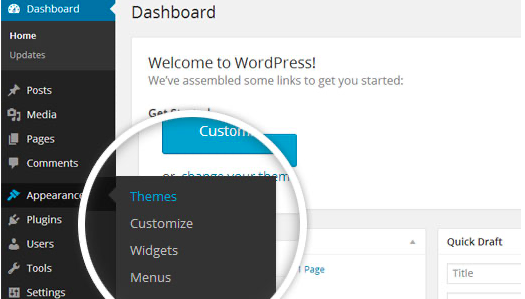
To begin, log in to your Wordpress account. On the menu on the left side of the dashboard, hover your mouse over Appearances , and select Themes within that option box.
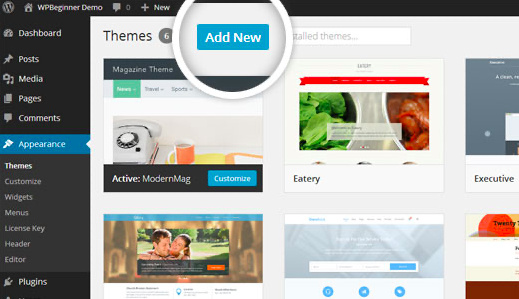
On the themes page, select Add New at the top of the page.
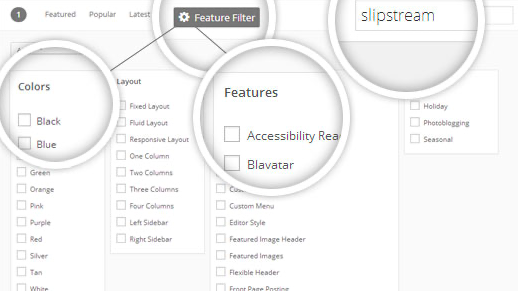
After clicking on the Add New button, you can select from featured themes, popular themes, or latest themes. You can even search for themes with specific features, such as themes with sticky posts or full width templates; layouts, such as grid layouts or two-column layouts; and subject, such as blogs, eCommerce, or photography.
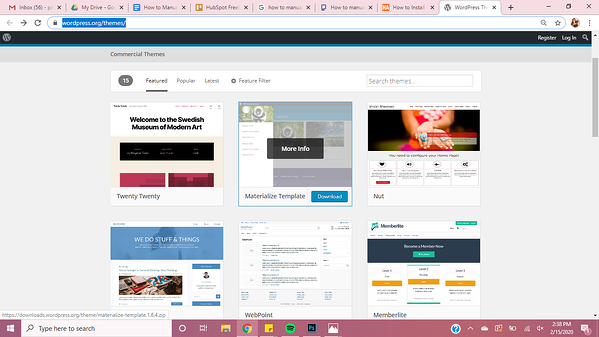
When you’ve chosen a theme, hover over the preview image of the theme. You’ll have the option to click More Info to learn about the theme’s features and preview the theme, or you can click Download to begin the installation process.
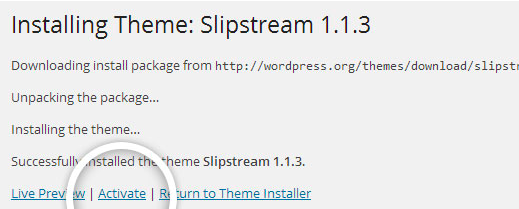
The theme will take a few minutes to install. After installing, you’ll receive a message that the installation was successful. But the theme isn’t live on your website just yet! Be sure to select Activate for the theme to appear on your site.
Install WordPress Themes Using Upload Method
You can easily upload a premium or custom theme in the WordPress dashboard with just a few steps.
First, download the .zip file you bought in the theme marketplace or commercial provider. Then, log in to your WordPress account and go to Appearance in the menu on the left of the dashboard and select Themes .
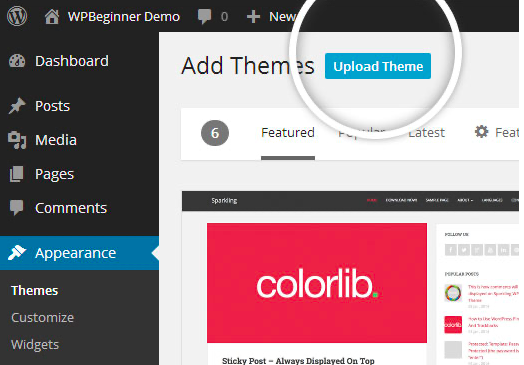
On the themes page, select Add New at the top of the page.
After clicking on the Add New button, select the Upload Theme button.
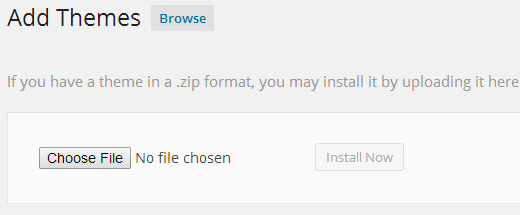
After selecting Upload Theme , click Choose File . Select the theme .zip folder you’ve downloaded, then click Install Now .
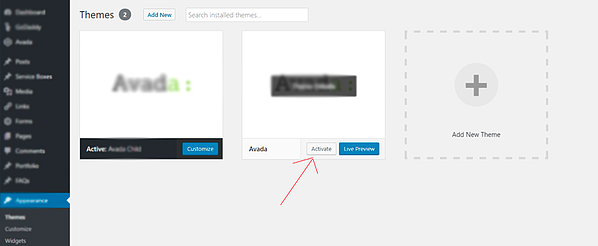
After clicking Install, a message will appear that the theme installation was successful. Click Activate to make the theme live on your website.
Install a WordPress Theme via File-Transfer Protocol (FTP)
If you have chosen a complex, robust theme with large files, it might be too big to upload manually. In this case, you’ll need to use FTP to upload the theme. There are five steps to installing your WordPress theme using FTP.
1. Download FTP Client to your computer.
To begin this process, you will need to download an FTP Client to your computer. This is a software tool that allows you to access and add or delete files on your website server.
2. Create an FTP account through your hosting provider.
Next, you’ll need to gain access to your hosting provider account through the FTP Client. Usually, you will have to set up your own FTP user account within your hosting dashboard, however, it is a different process for every hosting provider. Typically, the hosting provider gives you a username and password when you make a new account, which you’ll need when creating your FTP Client account.
3. Download your theme and unzip the file.
If you don’t already have your theme file downloaded to your computer, download it now. Certain companies provide more in the download folder than you need to upload your theme, so be sure to just download the .zip file. Once you’ve downloaded your files, you’ll need to unzip and compress your file. You can do this by simply right-clicking the .zip file, then selecting Extract .
4. Upload the theme folder to WordPress to install.
Within the FTP Client, find the root of your WordPress install. Next, go into the wp-content folder, and select Themes . Upload the entire folder you unzipped here.

5. Activate the theme from your WordPress dashboard.
After you’ve uploaded the theme folder using the FTP Client, navigate back to the WordPress themes section on your dashboard. You should see your new theme as an option under your downloaded themes. Select the new theme and click Activate to make the theme live on your website.
Create an Attractive Website With a New WordPress Theme
A cohesive and on-brand theme determines whether visitors will stay long enough to engage with your content or make a purchase. Whether you’ve found a free theme in the WordPress directory or uploaded a premium or custom theme manually, these steps will setup your website to attract and convert prospects.
 !
!