
Don’t buy a new computer before you try this first
I bought my laptop two years ago when I first received it was blazing fast eventually it got to be slower than a snail when I found the following tips that saved me from having to wipe my hard drive. Many people assume that is just normal, and that the average life cycle for a computer is under two years. Unfortunately, it’s this mentality which ends up in a typical situation with PC users: a slow and unusable computer, correctly earlier than the computer’s sell-by date.
Had computer gotten slow on you? This occurs over time because of the many programs you install. They sometimes include additional files, registry entries, toolbar and many start-up items that all combine to make your computer feel sluggish. You can do some easy computer maintenance no matter your experience to maintain your computer running smoothly. When you have not done it in months, and even years, then this might take hours to do the first time however it will likely be faster when you do it routinely. In case, you find any issue with below steps then don’t give up; see the bottom of this article and ask your query through comment system.
Steps For How to Make Computer Faster
Step 1: REMOVE
Uninstall any programs you don’t use
As mentioned, all these applications you’ve got installed are filling up your hard drive. When you no longer use them now’s the time to uninstall them.
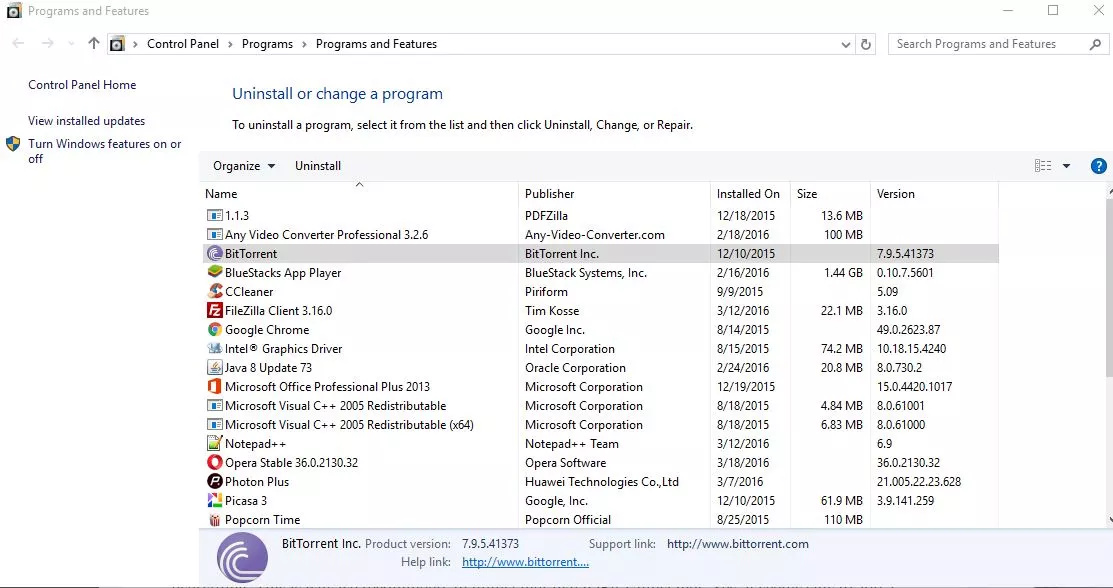
Option 1: By Using Windows Control Panel
- In Search, enter Control Panel and select Control Panel.
- Choose Programs > Applications and Features, after this select this system. Select Uninstall to remove the program. To repair the program, select Repair or, if that’s not available, Change.
- Follow the directions on the screen.
Option 2: By Using Third-Party Uninstaller Program
Windows uninstaller and poorly designed installations mean that removing a program doesn’t always remove all the things. Because of this, we recommend an uninstaller like IOBit Uninstaller . Powerful & Safe Uninstallation – Many stubborn programs can’t be uninstalled or uninstalled entirely in a simple way. IObit Uninstaller can powerfully remove them and delete all the leftovers, together with the registry and the file directory of any stubborn antivirus programs Sure, it appears foolish to add a program to remove programs, however, trust us on this one.
Uninstall Browser Add-ons
We spend a lot of time using a web browser compared to PC users of the past. We all use web browsers for e-mail, music, information, news and so on. Unfortunately, as a result, if we spend a lot of time using web browsers, many companies now create browser add-ons that take up a valuable real estate and often change browser settings, similar to the homepage, search provider and other settings you usually don’t need to be replaced. Take a while to overview the add-ons you’ve installed on every browser, and take away the ones you don’t use. Removing them will restore your default web browser settings and will generally improve your browsing performance
Step 2: CCleaner removal tool
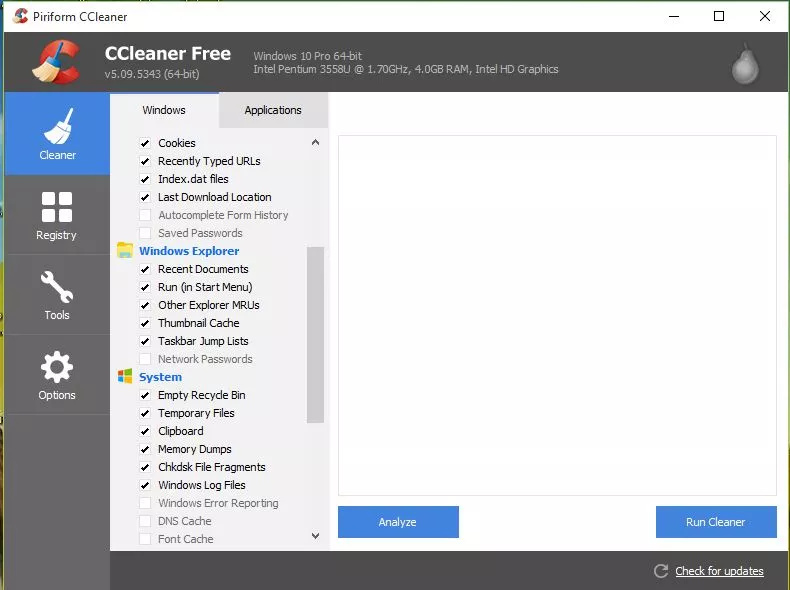
Clean your hard drive of junk files Windows does have a junk file cleaner, but it isn’t useful. CCleaner, on the other hand, gets a lot more junk files out of your PC while still being safe and justly conservative. Merely open CCleaner and the cleaner section must be open by default. Click on ‘Run Cleaner’ and wait. CCleaner has a lot of options you may look at later to fit your needs but saves that till you get aware of the program.
CCleaner is excellent freeware that will get rid of temporary internet files and junk and, also, fixes all the registry errors that alone will make your computer faster!!!
Step 3: Always Update Your Computer
Run Windows Update
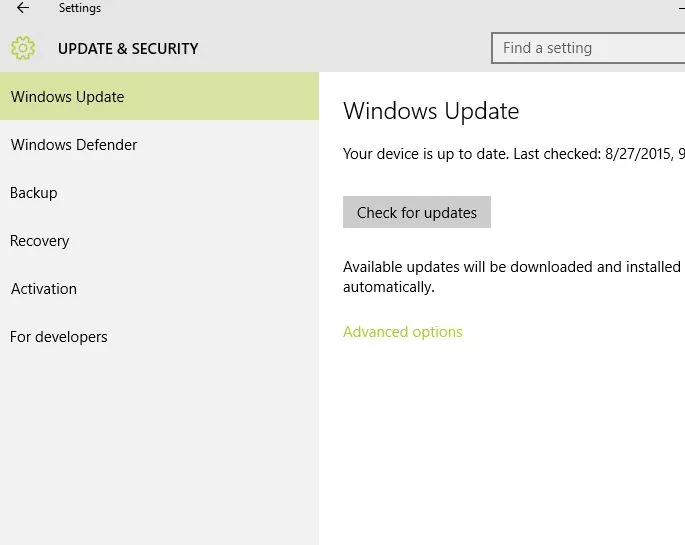
Although you could be using the most recent release of Windows (Windows 10 is the most recent at the moment), you will not be running the latest model of Windows. Microsoft is continually working on improving Windows by fixing security issues, known bugs and improving the way in which the operating system runs. For those who don’t regularly run the Windows Update application, you might be missing out on these updates, some of which can fix problems you’re having with your computer.
Checking for Home windows updates is simple. All you have to do is click on Start, then All Programs, then Windows Update, and next follow the prompts to check for updates.
Update Your Computer’s Drivers
Updating drivers could be done either automatically or manually. Our computer is made up of many individual pieces of hardware. Each of those pieces of hardware needs a piece of software (known as a driver) that allows that hardware to work with Windows. While you buy your computer you normally buying it with all the latest drivers installed so that your hardware works excellently with Windows. Over time, but hardware manufacturers release new drivers when changes are made to Windows so that your hardware always works smoothly. While Windows has a driver update utility, it doesn’t notify you of all updates, and they’re not a simple means so that you can find out which drivers are out of date that Windows doesn’t find.
3 Ways to Update Windows Drivers
- Using Windows Update. Your computer will automatically download and install several recommended updates by the operating system ( In Windows ). Even so, there are some devices whose drivers can’t be automatically installed by using Windows Update.
- Manually Install. Installing the drivers manually, either using the disc containing drivers that came with the buying of the device or downloading from manufacturer’s website. Do this if the Windows Update can’t discover a driver on your system and the device didn’t come with software that installs a driver. To obtain a driver, it’s essential to know some data regarding the system, akin to a vendor and the system ID. This will show troublesome when you don’t know how to get that information from your hardware device.
- Drivers Updater Software. The simple and convenient solution to update your drivers is through the use of home windows drivers updater software program.
Best Driver Updater Software for Windows:
- Driver Booster 3 (Free and Pro)
- Driver Genius
- SlimDrivers Free
- DriverMax Free and Pro
Step 4: Remove startup items
This is a little tougher than the other steps, so I saved it for last but don’t skip it! Startup items are an enormous culprit on the average computer. See all those icons in the lower right corner of your screen? These are all being loaded on startup, and those aren’t all of them either! If you’re questioning why you need to wait a minute to use your computer after startup, it’s as a result of all of those items are loading after the Windows has started up and robbed you of valuable system resources earlier than you open your first program. You’ve three choices right here depending on your comfort level;
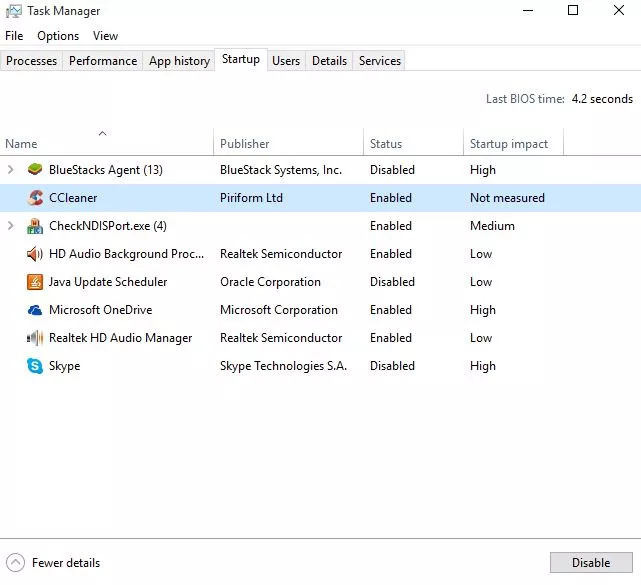
Option 1: By using Windows Task manager
- To bring up the Task Manager straight within Windows Vista, Windows 7 & Windows 8, Windows 10, press CTRL+SHIFT+ESC as a substitute. That is the Activity Supervisor shortcut in Home windows 10/8.
- Now, Click on the Startup tab.
- Uncheck the items you don’t want to launch on startup.
- When you’ve finished making your selections, click on OK.
- Within the box that appears, click Restart to restart your computer.
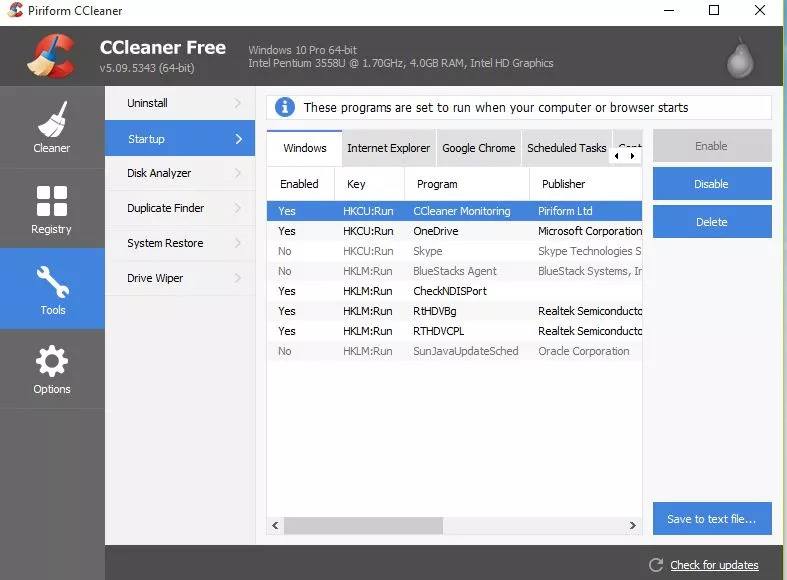
Option 2: By using CCleaner
Is basic and better than nothing. In Step 2 makes use of CCleaner since you have already got CCleaner and Option 3 requires another download but will help you identify startup items you don’t recognize. Now for the things you don’t see. Utilizing CCleaner, you’ll be able to look at Tools, Startup and see all of the items which might be loading. Here you need a slight knowledge however you should use some common sense. It’s safe to remove printer startup items if you don’t use your printers advanced features, for example. You can also Google some of the startup names to see what they’re. With CCleaner, you will have the advantage of having the ability to disable an item and remove it later once you recognize you don’t need it. Sometimes you find a lot of items from Java, Adobe, QuickTime, and iTunes that don’t need to be there.
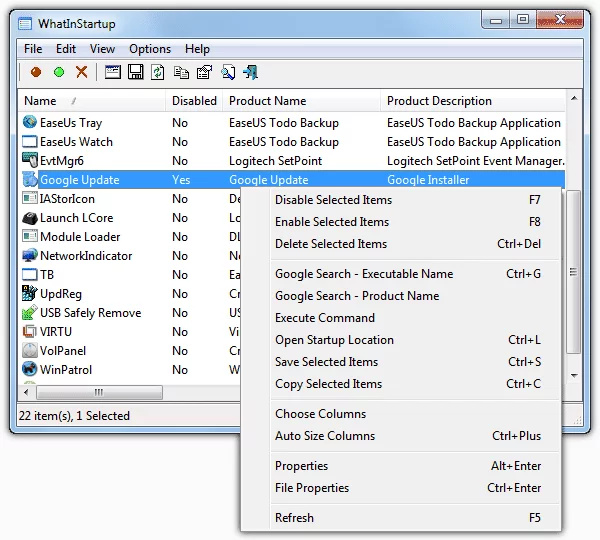
Option 3: By using WhatInStartup
If all of this seems a bit overwhelming and no one can help you out, then you might be able to get some help identifying what specific startup items are with a program known as WhatInStartup . On the far right, this will show you what company is running the executable so what’s what. Remember all computer systems have (and need) some startup items. Examples covered your anti-virus, printers and any program you use often. In case you are not comfy, doing this step, at least, decide to remove a few things. It makes a huge difference.
Step 5: DEFRAGMENT Hard Drive
The final stage! After you have completed all the above steps, the final step is to defragment your hard drive.
Simply put your computer has a lot of unneeded junk files on it and they scattered throughout your hard drive. Defragmenting your hard drive can place everything on your hard drive in a way that makes it faster on your computer to entry files faster.
How you can defrag in Windows 10 and Windows 7, 8:
- Select Start→Control Panel→System and Security. The Administrative Tools window seems.
- Click on Defragment Your Hard Drive. The Disk Defragmenter dialog box appears.
- Click on the Analyze Disk button. …
- When the analysis is complete, click on the Defragment Disk button. …
- Click Close.
Microsoft includes a disk defragmenter however it isn’t perfect. As an alternative, consider Auslogics Disk Defrag or IOBit Smart Defrag .
Step 6: Done!
Now you’ve got a computer that runs as good as new.
Source: compsmag
Fix your laptop and pc and see the results ![]() Enjoy!
Enjoy!