
DiskMakerX is the easiest way to build a bootable macOS installer flash drive, with just a few clicks.
The app is now compatible with macOS Catalina and we’re going to take a look at how to use it to create the bootable flash drive.
You Will Need:
- flash drive with at least 8GB of storage
- macOS Catalina
- DiskMakerX
HOW TO:
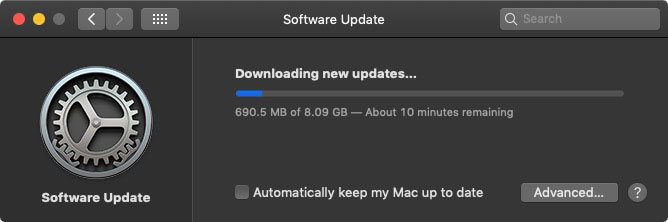
- Download macOS Catalina from the Mac App Store
-
Download DiskMakerX
-
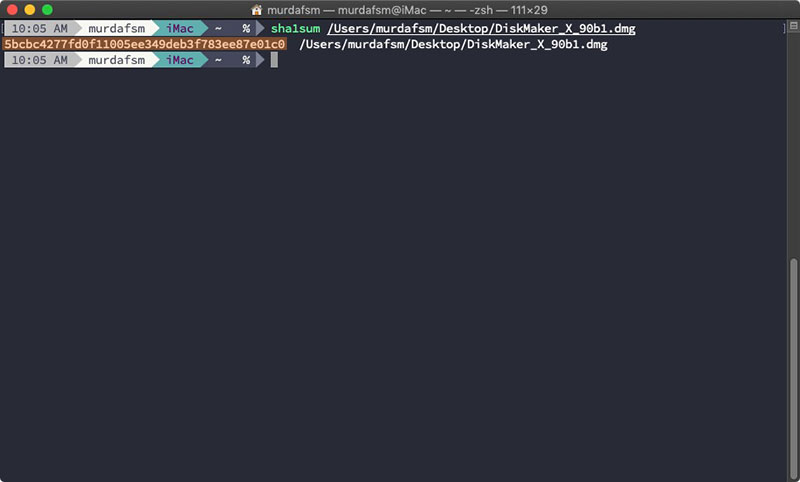
Verify DiskMakerX’s checksum. To do that, open up the terminal and type
SHA1SUM /path/to/diskmakerx.dmg.
NOTE: you don”t need to type the path, just drag and drop DiskMakerX to the terminal.
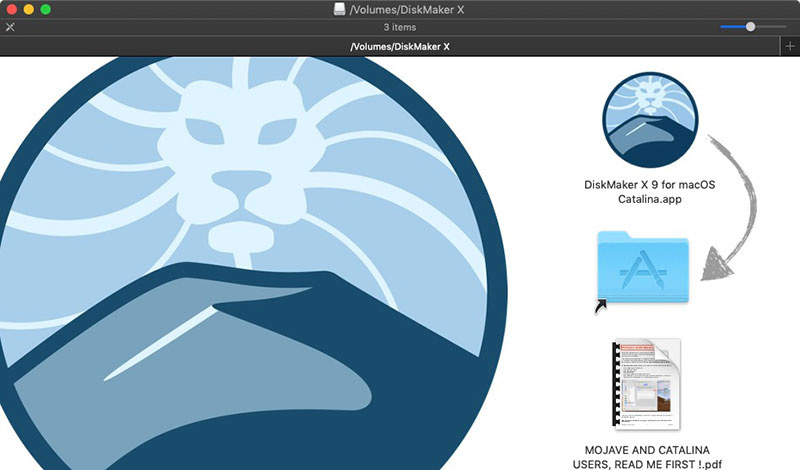
- Double-click on the .dmg file to open it and drag-and-drop the DiskMaker X app into the Applications folder
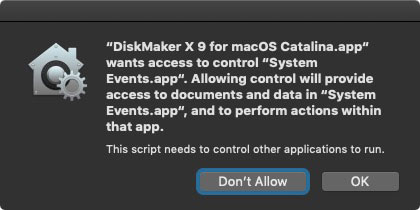
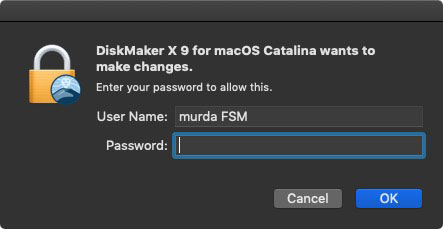
- Open DiskMakerX and allow the permission by clicking on “OK”
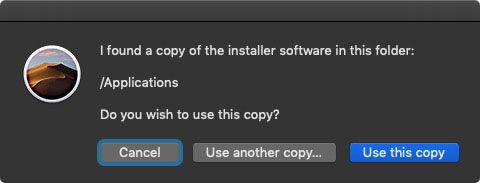
- DiskMakerX will search for your copy of macOS Catalina installer. Once it found your Catalina copy, it will ask if you want to use the copy that it found or you want to use another copy. Select “Use this copy”
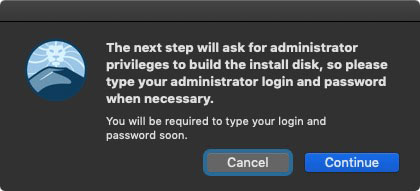
- Allow permission when prompted.

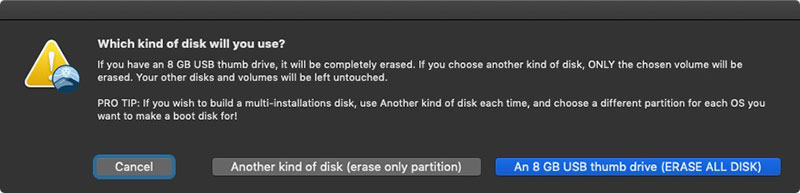
- Choose where you want DiskMakerX to create the bootable drive. In this case choose the thumb drive.
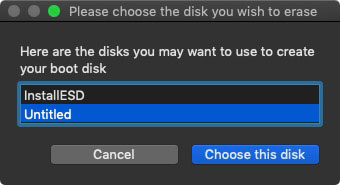
NOTE: if you have more than 1 drive, choose the one you want to use when prompted.
NOTE: it will erase the drive.
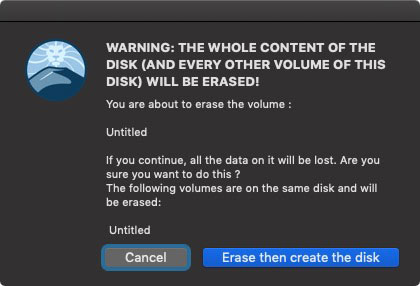
- Next, type your admin password to allow DiskMakerX to erase your thumb drive and copy the macOS Catalina files.
- Now all you have to do is wait. This will take some time. You will get notifications of DiskMakerX working in the background.

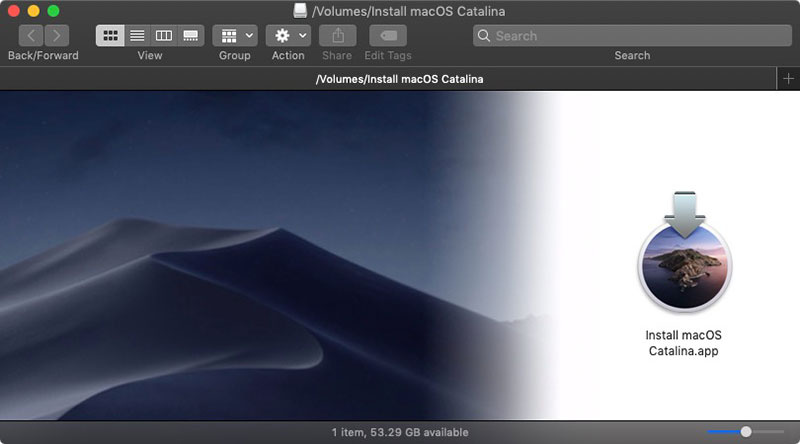
- When you’re done, the app will tell you that the boot disk is ready, you’ll see that your flash drive has been renamed as Install macOS Catalina and it will be opened.
Now all you have to do is restart your Mac and after you here the chime sound, press the Option ( Alt ) key until you see the option to choose the flash drive and boot from it.
 !
!