Besides having the coolest name for system utilities ever, PowerToys have a long history with Windows. PowerToys for Windows made their debut back in Windows 95 to aid in the optimization and customization of your Windows operating system (OS).
Back then, these features were high-tech wizardry. You may have used TweakUI to help you customize the Windows XP interface or FlexiCD to let you play a music CD from the taskbar. Now, the traditional PowerToys from the 90s are pretty much all baked into Windows or easily added through different apps.
Yet, Microsoft has resurrected PowerToys for Windows 10. They’ve also embraced their new open-source stance and getting the most out of their acquisition of GitHub. Being open-source, you can add your own functionality to PowerToys. More likely, there will be developers who add new features that Microsoft might never have thought to make.
Downloading & Installing PowerToys For Windows 10
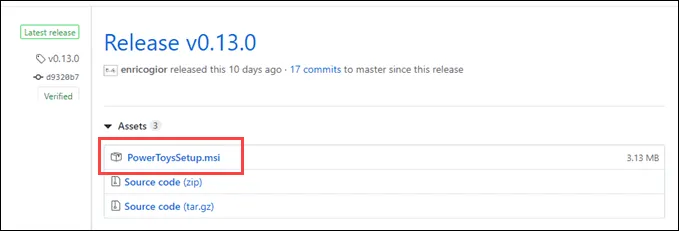
Head over to this link. There will be a few releases listed, the top one is the most recent one. Look for PowerToysSetup.msi and click on that to download the installer. If you’re interested in working with the source code, click on either Source code (zip) or Source code (tar.gz ).
Once PowerToysSetup.msi is downloaded, double-click to install it like any other program. There are options about where to install it, create a desktop shortcut, and run when Windows starts. The default options should be good for most people.

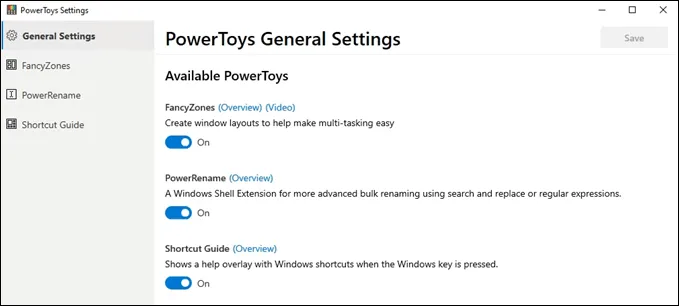
When installed and running, PowerToys will run in the system tray by the clock. Click on the icon to open the PowerToys General Settings.
![]()
The first settings you’ll see allow you to turn on or off the individual PowerToys. On the left side of the general settings window, you can access PowerToy specific settings.
PowerToy Fancy Zones
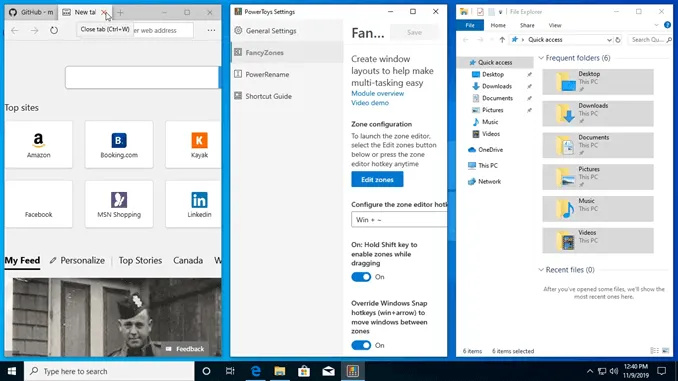
Fancy Zones is billed as a way to “create window layouts to help make multi-tasking easy.” If you’re working in a few programs you need to jump back and forth between, it could make your life a little easier.
- To use Fancy Zones, launch the editor by using the shortcut key combination Win Key + ~ . That’s the tilde key, near the top-left of most keyboards.
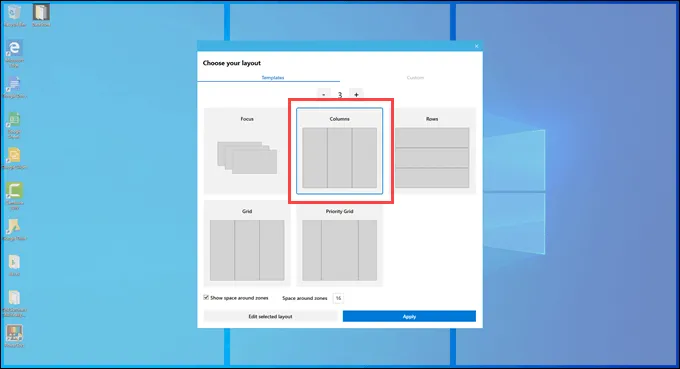
- Choose a zone template. For this example, we chose three equal columns. When you choose a layout, it will preview on your screen what that will look like.
- See in the background that there are three transparent zones? That’s the preview. Click on the Apply button to set the layout.
- Press and hold the shift key, and click and hold on the top-bar of any program. Drag it across the screen. As you pass into the different zones, it will conform to that zone. Release the mouse button to drop it in the zone you want.
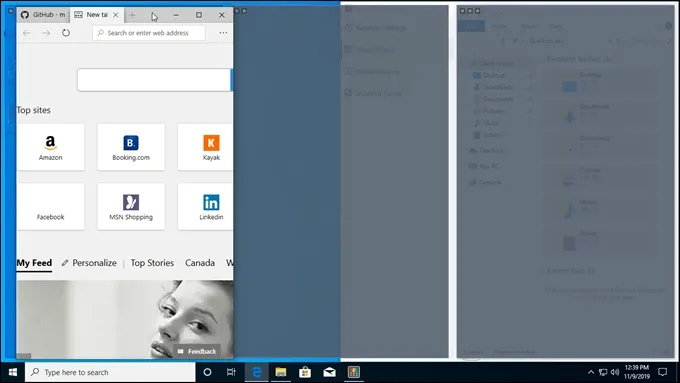
- Do that with three different programs and you’ll see how zones work.
PowerRename
By adding a feature to your right-click menu, PowerRename gives you a way to rename files or folders in bulk. You can do this through simple find-and-replace or even more powerful regular expressions.
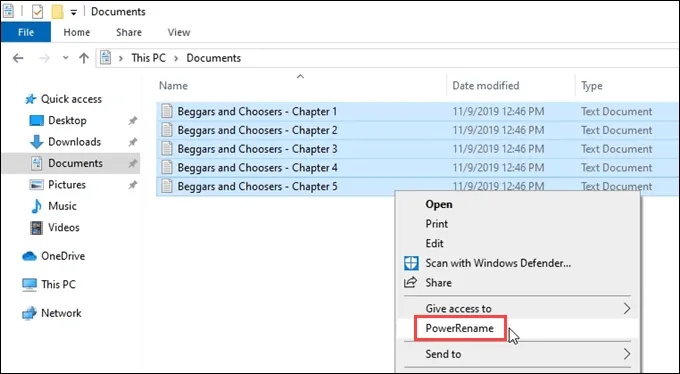
In the image below, you can see how simple it would be to rename all the files in a series of chapters of a book.
- First, select all the files that need to be renamed. Then, right-click and select PowerRename in the context menu.
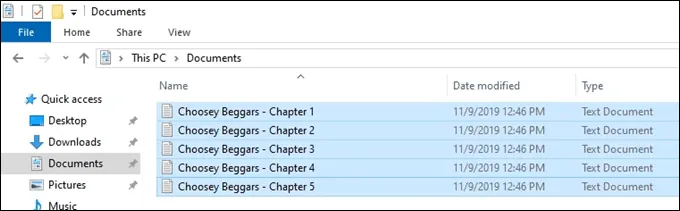
- The PowerRename window will open. There are several options provided. For this example, we’re sticking to the basic Match All Occurrences . The most powerful option is the Use Regular Expressions .
- If you know or learn regular expressions, you can do just about any renaming task you could ever think of with this tool. Regular expressions are great to learn if you do any programming at all, in any language, when working with texts of any kind.

- As you type in the Search for: and Replace with: fields, you’ll see a preview of the changes in the bottom part of the window. This is a great way to prevent mistakes before you commit to the change by clicking on the Rename button. Once you click the button, the changes are instantly made.
Shortcut Guide
Of the three PowerTools for Windows, Shortcut Guide is the one that should definitely be made a regular part of Windows. It’s an instant cheat sheet to the most common Windows shortcuts. When activated, all you have to do is hold down the Windows key for about a second. A transparent overlay will appear on your screen showing you Windows shortcuts.
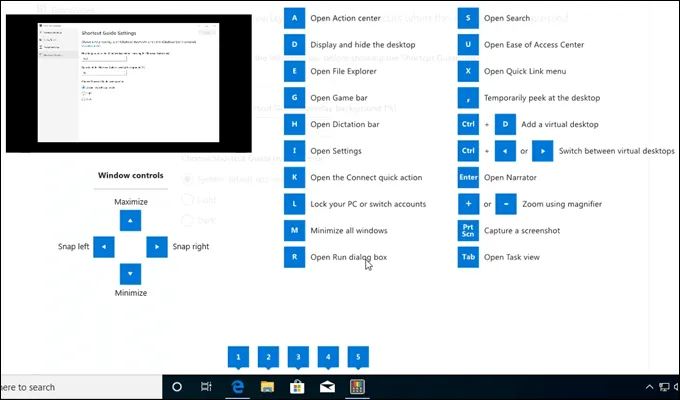
- To use any of the shortcuts, hold down the Windows key and press the corresponding shortcut key shown. For example, if you wanted to open Windows Explorer, you would press and hold the Windows key and then press the D key.
Pay close attention to the bottom of the Shortcut Guide. See how the numbers line up with the programs that are currently open? It’s showing you that you can jump between these programs by using the Windows key plus the corresponding number key.
In the example below, 1 opens the Edge web browser, 2 opens File Explorer, 3 opens Windows Store, and so on.

More PowerToys?
Right now, there are only three PowerToys. However, the much older versions had over 20 tools. Plus, this is an open-source project, so expect to see more PowerToys added by Microsoft and by independent developers.
There are three more currently in development; Maximize to New Desktop, Process Terminate Tool , and Animated GIF Screen Recorder .
Maximize to New Desktop will allow you to create a new desktop and send that app to the new desktop, fully maximized in size. There’s no preview for what that may look like right now.
Process Terminate Tool (PTT) will provide a shortcut to quickly terminate a running program. Using the key combination Alt + F4 can already do this for whatever program currently has the focus, so what’s the point of PTT?
It will work when the program is not responding and cannot be closed by regular means or through Task Manager. It’ll be much easier than killing a process from the command line, too.
The proposal is that the user will access PTT using the Alt + Shift + X key combo. In the PTT window, the user clicks and holds the left mouse button and drags it over the program they wish to kill.
An Are you sure you want to kill this program? prompt will open and the user can choose Yes or No . The image below shows a prototype from the Process Terminate Tool page on GitHub.

The Animated GIF Screen Recorder does what you think it will. The tool will be used to capture any area of the screen and generate an animated GIF of what is happening there.
Aside from easier meme creation, making animated GIFs are a good way to show people how to do things on a computer, without having to write a lot. The image below shows a prototype of what the screen recorder might look like. This is from the Animated GIF Maker spec page on GitHub.

Is That All?
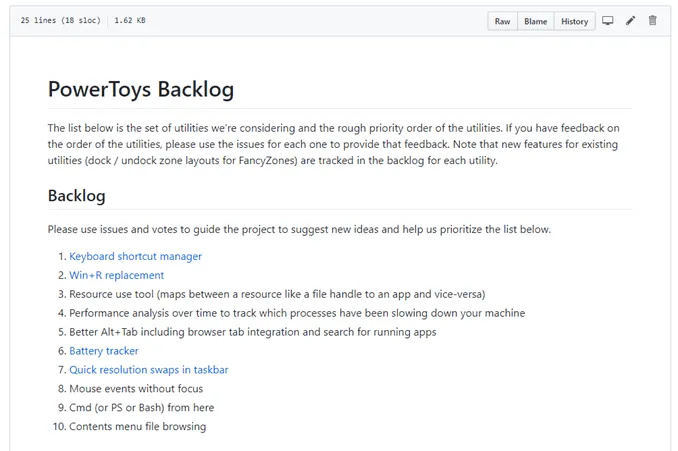
Considering Microsoft is kind of new to the open-source philosophy, they’re really embracing it. In addition to the three tools already released and the three in the pipeline, there are an additional ten tools sitting in their backlog.
So 16 free PowerToys for Windows is really something to be appreciated, and anything that makes your work easier is always welcomed.