


Please follow the steps give below carefully for high speed transfer/backup of files from one cloud to another. For this tutorial we will use “rclone” and a Runtime Cloud Service i.e. Colab Noteboks. I have tried to make tutorial simple by using Rclone WebUI, as many users are not comfortable with command line, but if you want much simple thing (for free) you can always use Multicloud or any other alternative.
For Advance users → no need to explain → Just go to terminal and do your thing.
Remember trying to learn how to configure rclone is time consuming, So please provide 15 mins, then its all simple and fast as flash (probably). Installation (< 1min), Configuration (<10 min), Testing (< 1 min), Running( <3 min)
If you don’t have cloud storage (in TBs), first see following posts, if you are happy with your free account then go to main part:
- https://forum.telugudjmusic.com/t/get-google-drive-unlimited-storage-tutorial/52409
- https://forum.telugudjmusic.com/t/get-5tb-onedrive-office365-for-free/58747
- https://forum.telugudjmusic.com/t/how-to-get-2tb-free-in-dropbox-easy-working/55229
– Thank @SaM for the topics and others for providing helping posts and discussion.
Overview:
Part 1. Installing and Configuring “rclone” on Local Machine (your computer)Part 2. Using configuration to run rclone in cloud service and transfer data online.
Notes:
- For example we will use Google Drive, One Drive and Dropbox but you can modify as you like.
- We will first install and configure rclone on local system, as rclone require browser support for configuring. If you have browser supported vps then just install it on vps
Part 1: Installing “rclone” on local system.(only once)
Rclone is a command line program to sync files and directories to and from cloud. It mount cloud storage system and make it work more like a normal file systemFirst, we need to install rclone on our local system. I have used Windows as many 1Hackers seems to use Windows (after months, I prefer Linux!).
-
Step 1: Go to https://rclone.org/downloads/ or https://github.com/rclone/rclone/releases/tag/v1.49.3 .
Download ZIP file according to your OS and architecture. (In my case, it is Windows 64 bit). -
Step 2: Extract zip file, and rename folder to “rclone”.
Copy rclone folder and paste it in C: drive. -
Step 3: Open “cmd” (Windows + X >> select command prompt or Window + R >> Enter “cmd”)
-
Step 4: Go to rclone directory in cmd by:
cd C:\rcloneNote: For Linux/macOS/BSD simply run in terminal:
curl https://rclone.org/install.sh | sudo bash -
Step 5: Configuration of remotes (cloud storage) using rclone WebUI (GUI is BETA mode so there may be some issues).
Run following in cmd:
rclone rcd --rc-web-gui --rc-user admin --rc-pass admin

Note: If asked, enter username and password “admin”.
If it gives any error,close browser and open cmd press Ctr + C to abort and run above command again.

-
Step 6: Now goto Configs and click on New Config. (We will setup Google Drive first, this very time consuming, others are fast and simple! )
-
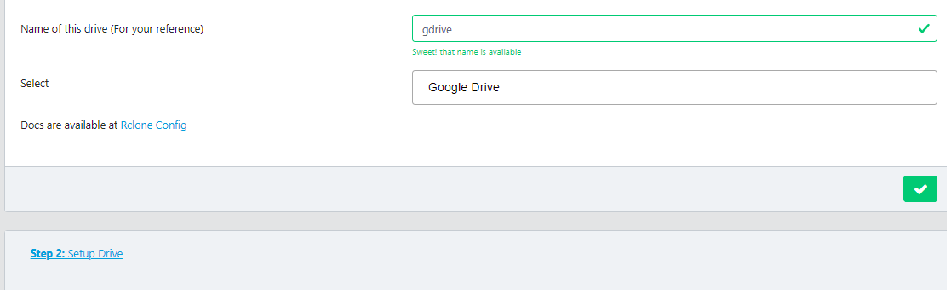
Step 7: Enter name: gdrive (you can enter as you like)
-
Step 8: Select provider as Google Drive from dropdown list.
-
Step 9: Click on Step 2. Here we need to enter Client ID and Client Secret. Follow below steps to get them (This is one time only):
-
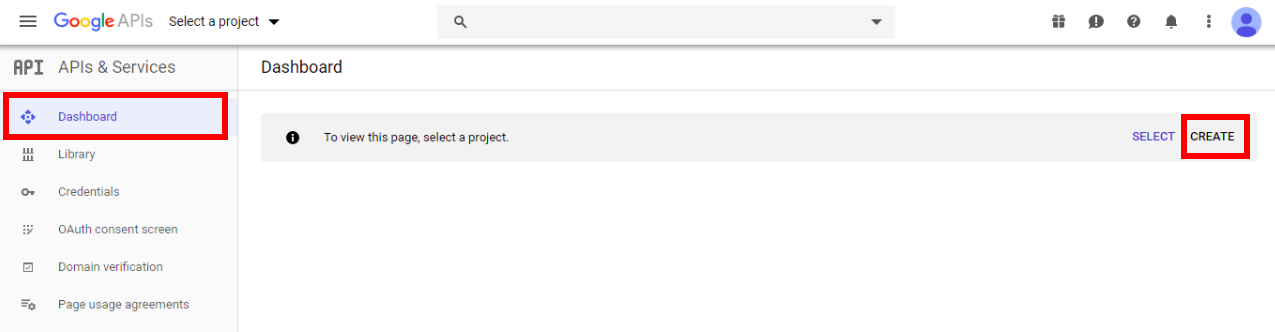
Go to https://console.developers.google.com/ and Sign in.
-
Click on “CREATE” to create a new project.
-
Enter a project name like “rclone-yourname” (anything) and click “CREATE”.
-
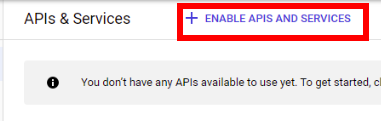
Click on “ENABLE APIS AND SERVICES” on the top.
-
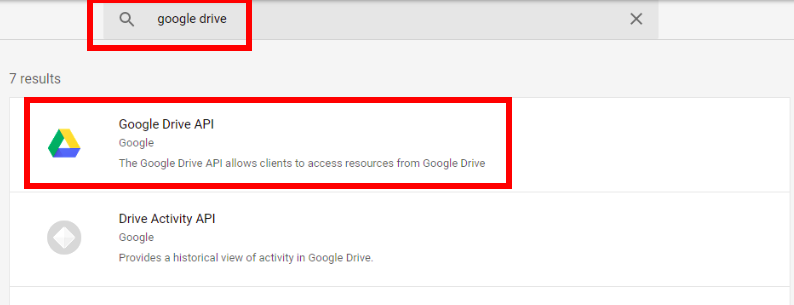
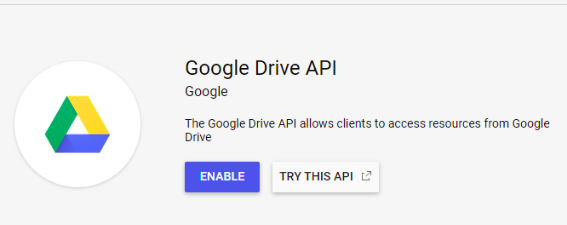
Search “google drive”, select Google Drive API and “ENABLE” it
-
Select Credential from panel on left side. (not “create credential”)
-
Now on this screen click “Create Credential” and select “OAuth client ID”.
-
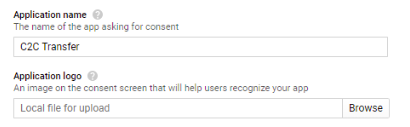
Click on “Configure consent screen”
-
Enter application name “C2C Transfer” (Your choice) and Click “Save” at the bottom
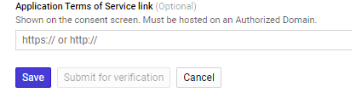
-
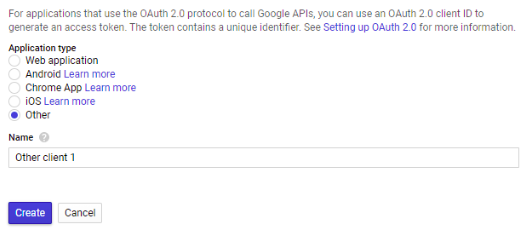
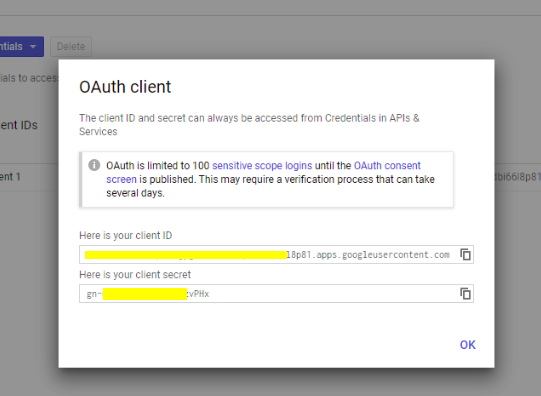
Now select Other and click “Create” (Default name is ok, change if you wish)
* Finally you are prompted with client-id and client secret, copy-paste them in Rclone WebUI
Note: We can use rclone default client id and secret by leaving them blank. But this may give low performance therefore rclone recommend to use our own
-
-
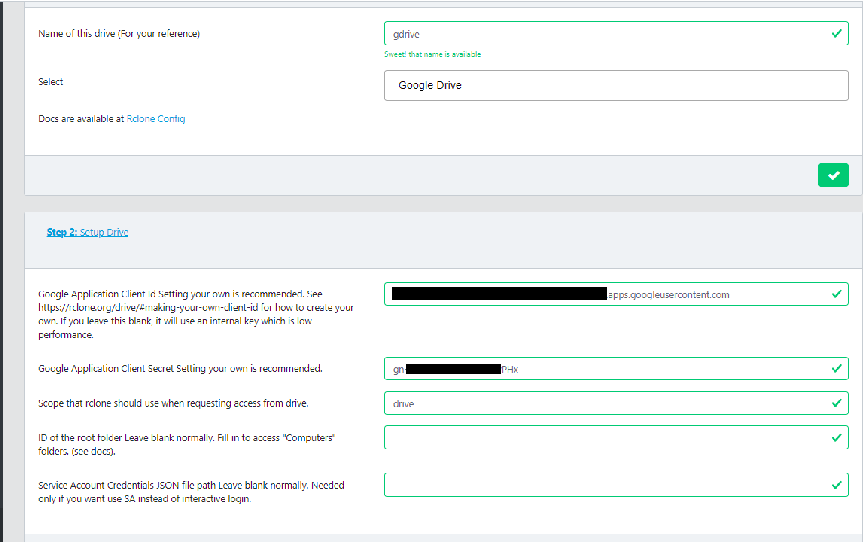
Step 10: In WebUI Enter “ drive” scope, leave rest blank and click Create Config .
-
Step 11: This will open new tab and sign in. If it ask app is not verified then, click advance and Go to C2C Transfer (Don’t worry its safe, it is app create by you!!) and Click Allow >> Allow. Success !
-
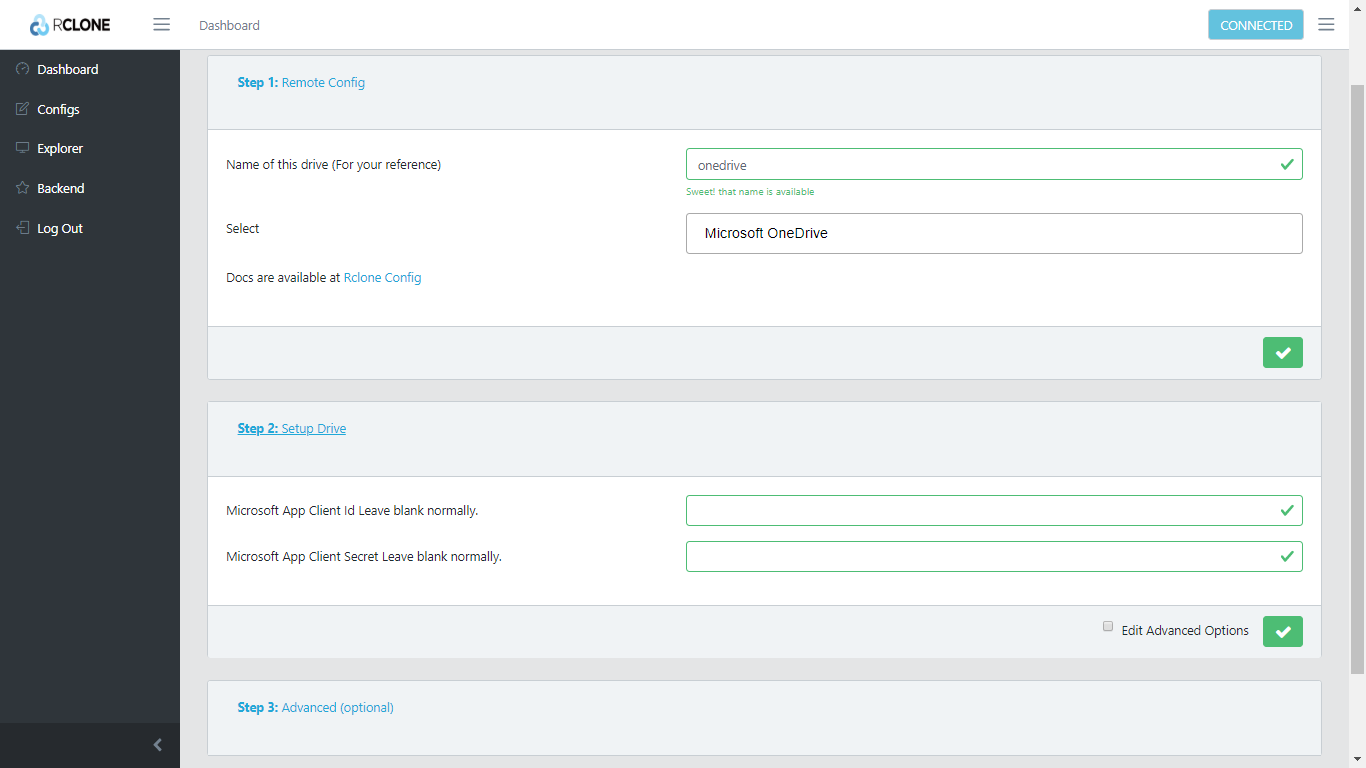
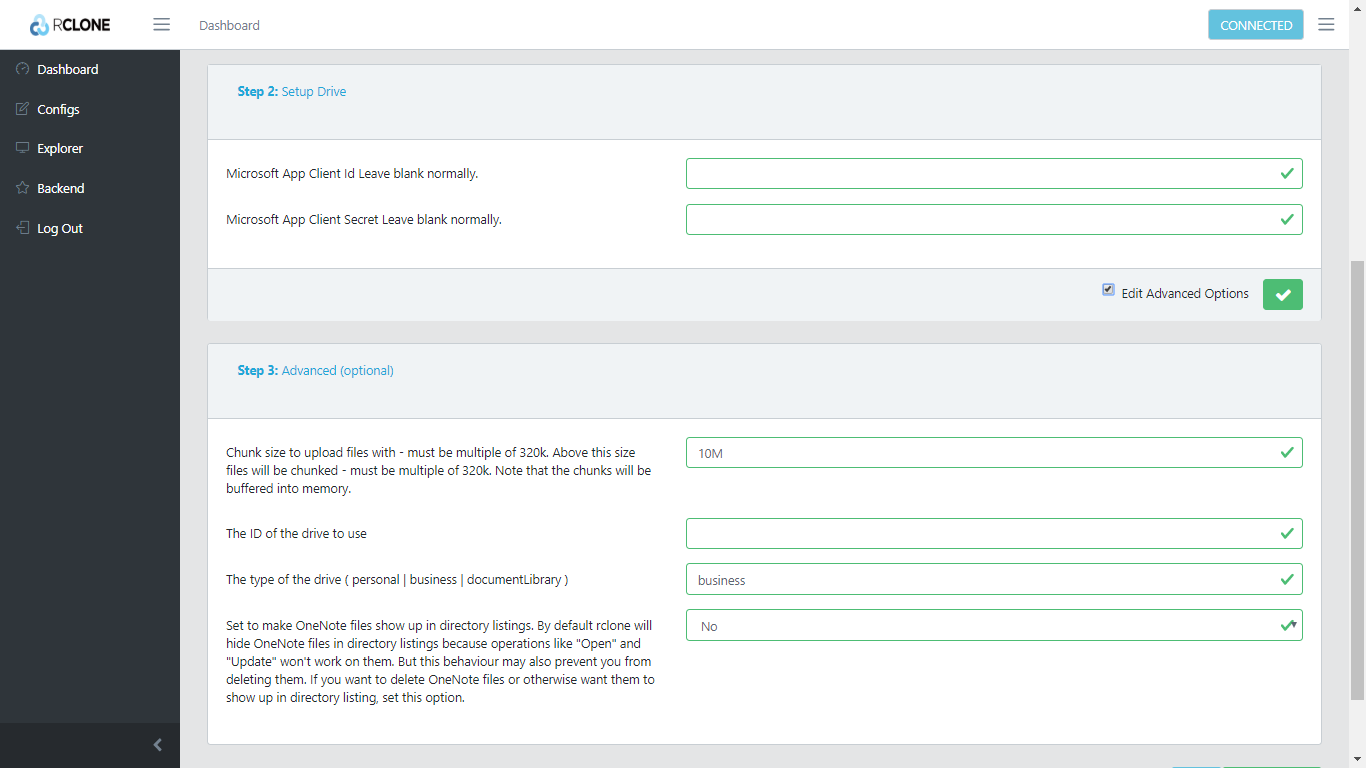
Step 12: Create new config for OneDrive as shown in images(Step 6).
Here no need of Custom Client ID, just use default by leaving empty. Enter type as business in Advance option. Click create and login >> success!!
-
Step 13: Create new config for Dropbox. Just enter name “dropbox”(as u like) and select type. Click Create Config and Log in to your account . Thats it!!
Try others and for more info visit rclone docs : https://rclone.org/docs/
-
Step 14: Click Log out and close browser.
Open cmd and press Ctr + C (if process not terminated automatically) -
Run following command in cmd to check if remotes were created successfully. If it shows cloud drives than config was successful.
rclone listremotes


Part 2: Using “rclone” in Colab Notebook.
- Step 1: Goto Google Drive and create New Folder with name “Config”
- Step 2: Goto
C:\Users\<username>\.config\rclonefolder and Upload rclone.config to newly created Config folder in google drive (by drag and drop) - Step 3: Goto https://github.com/gokupistol/c2c-transfer.
- Step 4: Click the button which says ‘Open in Colab’.
- Step 5: Goto File > Save a copy in Drive… (a new tab opens with the copy of this notebook).
- Step 6: Run the notebook in sequence.
- Step 7: Follow directions there.
Note: The idea of using google colaboratory is inspired by the recent articles about cloud storage. posted by Chief SaM and members of the forum.
rclone don’t require gpu or 300+gb hard drive as it will download data in chunks then upload it and then delete chunks, so i don’t think it will require much processing power, all it use is a node with high bandwidth. So, ML/AI/DS critics don’t worry! instead use this for downloading and creating backup of your datasets and results if required.
THREAD PERMISSION GIVEN BY Chief @SaM
NOTE: If this thread required any update, it depends on OP to update it time to time or later, Don’t rush if you need any help by OP, he will respond when he get time, in fact, everything written crystal clear so make yourself useful. Note Added By @SaM
 !
!