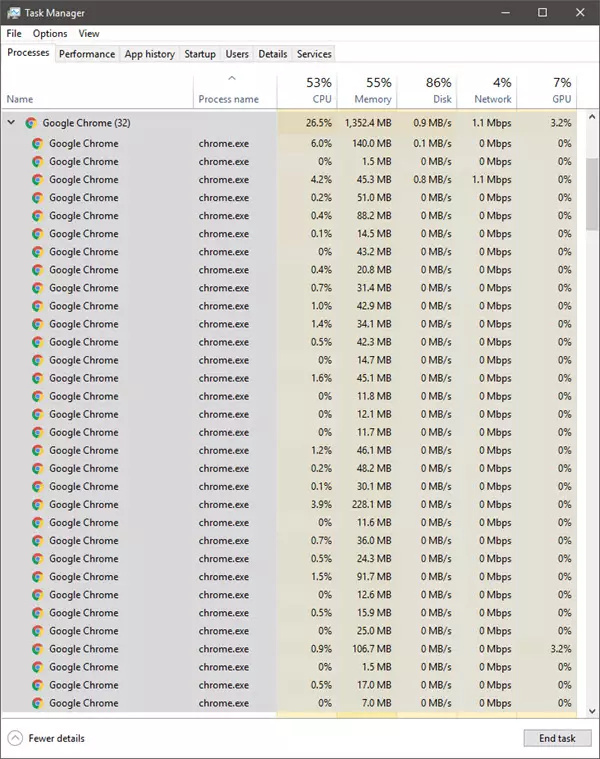
Google Chrome is a popular browser. The main reason behind its reliability is the fact that it runs on Chromium. Microsoft has recently announced moving Microsoft Edge to the Chromium engine. Many users, however, report that they have been spotting Google Chrome using high memory . It eventually makes the browser as well as the computer slower and affects the overall experience of the users. Today, in this article, we will be checking out how to get rid of this issue on computers running Windows 10.
Reduce Chrome high memory usage & make it use less RAM
We will be taking a look at the following fixes to reduce Chrome high memory usage:
- Close Unused Tabs.
- Run a Malware Scan.
- Enable Hardware Acceleration.
- Remove conflicting browser Extensions.
- Creating a new User Profile for Google Chrome.
- Disable the Site Isolation feature.
- Turn on Use a prediction service to load pages more quickly.
- Reset or Reinstall Google Chrome.
1] Close Unused Tabs
If any of the tabs are open that you are no longer using, there might be a high chance that it is going to use a good chunk of your RAM. So, to recover from this issue, you can try to close any of these unused tabs and check if the RAM usage comes down.
2] Enable Hardware Acceleration
First of all open Google Chrome and click on the Menu button (by clicking on three dots button on the top right corner). Next click on Settings.
After the Settings page opens, scroll down to find the button that is labeled as Advanced and click on it.
Under the section that goes by the name System , turn on the toggle of Use hardware acceleration when available .
Restart Google Chrome.
When it starts up again, type in chrome://gpu/ in the address bar and hit the Enter key.
This will now display if Hardware Acceleration or GPU Rendering is enabled or not
3] Run a Malware Scan
As mentioned before, this problem can occur due to some changes made by malware or adware. Therefore, scan your whole system for malware or adware. Use any antivirus software to scan your computer.
You may want to also use AdwCleaner. This useful freeware lets you carry out the following tasks with the click of your button:
- Reset Proxy
- Reset Winsock
- Reset TCP/IP
- Reset Firewall
- Reset Hosts file.
4] Create a new User Profile for Google Chrome
Kill every single process for Google Chrome from the Task Manager.
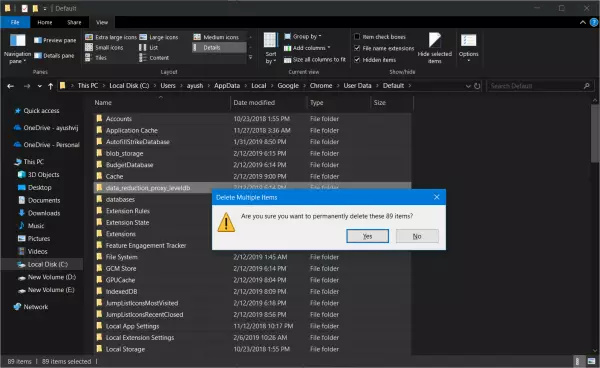
Next, navigate to the following location in Explorer-
C:\Users<username>\AppData\Local\Google\Chrome\User Data\Default
Press CTRL + A on your keyboard to select all the files inside of the location mentioned above.
Then press Shift + Delete to delete all these selected files permanently.
Now, open Google Chrome and create a new User Profile and then finally check if your issue is fixed.
5] Remove or disable conflicting Browser Extensions
There are high chances that the extensions and toolbars installed on your browser might be conflicting with the loading of your website. So, to fix that, you need to remove or disable these extensions and toolbars. Maybe you could start Chrome in Safe Mode and then try to identify the offending extension.
6] Disable the Site Isolation Feature
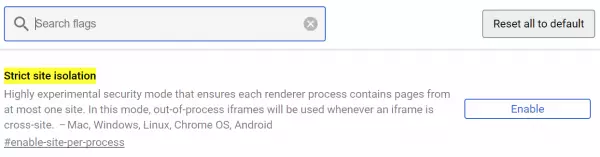
Open Google Chrome browser and visit this URL: chrome://flags
Look for Strict site isolation in the search box on the top portion of the page.
Then, toggle the appropriate entry to Enabled.
Restart Google Chrome for the changes to take effect.
This will enable the Site Isolation feature on Google Chrome.
7] Turn on Use a prediction service to load pages more quickly
Open Google Chrome and click on the Menu button denoted by three verticle dots in the top right corner.
Then, click on Settings. In the Settings section, scroll down and click on Advanced to reveal the Advanced Settings.
Now, scroll down to the Use a prediction service to load pages more quickly button and turn it on .
8] Reset or Reinstall Google Chrome
To reset Chrome browser, make sure that Google Chrome is not running anywhere in the background using the Task Manager.
When you use the Reset feature, the following will happen:
- Search Engine will be reset to default
- The homepage will be reset to default
- New Tab Page will be reset to default
- Pinned tabs will be unpinned
- Extensions, add-ons, and themes will be disabled. The New Tab Page will be set to open on Chrome start.
- Content settings will be reset. Cookies, cache, and Site data will be deleted.
To begin, hit the WINKEY + R combinations to open Run and then navigate to the following path,
%USERPROFILE%\AppData\Local\Google\Chrome\User Data
Now, select the folder named as Default and hit the Shift + Delete button combinations and then click on Yes for the confirmation prompt you get.
After deleting the Default folder, open Google Chrome and click on the Menu button denoted by three verticle dots in the top right corner.
Then, click on Settings. In the Settings section, scroll down and click on Advanced to reveal the Advanced Settings.
Now, scroll down to the Restore Settings to their original defaults button and click on it.
This will now give you a prompt like this-

Click on Reset, and this will reset your Google Chrome browser. When you use this option, it will reset your profile to the post-fresh-install state.
Now check if your issue is fixed or not.
And if all the methods that are mentioned above do not work properly, the last and the ultimate fix would be reinstalling Google Chrome. First, you will have to back up your browser data like bookmarks, passwords, etc, then, uninstall Google Chrome fully from your computer. This should also include all the leftover folders with browsing data, user data, etc. Now, make sure you download the latest version of Google Chrome from its website. Having done that, you could import your data back.
enjoy folks, get rid of memory usage in chrome. ![]()