Disclaimer
Customized ISOs for personal use are fine. If you want to share your customization with others, whether for free or for purchase, you’ll have to rename it; remove all distro specific artwork, branding, and other identity elements; and you can’t confuse your intended users about the customization being associated in any way with the base distro.
You’re free to use the softwares without renaming those, as they are licensed under GPL. But otherwise, it will be your own creation and no longer you base distros’.
The name and identity elements of a distro are trademarked and copyrighted. Unless you have approval from appropriate authorization you can’t use those (identity elements and name).
Description:
This is a simple command line tool to customize live cd/dvd of Debian, Archlinux, Ubuntu family, Linux Mint and some of their derivatives. It does not require that the host system and the target system be the same, i.e you can modify debian live cd sitting on ubuntu or archlinux, or modify archlinux live cd sitting on ubuntu and so on.
It gives you a chroot environment for modification and creates the modified iso image. You need to do all the customizations on your own, JLIVECD itself does not do any modifications.
It is developed with the help of the documentation found on:
- https://help.ubuntu.com/community/LiveCDCustomization
- https://wiki.debian.org/DebianInstaller/Modify/CD
- https://wiki.archlinux.org/index.php/Remastering_the_Install_ISO
This tool is intended primarily for personal use.
Please read through the Additional info section before you start with a Ubuntu or Linux Mint ISO for the first time.
Mentionables:
Resume capability
It works as project basis. For a JLIVECD project, you need to use your base ISO only once to extract it and deploy the project. After that, you can keep changing things and building and testing ISOs built on those changes.
Project and Global configuration
It works with both global and local configuration files. Using config files, you can skip prompts that need answers from user input. Local (project wise) config is prioritized over global config.
Global configuration file: /usr/local/JLIVECD/.config
Local configuration file: config.conf file in your project directory.
Dependencies:
- bash (This is generally installed by default in most Linux distros)
- squashfs-tools
- genisoimage
- syslinux, syslinux-utils (If you want hybrid ISO image (default))
- rsync
- xterm (optional)
- dosfstools (archlinux)
Install requirements with the following command in debian like systems:
sudo apt-get install squashfs-tools genisoimage syslinux syslinux-utils rsync xterm
and the following command in Archlinux:
sudo pacman -S squashfs-tools cdrkit syslinux rsync xterm dosfstools
Installation:
run the install.sh file in terminal:
chmod +x ./install.sh sudo ./install.sh
How to use:
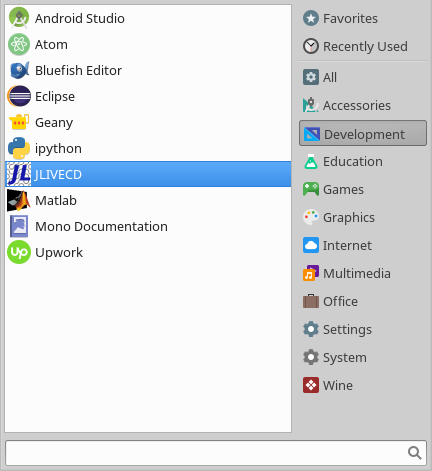
Run JLstart as root in a terminal or run it from menu->Development->JLIVECD.
Example:
~$ sudo JLstart
[sudo] password for user:

**************** JLIVECD******************
*Tips:
*   1. Paths must be absolute. (~ allowed)
*   2. Inputs are literal
*   3. Do not use NTFS partition
******************************************


=== Is this a new project: (y/n)?:

...............................
Hints are given on the go, follow them to successfully create a customized live cd/dvd.
It prompts for OSMODE (debian, ubuntu or archlinux) for new projects and saves it in project specific .config file so that next time it doesn’t require you to specify the OS again. Make sure you don’t change it in the .config file.
If you want to run JLIVECD in specific OSMODE, there’s three option for you:
| Option | Alt. option | Detail |
|---|---|---|
-ub |
--ubuntu |
Ubuntu mode (for Ubuntu family & Linux Mint) |
-db |
--debian |
Debian mode (Debian family) |
-al |
--archlinux |
Archlinux mode (Archlinux family) |
Note If you run JLIVECD in a specific OSMODE and it doesn’t match with what’s in .config file, it will throw error and exit.
Examples of running JLIVECD in specific OSMODE:
sudo JLstart -ub #ubuntu sudo JLstart -db #debian sudo JLstart -al #archlinux
Directories & Files:
In your project directory, you will find some default files/directories. Don’t change their names.
The directories are:
debcache:.deborpkgfiles are kept here. See the cache management section for more details.edit: This is the root filesystem (i.e/) for the live system (chroot system). Any change you make here will appear in the finalized ISO.extracted: This is where the original ISO is extracted. You can change several things here, like Diskname, release, date, splash screen, etc.mnt: A directory used only for mounting ISO image.mydir: A directory with 777 permission. This directory is moved insideedit/during chroot, thus in chroot it will be available as/mydir. Use this directory to store/install packages and files that you need to store for future but do not want to include them in the ISO.
The files are:
.config: configuration of the corresponding project i.eDISKNAMEand some other defaults (for internal use)config.conf: Configuration managed by user. This is essentially a bash script and thus you can make intelligent use of it and set dynamic options. Any non-empty value set to a variable (option) will bypass its input prompt.
Things to care:
- Paths must be absolute. JLIVECD does not run in the current directory.
~is respected. - Quotation in prompts are taken as literal.
~/"some folder"and"~/some folder"are different. If you want spaces then give it as it is:~/some folder. - Do not use NTFS partition.
- The default is
nfor ally/ntype prompts unless specified otherwise.
Some Tips & Tricks:
- If you are not being able to get connected to internet in chroot, you can try running the code:
sudo JLopt -rnin another terminal in your main system. This may happen if you start JLIVECD before connecting your pc to the internet. - If you want to change the timeout value then run this code in a terminal in your main system:
JLopt -t timeout_value. “timeout_value” should be replaced with your desired time in seconds. Ex: for 12 seconds timeout:JLopt -t 12 - JLIVECD seems to have problem running the
mate-terminalproperly. For mate DE, installxterminstead (sudo apt-get install xterm). - You can change the default terminal JLIVECD uses for chroot. To change the primary default terminal run this code in a terminal in your main system:
JLopt -t1 actual-terminal-command. To change the secondary default terminal:JLopt -t2 actual-terminal-command. For Ex.JLopt -t1 gnome-terminal - You don’t need to give the full name/path to the base iso prompt:
enter base iso path: ~/Downloads/x. As there is only one file that matches 'x in my Downloads folder isxubuntu-14.04.1-x64.iso, it will take that file as the input. - You can use full path with or without
.iso.
Archlinux specific tips
- Do not manually clean pacman cache (
pacman -Scc). JLIVECD cleanspacmancache after backing up thepkgfiles to reduce future downloads. If you do clean manually, thepkgcache will not be available anymore and you will have to redownload the same packages again when installing/reinstalling next time around.
Cache management
- Put your
.debfiles in edit/var/cache/apt/archives folder (orpkgfiles in edit/var/cache/pacman/pkg/) so that they don’t get downloaded again in the software installation process. - They will be moved automatically to a folder named debcache (located in the same directory as “edit”) prior to image creation so that they won’t be included in the iso image.
- You never need to delete
.deborpkgfiles from edit/var/cache/apt/archives manually and you shouldn’t (not even with package manager cache clean program unless you want it that way for disk space constraint). - Alternatively, you can put the
.deborpkgfiles in debcache folder too, but in that case you need to run JLIVECD after you have finished copying files to this folder.
New features:
- Support for Archlinux live ISO.
Customization help:
Customization related documents can be found on JLIVECD github wiki.
Creating bootable USB
By default JLIVECD creates hybrid image. You can either use tools like unetbootin or something like dd to create the bootable USB. If you want to use dd, be careful about mistyping and what you are doing. For example, you could end up wiping your hard disk if you mistype /dev/sdb as /dev/sda. For this, I have another script (chibu) that checks the validity of the usb device and makes sure it’s a USB device not something else like a partition on your hard drive. After cheking validity it runs a dd command to create the bootable USB.
Note: chibu or dd will destory existing data on the USB
With chibu, it’s like this:
sudo chibu iso_path /dev/sdx
where /dev/sdx (not /dev/sdx1 etc…) is your usb device, (x is a letter)
You can find the device id with:
sudo fdisk -l
look for the usb device in the output of the above command.
Notes:
- USB created with
unetbootinmay not have its boot flag set. Check withgpartedand set the boot flag if not set. - USB created with
unetbootinmay fail to boot with its first default boot option, choosefailsafeoption. - If
unetbootindoesn’t work, trydd(preferably chibu) unetbootinwon’t work for archlinux, usedd(preferably chibu)
Tested OS:
- Debian (xfce) testing (stretch) @ Thu Mar 23 13:31:53 UTC 2017
- Debian (xfce) 8.7.1 Jessie
- Archlinux 2017.05.01 x86_64
- Xubuntu 16.04 LTS
- Linux Mint 17 cinnamon
- Linux Mint 17 XFCE
- Xubuntu 14.04.1 LTS
- Ubuntu 14.04.1 LTS
- Ubuntu 14.04.3 LTS
- Kubuntu 14.04.1 LTS
Additonal info:
1.In Linux Mint 17 XFCE there’s a bug. To fix this edit /usr/sbin/invoke-rc.d file (in chroot) as: replace exit 100 with exit 0 at line 285 and 421, then apply upgrade. after upgrading revert this modification (must).
2.In Linux Mint 17 xfce, if you install nautilus then it will set gnome-session as default session and if gnome desktop is not installed then no desktop window will show up in live session. change the link /usr/bin/x-session-manager to point to /usr/bin/xfce4-session.
3.In xubuntu 14.04.1 there’s another bug: Can’t open /scripts/casper-functions" error) to fix this, run this code in chroot:
ln -s /usr/share/initramfs-tools/scripts /scripts
Follow the following link for bug report:
4.In Ubuntu 14.04 Gnome LTS you might encounter two more bugs:
One should be solved by editing:
/var/lib/dpkg/info/whoopsie.prerm
/var/lib/dpkg/info/libpam-systemd\:amd64.prerm
/var/lib/dpkg/info/libpam-systemd\:amd64.postinst
(change exit $? to exit 0 in the invoke-rc.d lines)
Other one should be solved by editing:
/etc/kernel/postrm.d/zz-update-grub
/etc/kernel/postinst.d/zz-update-grub
find the following and comment out the if and fi line:
if [ -e /boot/grub/grub.cfg ]; then
   #exec update-grub
fi
Revert these changes before exiting the chroot.
Follow the following link for bug report for more details:
https://bugs.launchpad.net/ubuntu/+source/systemd/+bug/1325142
5.You may encounter another bug: Ubiquity installer, hang/freeze on harddisk detection. This bug can be solved by editing the file edit/usr/share/applications/ubiquity-gtkui.desktop and changing the section exex from
sh -c ‘ubiquity gtk_ui’
to
sh -c ‘sudo ubiquity gtk_ui’ ```y