As everybody knows Vestacp is freemium open-source website hosting control panel like Cpanel and also known as good alternate of Cpanel. Here I’m sharing to you — How to install and setup vestacp under 10 minutes.
How To Deploy App On Cloud Hosting
Currently, using — Digital Ocean
Have you configured shh with your project using putty and set/change password?
You need download/install putty in your PC — Download from here: https://www.putty.org/ Or you can use CMD (If you know usage).
- Create Droplet
- Choose an image (Ubuntu any version)
- Choose a Plan
- Choose a datacenter region
- Authentication — Select one time password so you can set any password you want and temporary password will receive you on the email.
- Choose a hostname (enter any or use default)
Here is the review please have a look to understand it better:
Step 1-

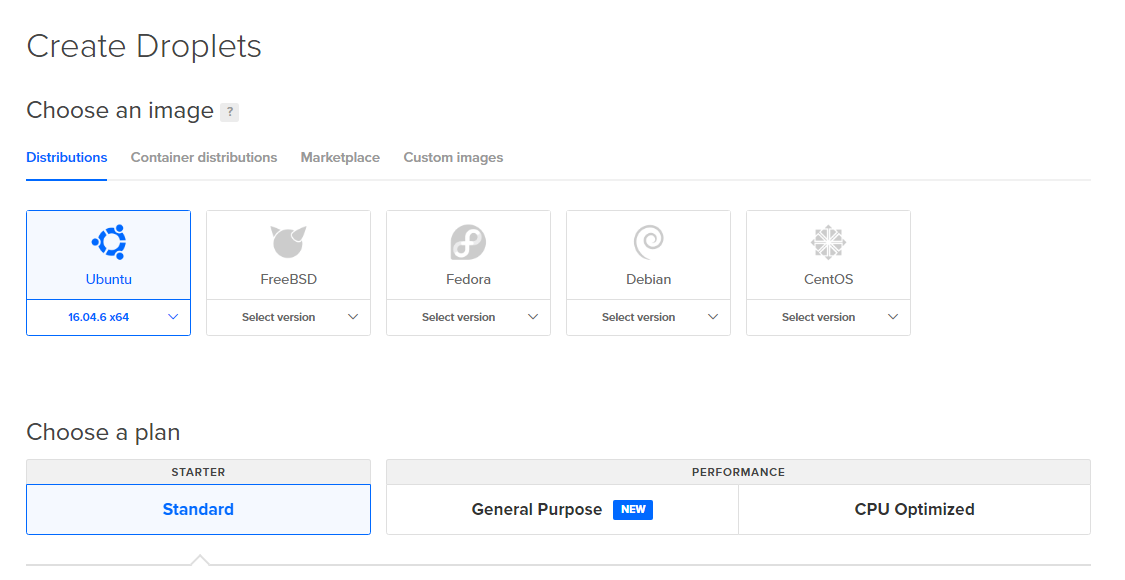
Look the distribution set it Ubuntu, use any version else it’s fine with default.
Step 2-

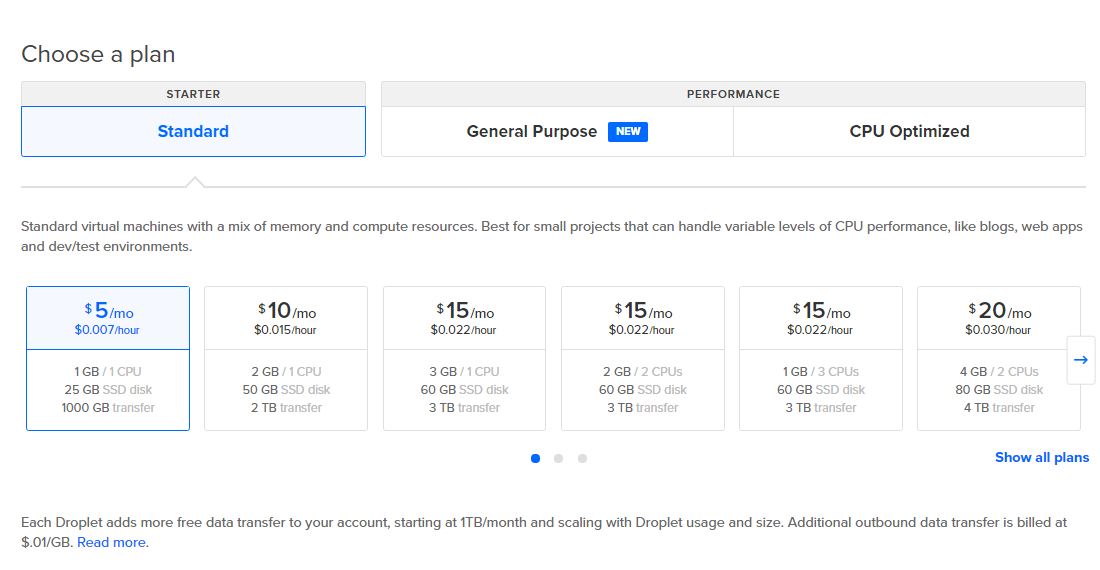
Select pricing its depend on your usage.
Step 3-

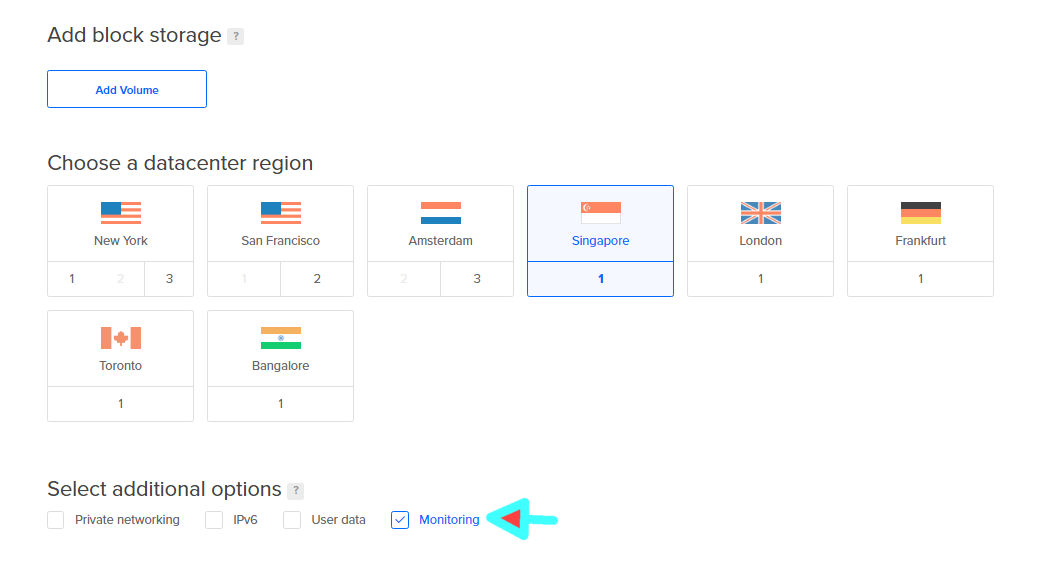
Select your plan according to your website consumption maybe $5 is enough for normal websites which are getting 0–150K monthly visits on optimized WordPress and PHP based sites. Also allow monitoring so you can see the usage of your running resources/usage.
Step 4-

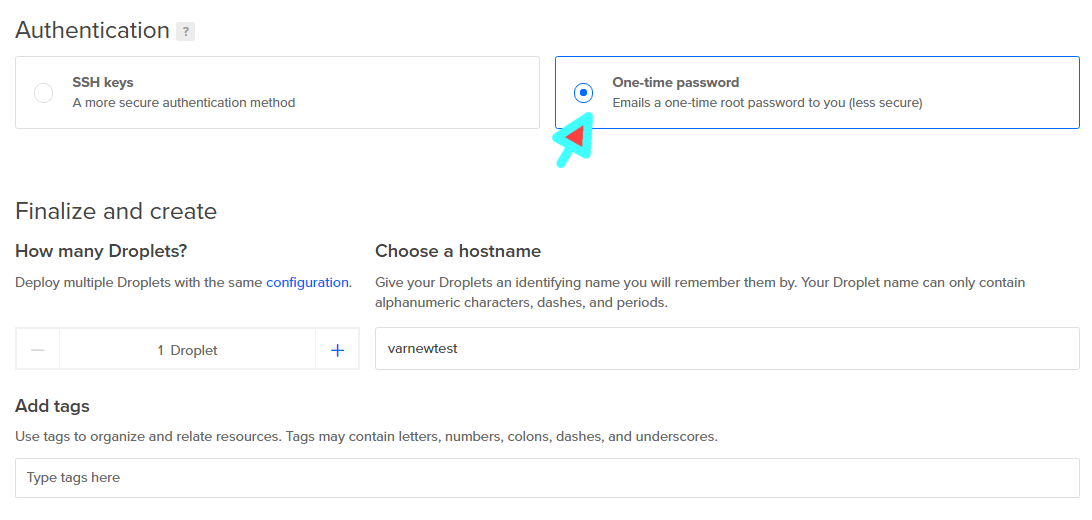
Newbie don’t know the SSH usage so the best thing is to get direct Root access on the email so you can set shh password as you want (custom). Give any name to your project or use default.
Step 6 — Click on Deploy.
How To Install VestaCP In Digital Ocean, Vultr And Other Cloud Hostings
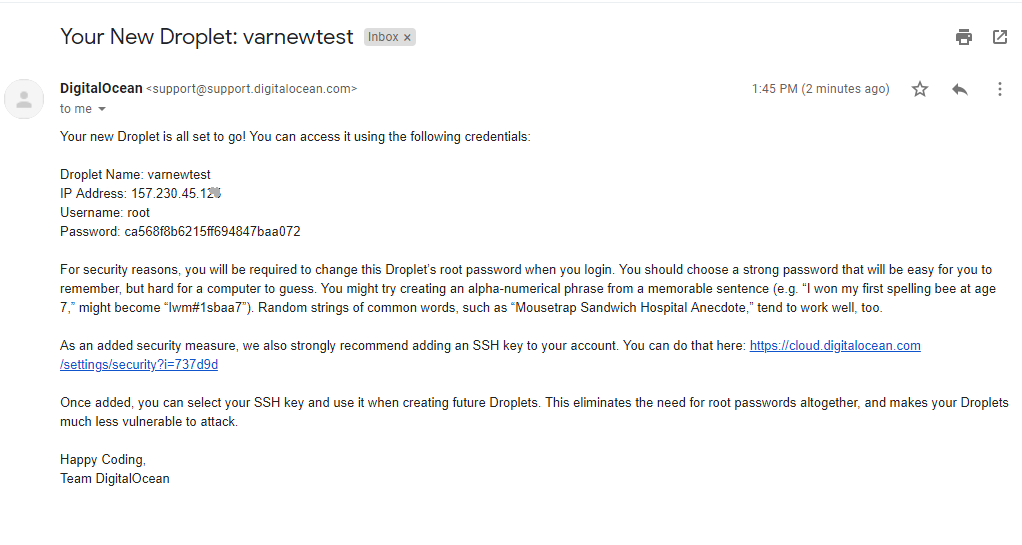
Check your email to get Root access.

Now, open CMD in your PC (I’m not using putty but you can use both is easy once you learn).
Type: ssh root@with-your-ip

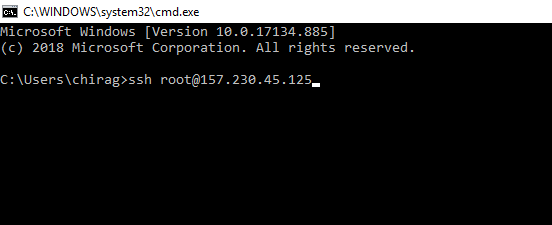
Press: enter and type: yes
Now copy password from the email you have received and paste in the CMD.


Note: you won’t able to see the password. (use right click of mouse to paste the password).


Done!
Now paste it in the current logged ssh -
curl -O http://vestacp.com/pub/vst-install.sh
bash vst-install.sh
Now it will be installed automatically you don’t need to do anything also you will see the admin path, user and password.
For login the panel port is your-web-ip :8083
How To Setup VestaCP
VestaCp is installed but not able to understand domain work?
For adding the new domain go to web section from the header click on green color + button to add your domain.


Also add this domain in your digital ocean deploy application from the three dots > add domain section.
Install SSL to edit your domain from Vestacp
Open web section from the header and visit in your domain if you have added in it, else add the domain and point them with digital ocean’s DNS.
After adding the domain click on edit and come below at SSL Support — Tick mark at: Lets Encrypt Support

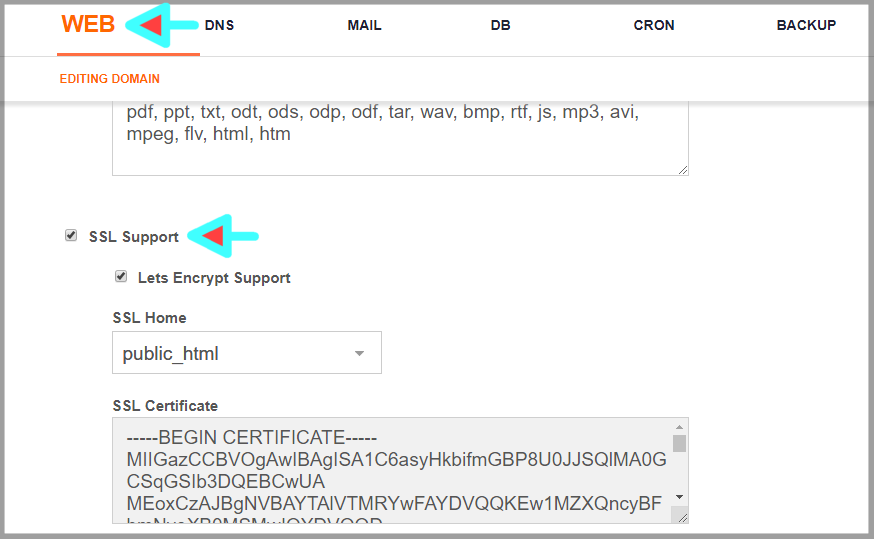
Wait few minutes, It will be installed.
FTP setup in VestaCp
You are facing issue with FTP right? Mean you are not able to connect with it.
Here is quick fix for it.
First open web section from the header
Click on edit
Come below and tick at Additional FTP
Now enter any name what you want to set and also set password, And save it.

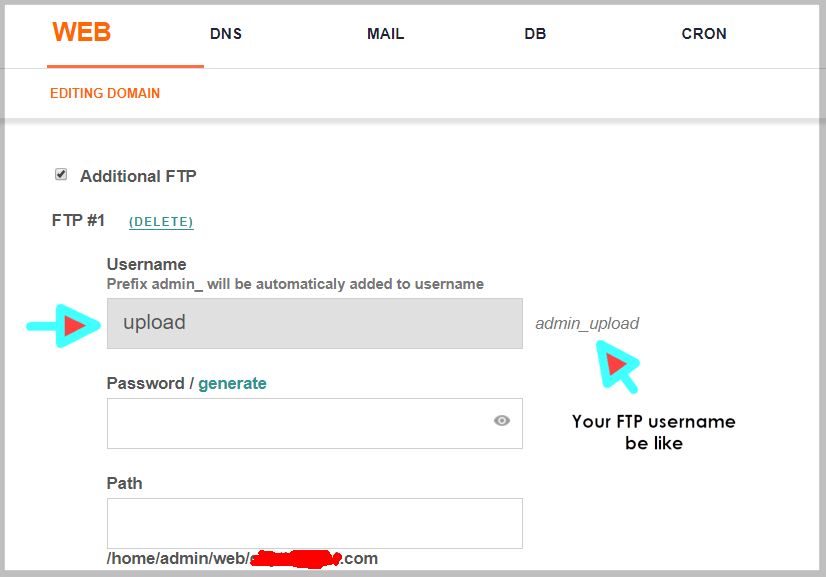
Save it.
Let’s fix FTP connecting issue with VestaCP
1st. Open Firewall
Find — TCP/ FTP (open it)
Come below at: Port and enter there: 5514 at the place of 12.


Save.
2nd. Open Server
Come below and open: vsftpd — click on configure to set.
Now add there: listen_port=5514
Here look how-


Save and done.
Now you can connect VestaCp with FTP using Filezilla .
Download Filezilla from here: https://filezilla-project.org/download.php?platform=win64
Cloud Hosting Checklist
-
App deployed
-
VestaCP Installed
-
Domain Added and pointed
-
SSL installed
-
FTP Working
Everything is configured perfectly, It may take sometime for new user but that’s quick easy once you experience with it.
What Is VestaCP
Vesta control panel (VestaCP) is an open source hosting control panel also known as Cpanel alternative, which can be used to manage multiple websites, creat and manage email accounts, FTP accounts, and MySQL databases, manage DNS records with more features.
Thank You, Appreciate!