If you’re looking to remove audio from a video on a Windows PC, or if you’re using a Mac and don’t want the huge iMovie app taking up space, then VLC Media Player is your best, free option. VLC isn’t a video editor, but it does offer some basic video conversion tools that allow you to quickly remove the audio track from a video.
On Windows
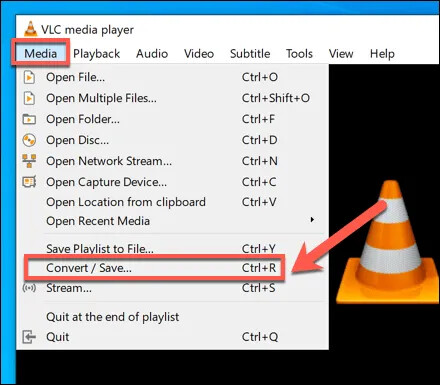
- To do this on Windows, you’ll need to first download and install VLC. Once installed, begin the removal by selecting Media > Convert/Save from the menu.
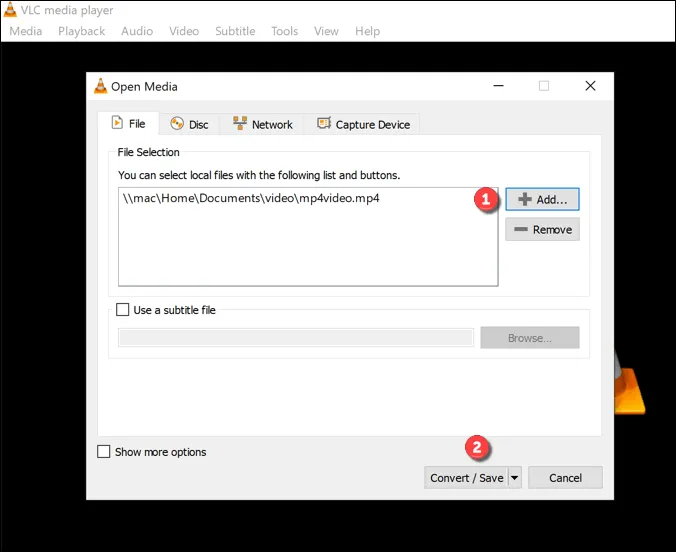
- In the Open Media window, select Add to add the video containing the audio you wish to remove. Once added, select the Convert / Save option.
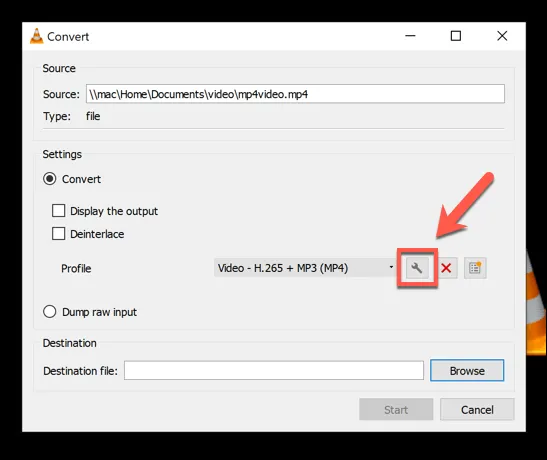
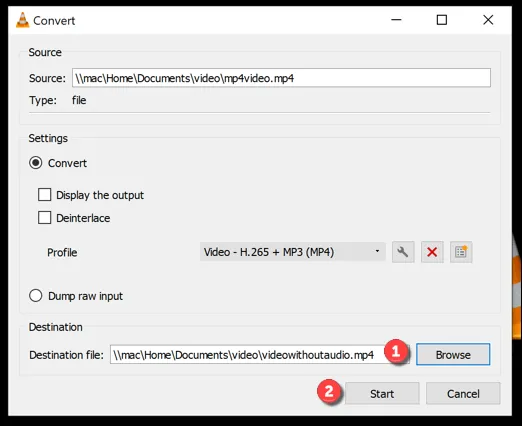
- In the Convert window, you can make changes to your video output file. Select the settings icon in the Profile section to begin removing the audio track.
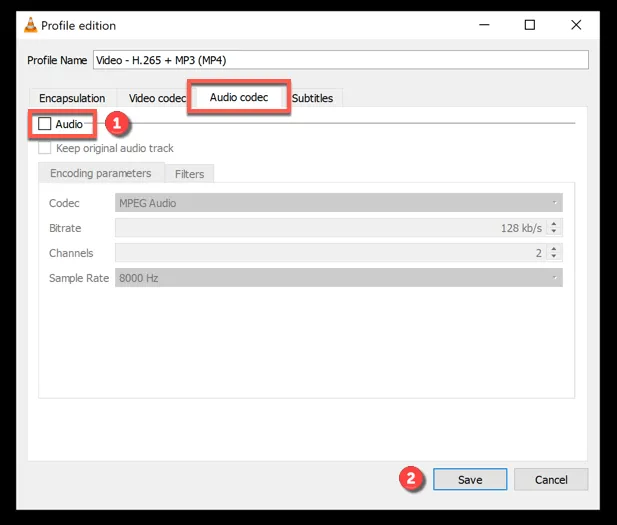
In the Profile edition window, select the Audio codec tab. From there, uncheck the Audio checkbox. This will remove all audio from your video. Select the Save option to confirm.
- With the audio track removed, you’ll return to the Convert window. Confirm where you’d like to save the audioless video file and give it a new file name by selecting the Browse option in the Destination section. Once you’ve done this, press Start to begin the conversion process.
Once saved, the new video file (without audio) will be available in your chosen save location.
On Mac
The steps for removing audio from video are slightly different using VLC on Mac.
- To start, download and install VLC for Mac. Open VLC is installed and opened, select File > Convert/Stream from the menu bar.

- In the Convert & Stream window, insert your video file by selecting Open Media . Once the file is inserted, select Customize to begin removing the audio track.

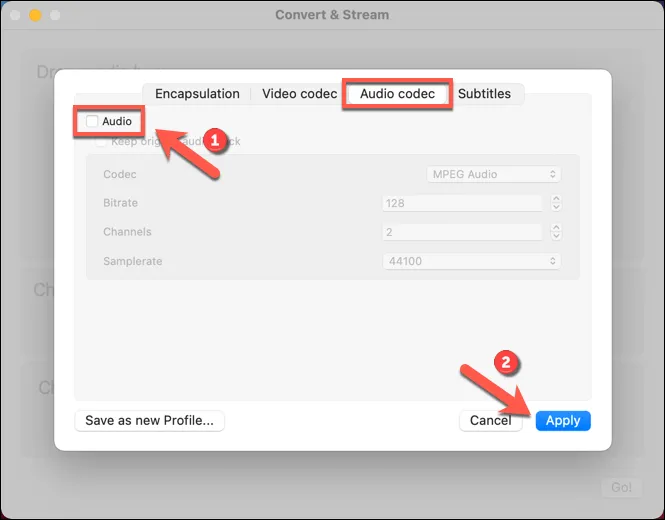
- In the pop-up window, select Audio Codec, then uncheck the Audio option to remove the audio track. Select Apply to apply the new settings.
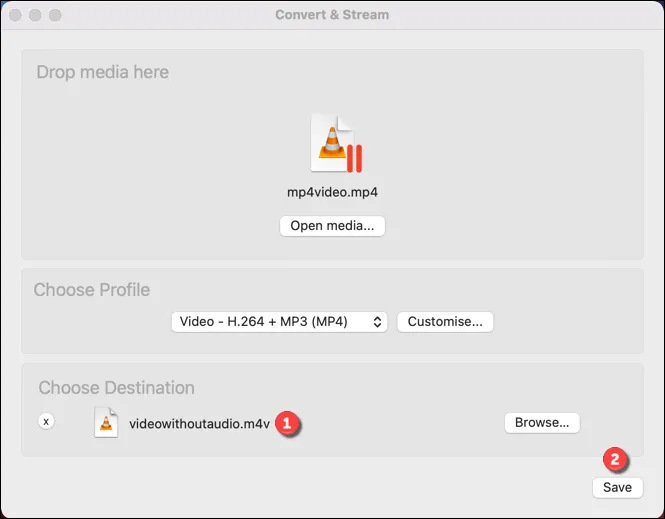
- With the audio track removed, select Save as File to confirm the new filename and save location for the final, audioless video file. Once confirmed, select Save to begin the save process.
VLC will convert the file at this point, removing the audio track and leaving the video intact. If you select any other video conversion settings (such as changing the video file type), these will be applied at this point.
The source video file will remain intact, allowing you to make further changes and repeat the process, if desired.
Optional:
Using Online Services to Remove Audio From Video
If you’re looking to remove audio from video without installing new software, you could use various online services to do it for you. However, a word of warning—doing this will involve uploading your video to a remote server, where a script will run to remove the audio from your video automatically.
There are some privacy implications that you should consider before doing this. While online video editing sites shouldn’t hold on to your video, it isn’t guaranteed. You should only use online services for audio removal for videos that don’t contain personal information, or for videos that you’d otherwise be happy to share.
While various online services exist for this purpose, one of the quickest and easiest to use is AudioRemover. Open the AudioRemover website and select Browse to select your video file. Once selected, select Upload Video to upload the file to the remote server. (Source: onlinetech)
Happy learning!