Android Debugging Bridge (ADB), as the name suggests, is a command-line utility that allows developers to debug various parts of their applications. However, it is not restricted to just developers. If you want to access certain features of the Android platform that are not otherwise accessible, you too can use the ADB commands by installing ADB on your computer, be it Windows, macOS, Linux, or Chrome OS. Once you install it, there are numerous cool things that you can do with ADB on your Android device. Plus, there are various apps that require ADB permissions to work. So, if you have been confused about how to install and use ADB on Windows, macOS, Linux or Chrome OS, we have you covered.
Setup Your Android Device for ADB
Even if you install ADB on your computer, it is of no use unless you set up your Android device first to work with ADB. So in case you are not sure how to do that, follow the steps below to find out.
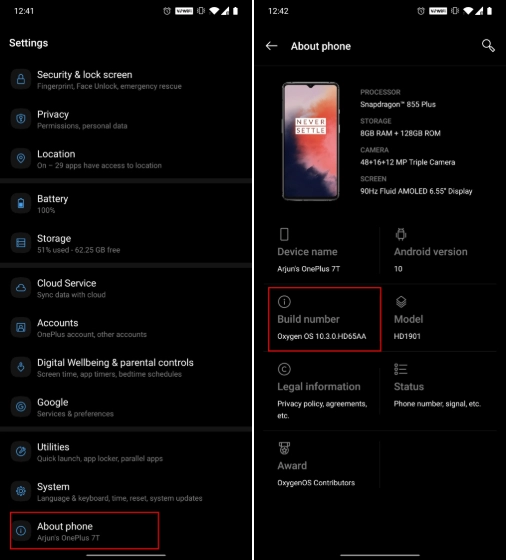
- Open Settings on your Android device, and go to “About Phone”. Here, tap on “Build number” 7 times consecutively. Keep in mind, as Android devices have different skin, the ‘Build Numer’ page may be kept under some other pages.
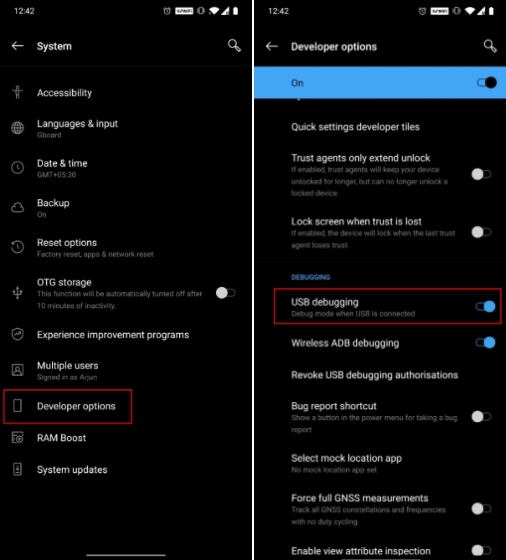
- This will enable “Developer options” on your Android device. Head over to “System” and then open Developer Options and enable “USB debugging” . Now, whenever you will connect your Android device to the computer, select the “File transfer (MTP)” mode. You are done on the device front. Now, the next step is to set up ADB on your computer.
Install ADB on Windows
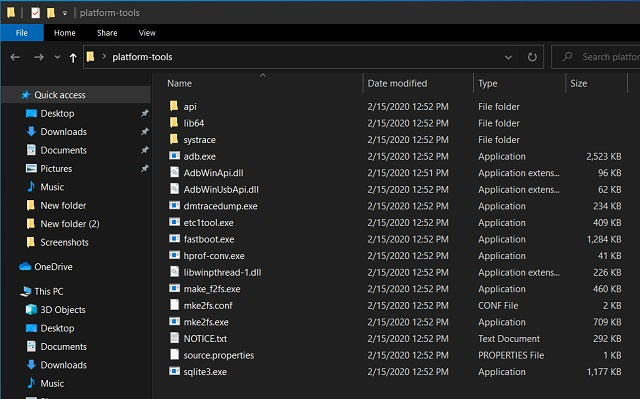
- Firstly, download the ADB Platform Tools for Windows from Google’s official page. Once downloaded, extract the contents of this file on your Windows PC using a file archiver utility like WinRAR.
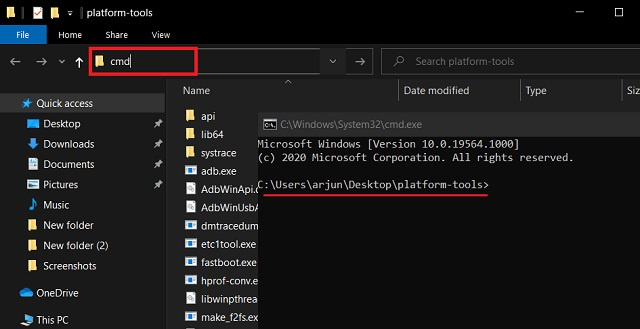
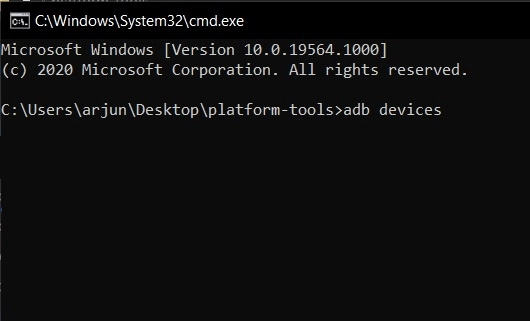
- Now head over to the extracted folder, and click on the address bar. Now, type “cmd” and hit enter. Instantly, a command prompt window will open up in the ADB directory.
- After that, connect your Android device to Windows PC and execute
adb devicescommand.
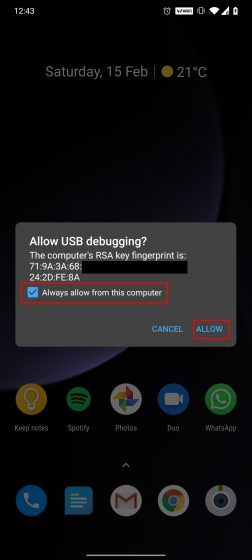
- It will prompt a “USB debugging” prompt on your smartphone. Enable the “Always allow” checkbox and then tap on “Allow”.
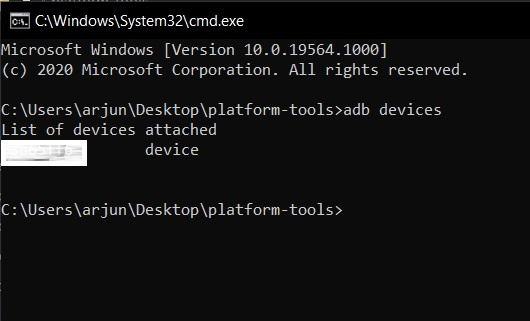
- Now, you should see your device’s serial number in the Command Prompt window. If it does not detect your device then run
adb devicesagain and this time, it will definitely detect your device. Congratulations! ADB is now successfully installed on your Windows PC.
Install ADB on macOS
Here, we will take a slightly different path to install ADB on macOS. We will have to install Homebrew first on macOS and then we can install the Android platform-tools easily. Homebrew is an open-source package manager that installs the missing packages. So with all that said, here we begin.
- First of all, open the Terminal on your Mac and execute the below command. It will install Homebrew on your Mac. During the installation, it might ask for your password. The whole installation will take about 10 mins.
ruby -e "$(curl -fsSL https://raw.githubusercontent.com/Homebrew/install/master/install)"

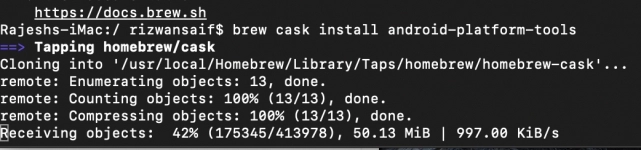
- After that, install the ADB platform-tools from the below command.
brew cask install android-platform-tools
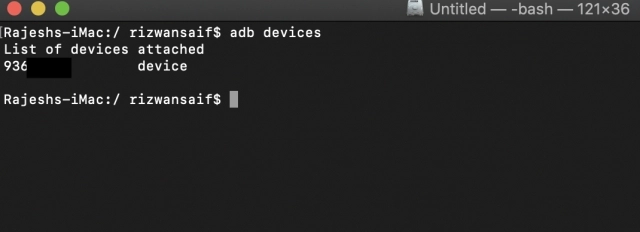
- Now connect the Android device to your Mac and execute the
adb devicescommand. You will receive a prompt on your Android device to allow USB debugging. So, just enable the checkbox and tap on “Allow”.
- You should now see the serial number of your device on Mac This signifies that ADB is successfully installed on your Mac.
Install ADB on Linux
- Download the ADB Platform Tools for Linux from Google’s official page and unzip the file to a suitable location like your home directory.
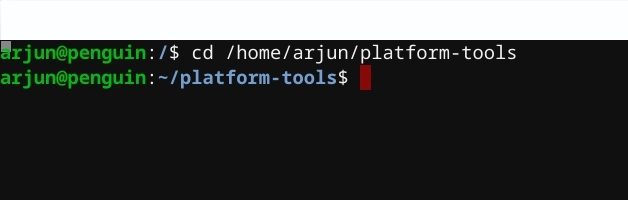
- After that, open the Linux terminal and move to the extracted folder location. Execute the below command to move to the particular folder. Make sure to change the username to your actual Linux username.
cd /home/arjun/platform-tools
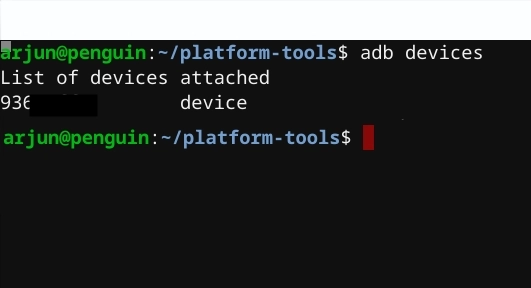
- Connect your Android device and run the
adb devicescommand on the Linux terminal. On your Android device, check the box for “Always allow” and then tap on the “Ok” button.
- Finally, your Android device will show up on the Linux Terminal with the serial number. This is how you can install and set up ADB on Linux systems.
Install ADB on Chrome OS
Before I move forward, let me clarify that your Chromebook should have Play Store support; Chrome OS should be on the Developer Channel and have Linux enabled on your machine. To move to Developer Channel, open Settings → About Chrome OS → Additional Details → Change Channel to Dev. Now having said all of that, let’s learn how to install ADB on Chrome OS.
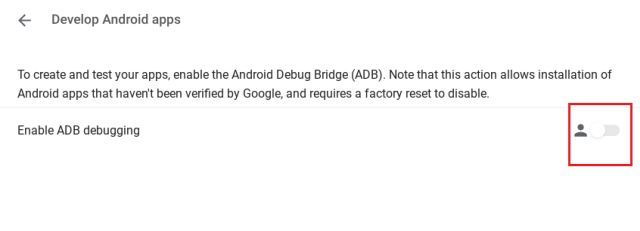
- First off, open Settings and navigate to Linux → Develop Android Apps → Enable the toggle for ADB Debugging . Now, restart your Chromebook and an ADB prompt will come up after the reboot. Click on “Allow” and move to the next step.
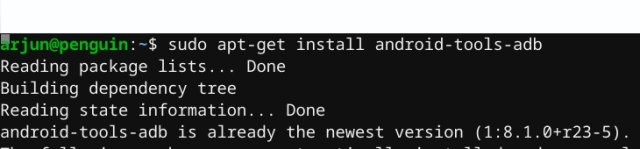
- Now, open the Linux Terminal from the app drawer and execute the below command to install the ADB platform tools . Further, press “Y” to allow the installation.
sudo apt-get install android-tools-adb
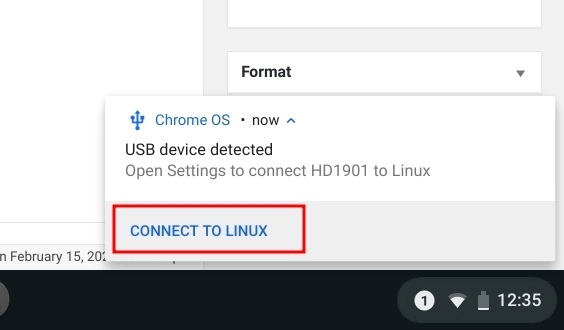
After the installation, connect your Android device to Chromebook. You will get a prompt on your Chromebook about a USB device detection. Now, click on “Connect to Linux”.
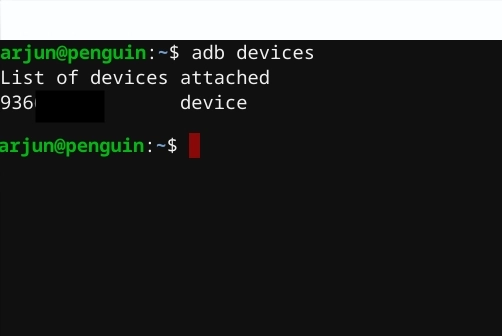
Back to Linux Terminal, execute the adb devices command and a prompt will appear on your Android device. Enable the checkbox for “Always allow” and then tap on the “Ok” button. Congratulations, you have successfully set up ADB on Chrome OS.
- If the Terminal shows “Permission Denied” or “Command Not Found” error then run the
adb start-servercommand first and then try again with theadb devicescommand.
How to Use ADB on Windows, macOS, Linux and Chrome OS
After you have successfully installed ADB on your Windows PC, Mac, Linux system or Chromebook, using it is just a matter of executing various ADB commands in the Terminal. Just make sure that you have connected your Android device to your computer while USB debugging is enabled. After this, you can try different commands and experience Android a whole lot differently. To help you get started, given below are a few of the most commonly used ADB commands .
| Command | Description |
|---|---|
| adb devices | To view the list of Android devices communicating with your computer |
| adb push | To move a file onto your Android device programmatically |
| adb pull | To move a file from your Android device programmatically |
| adb install | To install apps programmatically using APK files |
| adb reboot | To reboot your Android device |
| adb reboot recovery | To reboot your Android device in recovery mode |
| adb reboot bootloader | To reboot your Android device to bootloader |
| adb shell | To start a remote shell with your Android device |
Install ADB on Windows, macOS, Linux and Chrome OS With Ease
ADB is a very useful utility for all Android programmers. Even if you are not one yourself, you now know how to set up ADB on your PC or Mac and use it with your Android device. And if you’re new to this, I’ve already listed some of the common ADB commands above. This allows you to experience Android like never before.