Keep your feed clean and stress-free
Privacy does matter at all the social media sites, No matter for what purpose, but whenever you feel keeping yourself limited viewing by others you better look forward to such settings according to social media site you’re on, Well, Twitter is known for its openness and opportunity to follow or be followed by almost anyone, but every user has the option to make their Twitter profile private.
By default, Twitter user accounts are always set to public. So when you first create an account, anyone who visits your profile will be able to see your tweets, unless you make your profile private.
When you make your profile private, it will display a padlock icon to users who don’t follow you. Likewise, if you come across a user profile that you haven’t followed yet and they have made it private, then you’ll see a lock icon there in place of their tweets and profile information.
Follow the steps below to learn how to make your Twitter profile private either from Twitter.com or on the official Twitter mobile app.
Access Your Settings and Privacy
Before you can make your profile private and protect yourself online, you need to sign in to your Twitter account first.
On Twitter.com:
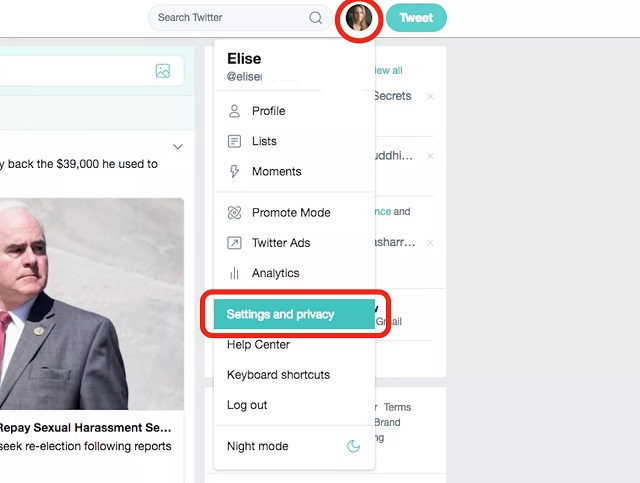
Click your profile photo icon in the top menu to the far right (beside the Tweet button) so that you can access your personal user settings. A dropdown tab will be displayed when you click this. From there, click on Settings and privacy .
On the Twitter App:
If you’re accessing Twitter from within the mobile app, tap your profile photo icon that appears in the top left corner of the screen. A menu will slide out from the left. Tap Settings and privacy .
Select ‘Privacy and Safety’
On Twitter.com:
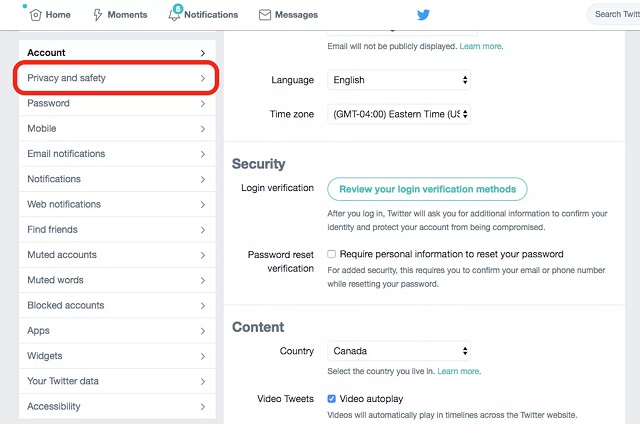
On the web, look in the left sidebar and click on Privacy and safety , which should be the second option from the top. You’ll be brought to the main privacy page of your account featuring a list of security and privacy settings that you can customize to fit your needs.
On the Twitter App:
On mobile, a full tab of options will be displayed after tapping Settings and Privacy . Tap Privacy and safety here.
Check off the ‘Protect My Tweets’ Option
On Twitter.com:
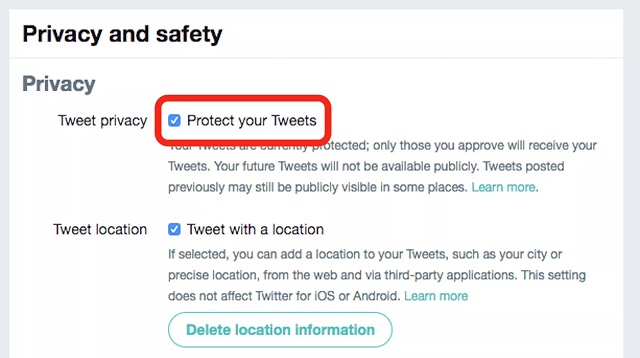
Scroll down about halfway down the page past the Security section to the Privacy section, which should show a Protect your Tweets box that can be checked or unchecked. It’s left unchecked by default so that Twitter profiles are kept public.
Click to place a checkmark in it so that your tweets are protected from strangers and non-followers. Don’t forget to scroll down to the bottom of the page and click the big blue Save changes button .
On the Twitter App:
On the mobile app, this option appears as a button that turns green when it’s turned on. Turn the Protect your Tweets button on by tapping it so it appears green.
Tap the back arrow button in the top left corner of the screen to finish and leave.
NOTE: Twitter will ask you to reenter your password before your profile is officially set to private. This will also be the case if you decide to set your profile back to public, which you can do anytime by accessing your Settings and privacy again and turning the protected tweets option off.
Look for the Padlock Icon Next to Your Name
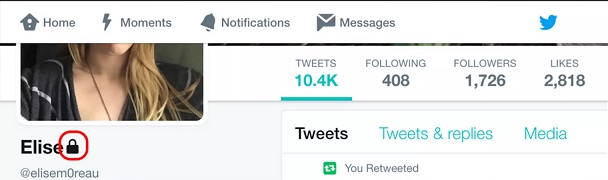
If you followed all these steps correctly, you should notice a little lock icon appear next to your name on your profile. That means that you’ve successfully changed your account to private and all your tweets are now limited to being viewed only by your followers.
Non-followers who view your profile will be shown a “@Username’s tweets are protected” message in place of your tweet timeline. They may click the Follow button to try and follow you, but they will not be able to view your tweets unless you personally approve their follow request.
If you don’t approve a user’s follow request, they will never be able to see your tweets. You may even wish to block them if they’re causing you any inconvenience.