There are many applications which will implement authentication and encryption of network traffic through a separate third party program.
However, the Microsoft operating system can also implement this natively through the configuration of IPSEC. In this article we will look at what IPSEC is and a simple example of implementation.
What is IPSEC?
Internet Protocol Security, or IPSEC is a protocol used to authenticate and encrypt IP communications. This is accomplished through mutual authentication between agents as well as the exchange of cryptographic keys at the beginning of a session.
IPSEC will also allow the addition of IP restrictions and TCP/UDP level encryption to applications which might not otherwise support it. IPSEC utilizes IP Protocol 50 (ESP), IP Protocol 51 (AH), and UDP Port 500.
Implementing IPSEC
In this example, we will set up IPSEC to encrypt communications between two windows machines. The first machine, a windows 2012 server will act as the VPN server.
The second machine, a Windows 10 client, will act as the VPN client. A LT2P IPSEC VPN can exchange either a pre-shared key or a certificate. In this example, we will exchange a pre-shared key.
Setting up the VPN Server
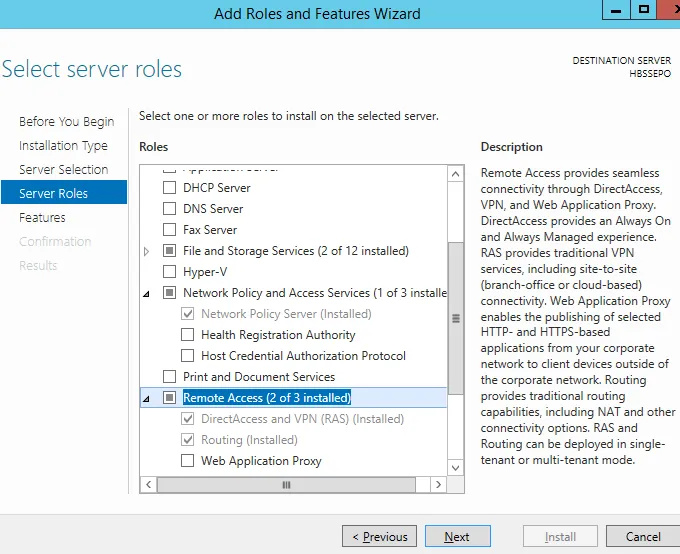
On the Windows 2012 machine, we will need to install the routing and remote access features. To do so, go in to the Server manager, and Add Roles and Features . Choose a role based or feature based installation . Select the local server. Choose to install the following server roles.
Network Policy and Access Services
Network Policy Server
Remote Access
        Direct Access and VPN (RAS)

        Routing
Once these new features are installed, you will require a snap in to manage them. Open mmc.exe as an administrator. Go to File | Add/Remove Snap In . Add the routing and remote access snap in.
This snap in allows the configuration of multi-protocol LAN-to-LAN, LAN-to-WAN, virtual private network (VPN), and network address translation (NAT) routing services.
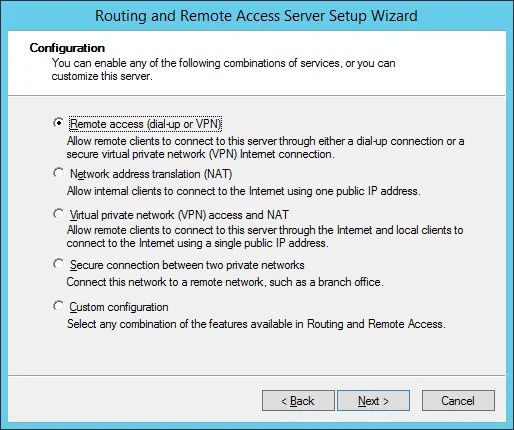
In the mmc console, right click on routing and remote access and choose to add server. Choose the local machine. Next, right click on the newly created machine and choose Configure and Enable Routing and Remote Access . Choose the Remote Access (Dial Up or VPN).
Then check the VPN option . You must have at least two network cards for this to work. One of them can be a loopback. Specify a range of addresses to be provided for the incoming connection. Make sure they do not conflict with any other addresses allocated on your existing network. In this example, we will not be using a radius server.
Next, attempt to start the routing and remote access service. The following registry key may need to be deleted to start the service.
**HKEY_LOCAL_MACHINE\SYSTEM\CurrentControlSet\Services\RemoteAccess\RouterManagers\Ipv6**
In the mmc.exe console, right click on the computer name and go to Properties . Modify those properties on the security tab.
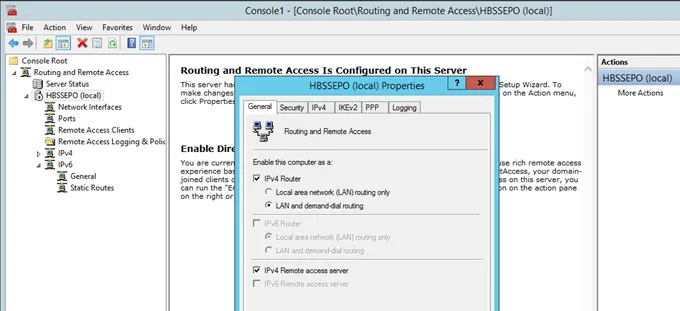
Choose the authentication methods as shown below.
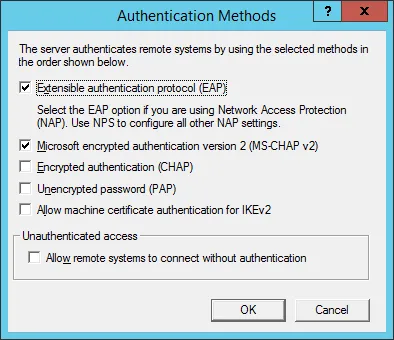
Check the box to allow custom IPSEC policy for L2TP/IKEv2 connection. Add a pre-shared key.
Finally, you will need to modify a user to be allowed to access the VPN. Open compmgmt.msc , go to Local Users and Groups , and hit properties on the user that you wish to utilize for the VPN.
Go to the Dial Up tab. Choose Allow Access and hit Apply . A reboot will be required on your machine. After the reboot, you will be ready to test your first client.
Setting up the Windows 10 machine
On the Windows 10 machine, open Network and Internet Settings . Choose VPN from the left panel and add a VPN connection. Edit the advanced options .
Place the IP address of your VPN server under server name or address. Choose the L2TP/IPSEC with pre-shared key option under VPN type. Add in the pre-shared key and username and password.
The security properties for the VPN will need to be modified under the network adapter. On the VPN adapter, choose properties, and go to the Security tab. Check the EAP radio button and choose Microsoft: Secured password (EAP-MSCHAPv2)(encryption enabled) .

Finally, right click the adapter again to connect. Congratulations! You have created an IPSEC VPN tunnel.
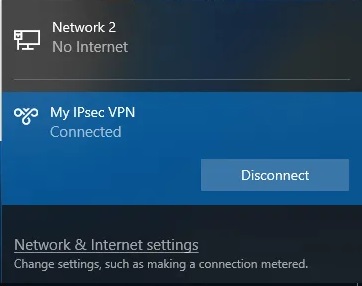
That’s all. enjoy!
Source: thebackroomtech