
Facebook is a channel that is changing all the time, which doesn’t always make it easy for busy marketers to keep up with each and every small change.
Aside from the common powerful marketing tools like lookalike audiences, there are additional Facebook features that are less prevalent but can make a world of difference for the right campaign.
This post will use the updated Business Manager navigation bar. This navigation update just introduced in late July and, as of publication, has not been released to all advertisers, so there might be some small differences in what you see and what is reflected in this post.
Facebook Tools
In my opinion, Facebook has a lot of great tools for advertisers that fly under the radar.
Many of these make advertising on Facebook easier, but you may not know about several of them.
Let’s hop in.
Click On Images To Enlarge Them!
1. Third-Party Tag Integration
Setting up the Facebook pixel used to entail several steps, especially when it came to shopping carts and event tracking.
Back in 2017, Facebook made this process much easier with the integration tool that can be found within Business Manager.
Advertisers using Google Tag Manager, WooCommerce, Shopify, Magento, or BigCommerce can implement the Facebook pixel without touching the code to their website. Click on the link for each platform to see step-by-step instructions.
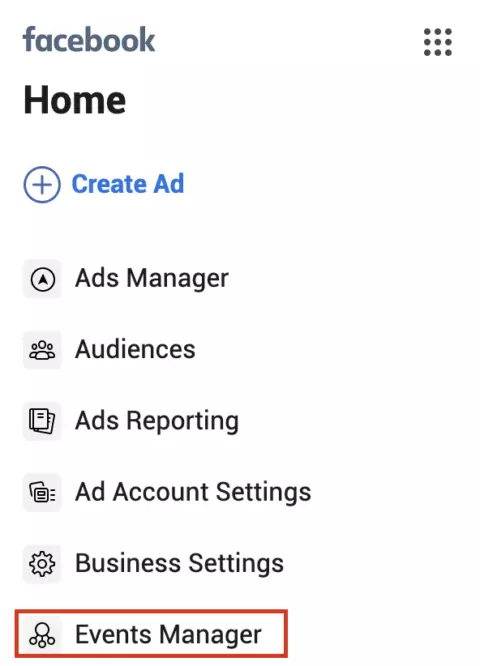
Get started by selecting “Events Manager” in the new Facebook navigation sidebar.
Click “View Setup Instructions” to see how to create your pixel.

Follow the steps to get started and then use the next tool below to double-check your implementation.
2. Pixel Helper

Before getting started in any channel, it’s important to not only set up your conversion pixel but also confirm it is firing properly.
Facebook’s Chrome extension allows advertisers to double-check implementation, troubleshoot their pixel and learn how to improve performance before launching campaigns.
Check out this list of error messages once you have downloaded the tool.
3. Creative Hub
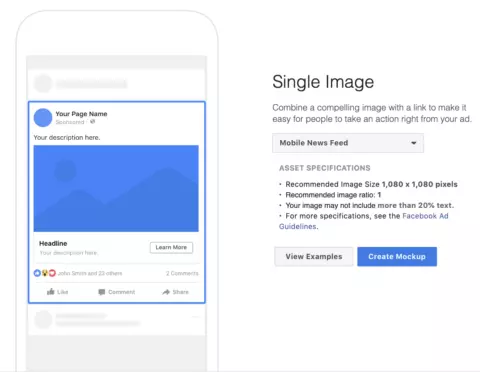
Creative Hub is an ad mockup tool that allows users to test different ad types, placements, and ad elements.
These mockups can be saved for later reference.
Slideshow, video and interactive ads can also be tested here.
This tool can be very useful when pitching new ad types to clients.
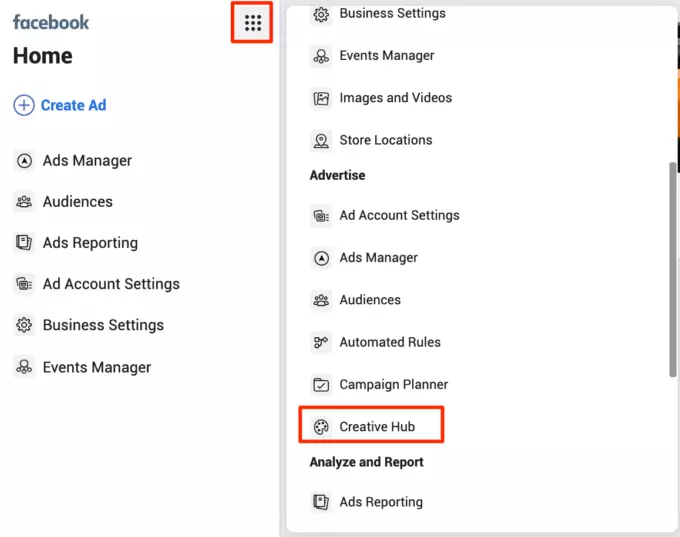
You can find Creative Hub in the Facebook navigation sidebar by clicking the “dot” button and scrolling down to “Advertise” > “Creative Hub”.
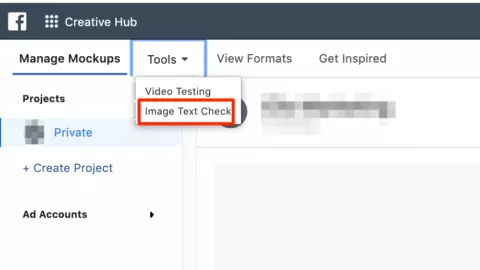
4. Image Text Check Tool
According to Facebook, images with less than 20% text perform better.
Because of this belief, Facebook and Instagram images are automatically reviewed for the amount of text before being eligible to run on the platforms. (Unless the images qualify for one of these exceptions.)
If there is too much text in your image, it will be served at a lower rate.
Hidden away in Creative Hub is a tool that has the power to solve many advertiser’s problems with “too much text in image” errors.
Upload images into the Image Text Check tool to make sure delivery will be normal.
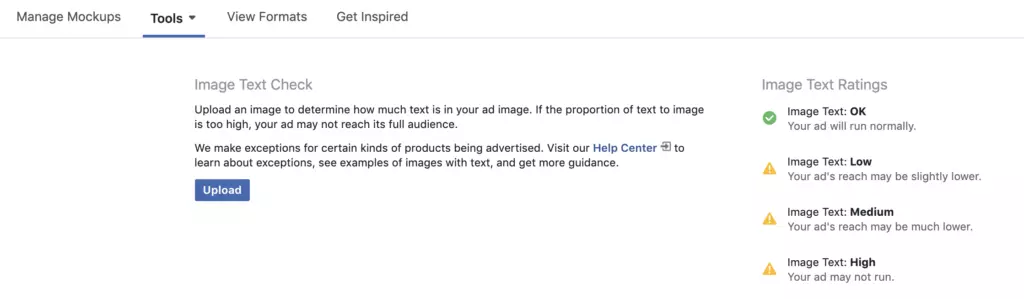
Stop wasting time with ad disapprovals: this is a tool worth utilizing any time new ads are launched!
You can find this tool within Creative Hub under Tools > Image Text Check.
5. Facebook Analytics
This tool offers additional insights on Facebook performance.
You can access this tool in the Business Manager navigation bar by using the menu and selecting “Analytics” under “Analyze and Report”.

Similar to Google Analytics and other tools, you can see user metrics, engagement metrics, page metrics and user demographics.
You can create Funnels that include a sequence of actions you’d like to measure.
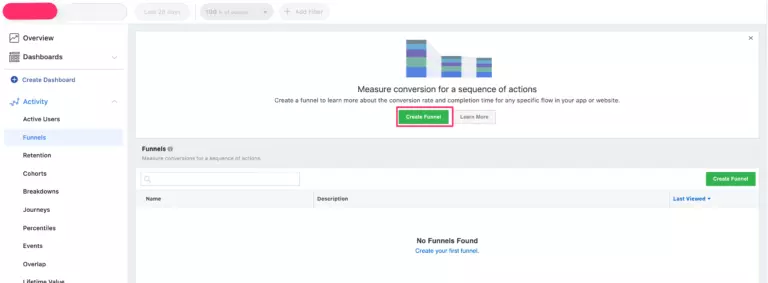
You can also create Cohorts of users to track behavior over time, create pivot tables (called “Breakdowns“) for on-going data reporting, create Dashboards and review Lifetime Value, among other features.
To get started with Facebook Analytics, I’d recommend checking out the Analytics blog.
6. Audience Insights
This interactive audience tool offers additional details on your Facebook audience that you aren’t able to gather from Facebook Analytics.
You can access this feature through the navigation menu and scrolling down to “Analyze and Report” > “Audience Insights”.

You can build your ideal target audience and gather demographic, Page likes, Facebook usage data, and interests.

If you have additional information you want to provide about your audience, click Advanced.

Each of these sections has multiple options available for selection.
Below is a look at how categories of Pages that my audience likes.
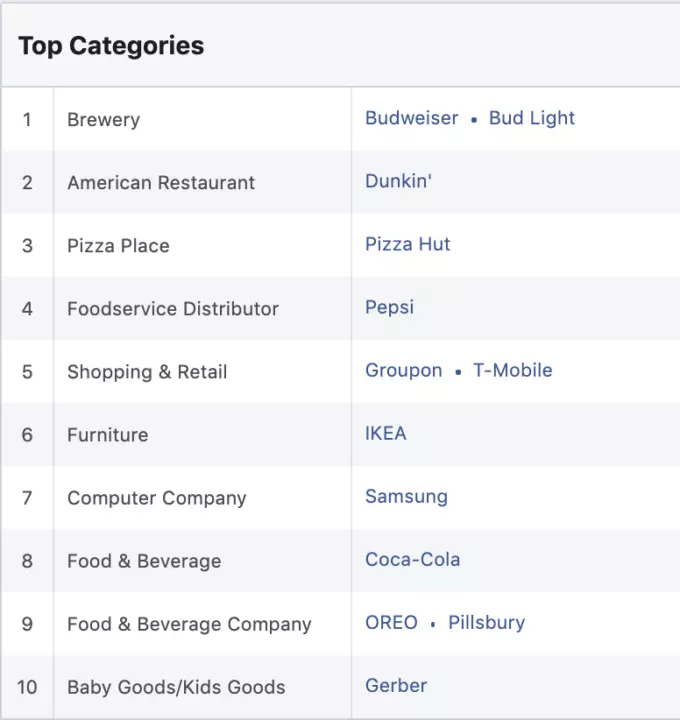
You can also see Pages that are likely to be relevant to your audience based on their interests and how likely your audience is to like these pages (versus the rest of Facebook).

Facebook Ad Features
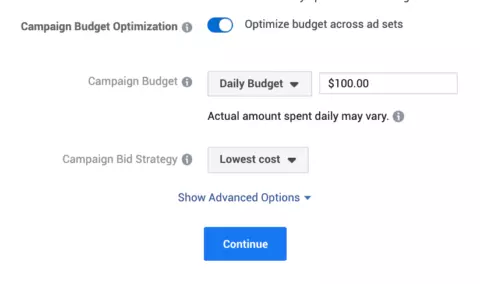
7. Campaign Budget Optimization
Introduced in November 2017, this feature allows advertisers to balance their ad spend across ad sets.
By setting one central campaign budget across multiple ad sets, Facebook can distribute the budget to the ad sets that are performing best.
This option can be found when creating a new campaign and is applicable to either daily budgets or lifetime budgets.
8. Ad Scheduling
Many advertisers prefer to restrict their budget by only running ads certain times of the day.
Currently, Facebook only allows advertisers to use ad scheduling when using a lifetime budget.
When creating a new campaign, after you have set your lifetime budget, you’ll see the option to run ads all the time or run ads on a schedule.
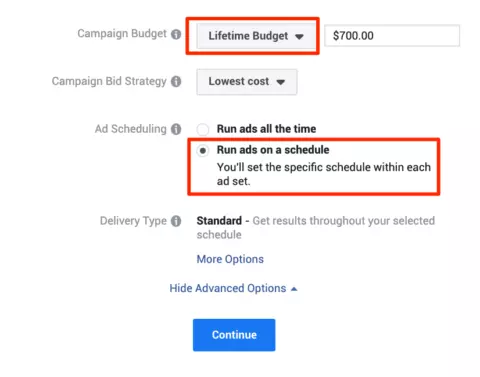
The remaining ad scheduling options must be set within each ad set.
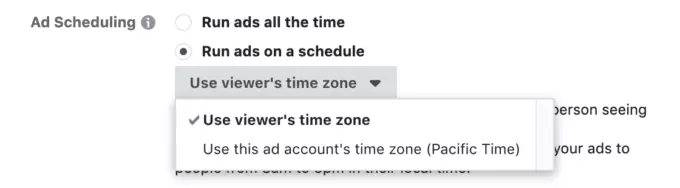
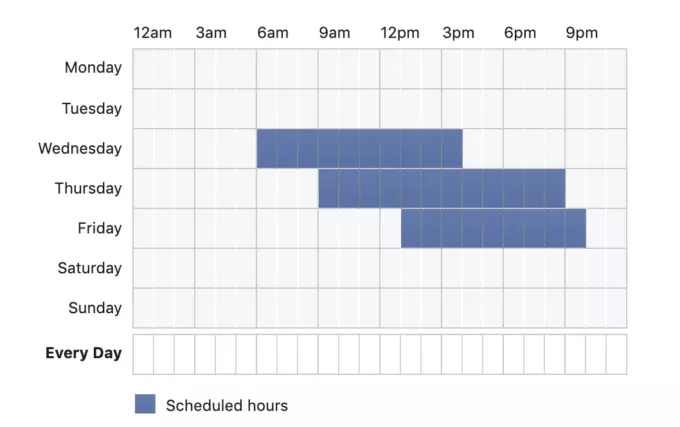
Now just make your ad schedule by clicking on the times you want to serve ads.
9. Location Targeting
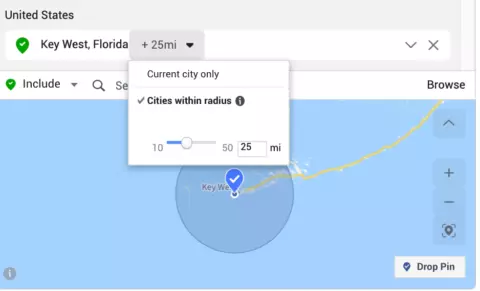
Location targeting is set at the ad set level and has several additional options that I think are really useful.
Once you have set your location targeting, you can select radius targeting or target the city only.
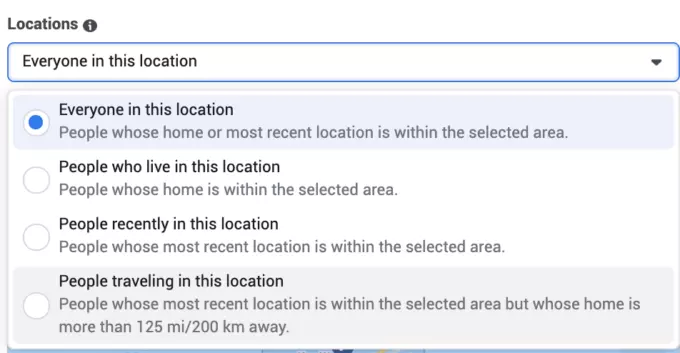
You can select 4 additional settings for location targeting:
Everyone in This Location
This is people whose location was recently this location(s).
People Who Live in This Location
This is only people who have listed their home as this location. This option is great to select for home-related businesses or anywhere that you are targeting homeowners only.
People Recently in This Location
This is people who have recently used Facebook in this location.
People Recently Traveling in This Location
This is for people who have recently used Facebook in this location, but whose home is listed as more than 125 miles away.
Using Key West as an example, this targeting would be great for businesses offering activities to tourists. It’s a great way to differentiate residents from tourists if that’s something you need.
10. Connections
If you have an app, use Events or want to reach folks connected to your Facebook page, this is a great feature for you.
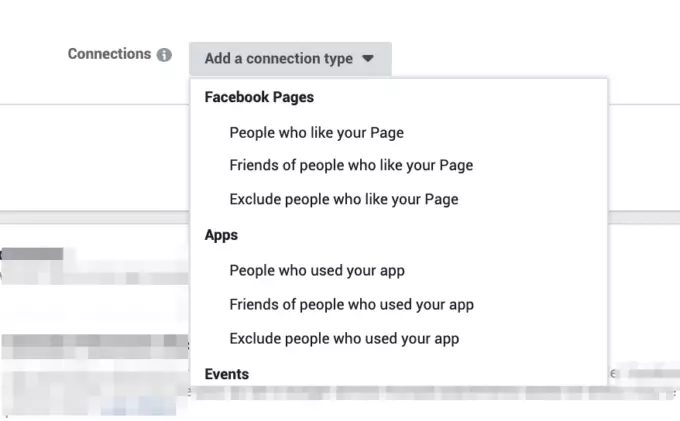
You can target people who like your Page, friends of people who like your Page or exclude people who like your pages.
You can also target people who used your app, friends of people who used your app or exclude people who used your app.
For events, you can target people who responded to your event or exclude people who already responded.
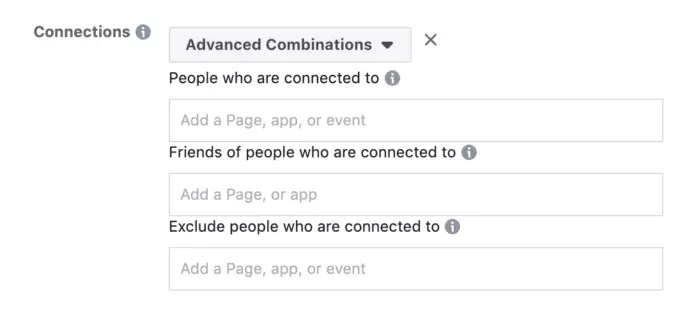
You can create different combinations of these options as well.
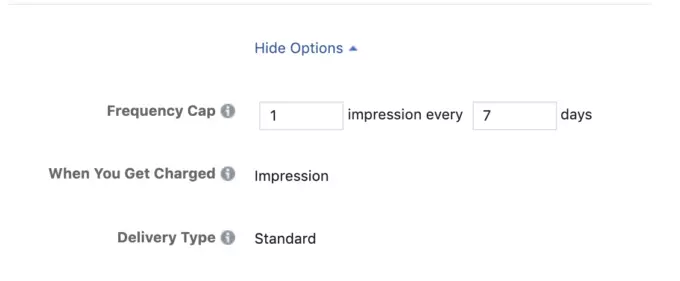
11. Frequency Cap
If you’re looking for a way to limit your ads’ exposure on Facebook in Reach or Brand Awareness campaigns, this feature is what you need.
In the Budget & Schedule section of ad set targeting (when using an Awareness campaign), you’ll find a Show Advanced Options button. Once you click this, you’ll see the frequency cap options.
The default setting is 1 impression every 7 days, but you can make this window longer or shorter.
To see your Frequency on current ads, edit your Account Overview columns to include Frequency.
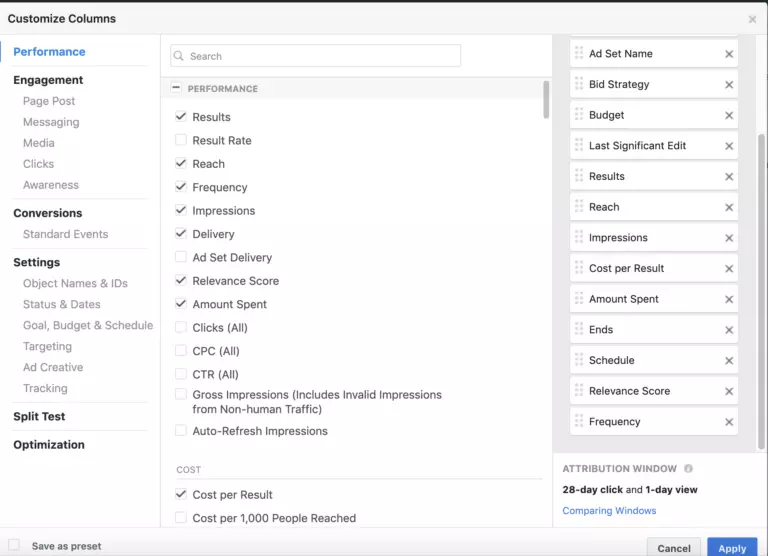
While this is an estimated metric, it will let you know if your ads are appearing too often, which can have a direct impact on conversion rates.
12. Block Lists & Publisher Lists
In 2018, Facebook released its Publisher List of thousands of URLs where your ads might appear across the Audience Network, in-stream videos, and banner/interstitial ads. Facebook recommends reviewing this list every 30 days for updates.
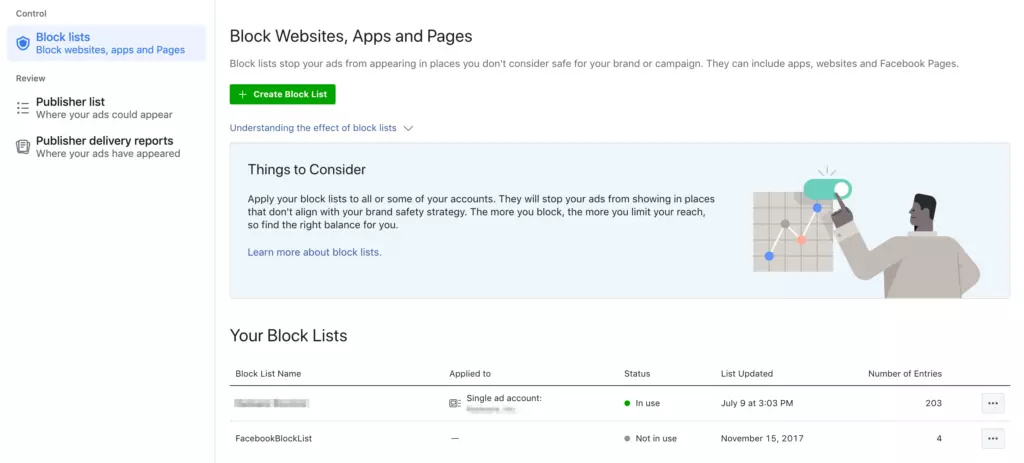
Once you review the ads and identify URLs that you don’t want your ads to appear on, you can add them to your Block List.
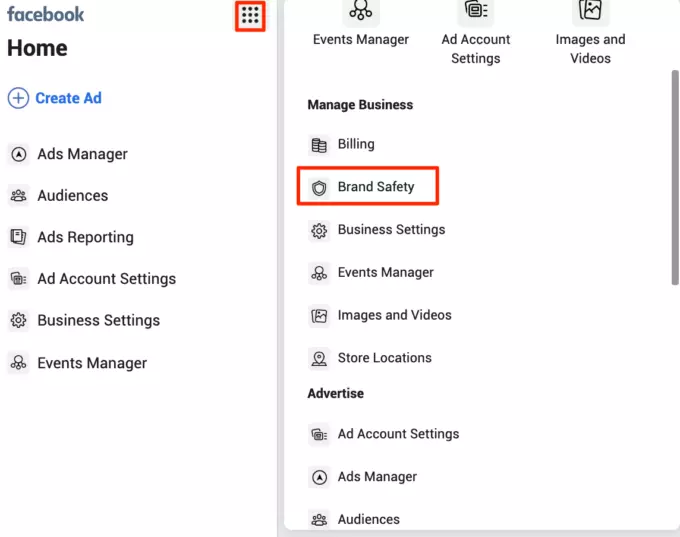
You can access your Block List, the Publisher List and Publisher Delivery reports in the Brand Safety section of the navigation menu.
Review the Publisher Delivery report to see a summary of each ad type, where it appeared and how many impressions that placement received.
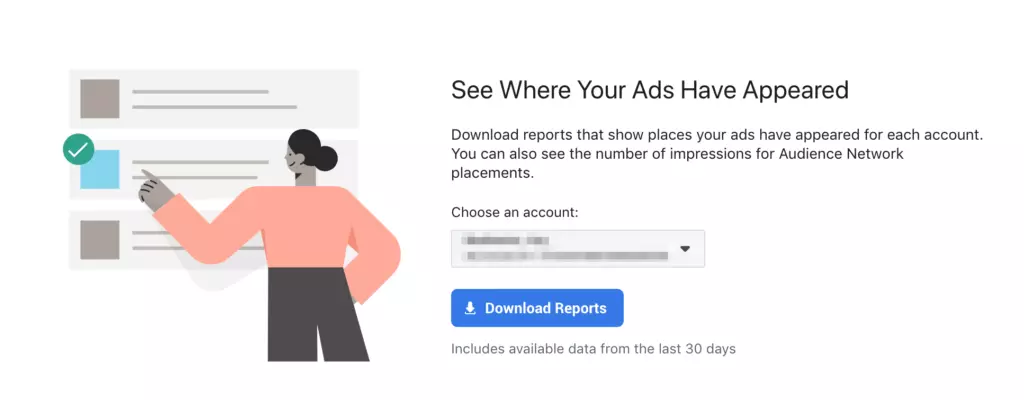
Since the data is only a summary of the last 30 days, this is something you’ll want to review on a monthly basis.
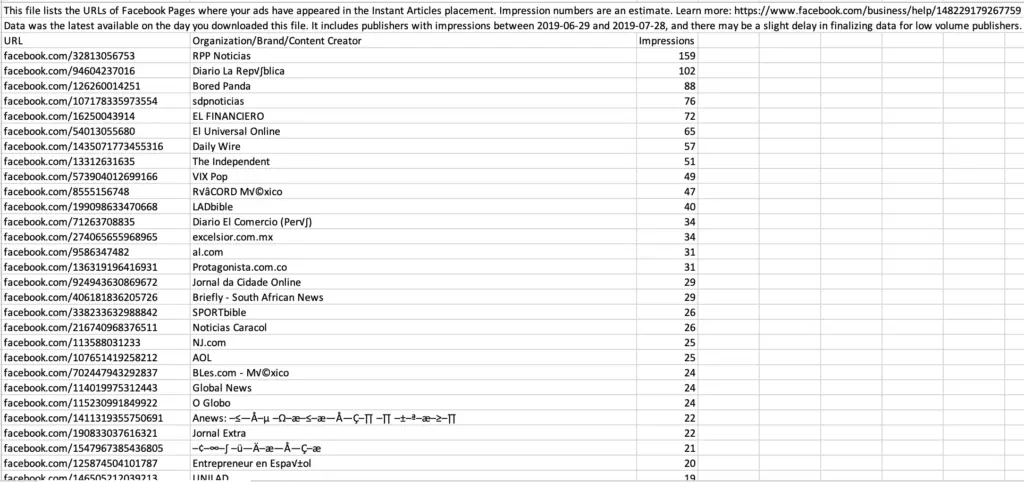
Once you have identified URLs and pages you want to exclude, save the URL column in your file. You can delete headers and the impressions column. The URL column is what you’ll need to communicate to Facebook what to exclude.
Navigate to the Block List page and select the green “Create a Block List” button. (Shown above)

Make sure your list is saved as a .txt or .csv file. Upload it and click “create Block list” to finalize.
You can apply, remove, replace, download or delete block lists using the three-dot button beside each block list.
It is possible to apply the list to multiple accounts if needed.
13. Automated Rules
Automated rules can be a lifesaver when it comes to activating, pausing, and managing campaigns.
While Facebook’s options are not as advanced as you may be used to in other channels, they are still helpful.
Get started by heading to “Automated Rules” under “Advertise” in the navigation menu.
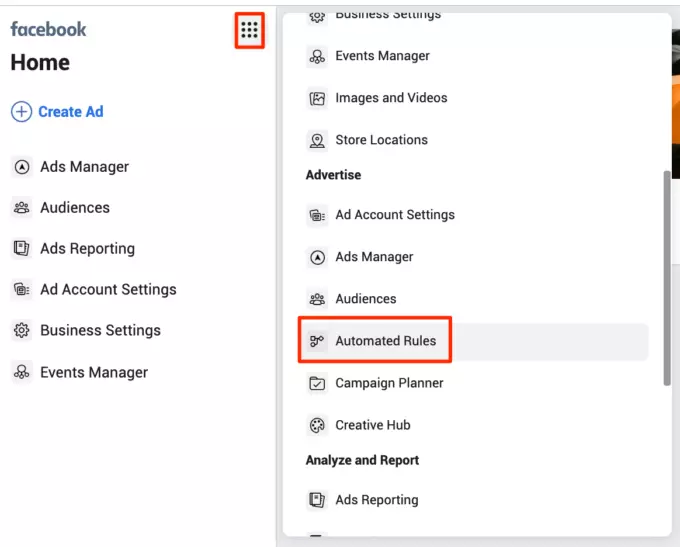
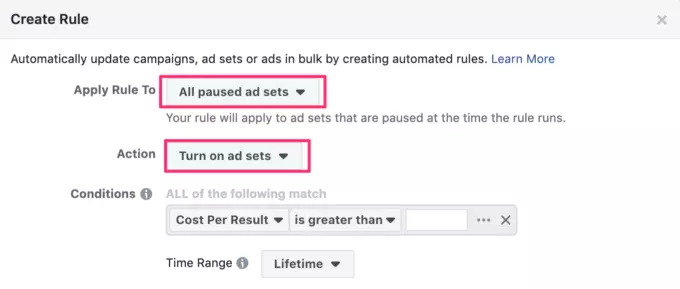
Click the green “Create Rule” button in the top right corner.
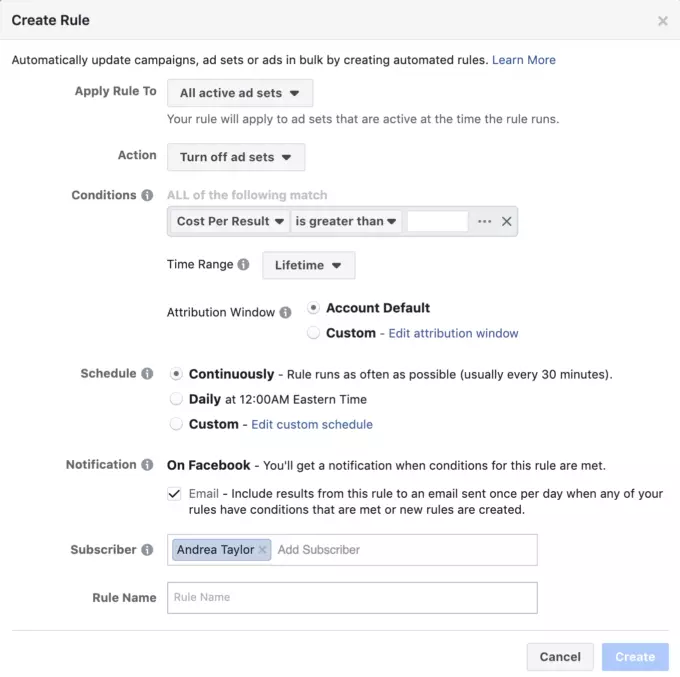
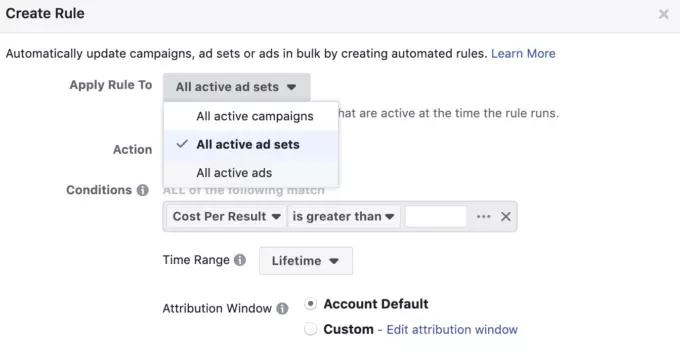
At the time of publication, you can only apply your rule to all active or paused campaigns, all active or paused ad sets or all active or paused ads.
In the action field, you can select to pause, activate, send a notification, adjust budgets or adjust bids.
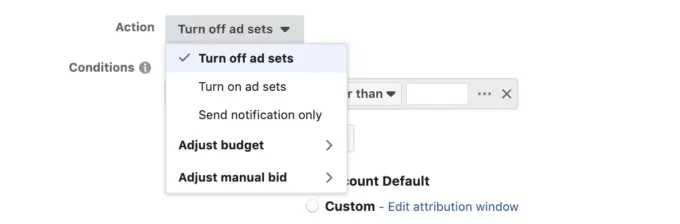
Tip : If you select “Turn on Ad Sets” in the Action field, you’ll see the “apply rule to” field will change to paused campaign, ad set or ad.
There are infinite combinations of automated rules you could create. Instead of running through the intricacies of these options, important things to know about automated rules are below.
Additional options available are:
- You have the ability to scale budgets by target field. Meaning that you can update your CPA, CPA or other cost goals
- Bids can be adjusted in the same manner as budgets.
- Options for action frequency are bi-weekly, weekly, daily and hourly.
- You can add conditions, such as “cost per result is greater than $50”, with a time range that can be from today all the way to the lifetime of the account.
- The attribution window can also be adjusted if you would prefer a different window than what your account is currently using.
- Rules can run as often as every 30 minutes, daily or on a custom schedule.
- You can also opt to get an email notification in addition to your Facebook notification.
- Additional subscribers can be added if there are others on the account who would like updates on rules.
Automated rules are a great way to leverage some automation in Facebook without giving up too much control.
Conclusion
Facebook has many hidden gem tools and features that are often buried in the complicated interface.
By utilizing these features and tools, you can take your Facebook campaigns from good to great!