Introduction
Keeping yourself anonymous is sometimes your job requirement or for fun. Hackers always find ways to keep their internet traffic completely anonymous and if a hacker is given the option to select proxy server of his/her choice than its a cherry on cream.
You all must be aware of TOR , today we will talk about a tool that will help you to select proxy server or TOR exit node of your choice easily. Using this tool, we can connect to any country using country ISO code. According to researcher of International Institute of Cyber Security TorGhostNg blocks all non TOR traffic through Iptables and redirects all the traffic to TOR network.
Environment
- OS : Kali Linux 2020
- Kernel-Version : 5.5.0
Installation Steps
- Use this command to clone the project.
- git clone https://github.com/githacktools/TorghostNG
root@kali:/home/iicybersecurity# git clone https://github.com/githacktools/TorghostNG
Cloning into 'TorghostNG'…
remote: Enumerating objects: 81, done.
remote: Counting objects: 100% (81/81), done.
remote: Compressing objects: 100% (79/79), done.
remote: Total 215 (delta 46), reused 0 (delta 0), pack-reused 134
Receiving objects: 100% (215/215), 80.06 KiB | 266.00 KiB/s, done.
Resolving deltas: 100% (117/117), done.
- Use the cd command to enter into Torghost directory
root@kali:/home/iicybersecurity# cd TorghostNG/
root@kali:/home/iicybersecurity/TorghostNG#
- Now, use this command to install dependencies sudo python3 install.py
root@kali:/home/iicybersecurity/TorghostNG# sudo python3 install.py
[+] Applying display language… Done
TorghostNG 1.3 - Make all your internet traffic anonymized through Tor proxy
Rewritten from TorGhost with Python 3
[i] tor is already installed
[i] macchanger is already installed
[i] pip3 is already installed
DEPRECATION: Python 2.7 reached the end of its life on January 1st, 2020. Please upgrade your Python as Python 2.7 is no longer maintained. pip 21.0 will drop support for Python 2.7 in January 2021. More details about Python 2 support in pip, can be found at https://pip.pypa.io/en/latest/development/release-process/#python-2-support
WARNING: Skipping pyinstaller as it is not installed.
[+] Installing PyInstaller…
Collecting pyinstaller
Downloading PyInstaller-3.6.tar.gz (3.5 MB)
|████████████████████████████████| 3.5 MB 1.4 MB/s
Installing build dependencies … done
Getting requirements to build wheel … done
Preparing wheel metadata … done
Collecting altgraph
=======================================================================================================SNIP========================================================================================
13158 INFO: checking PYZ
13159 INFO: Building PYZ because PYZ-00.toc is non existent
13159 INFO: Building PYZ (ZlibArchive) /home/iicybersecurity/TorghostNG/build/torghostng/PYZ-00.pyz
13879 INFO: Building PYZ (ZlibArchive) /home/iicybersecurity/TorghostNG/build/torghostng/PYZ-00.pyz completed successfully.
13888 INFO: checking PKG
13889 INFO: Building PKG because PKG-00.toc is non existent
13889 INFO: Building PKG (CArchive) PKG-00.pkg
19268 INFO: Building PKG (CArchive) PKG-00.pkg completed successfully.
19281 INFO: Bootloader /usr/local/lib/python3.8/dist-packages/PyInstaller/bootloader/Linux-64bit/run
19281 INFO: checking EXE
19282 INFO: Building EXE because EXE-00.toc is non existent
19282 INFO: Building EXE from EXE-00.toc
19283 INFO: Appending archive to ELF section in EXE /home/iicybersecurity/TorghostNG/dist/torghostng
19328 INFO: Building EXE from EXE-00.toc completed successfully.
[*] Done
[i] You can run TorghostNG with 'torghostng'
[i] If you have any questions, take a look at TorghostNG Tutorial Videos here: https://bit.ly/34TNglL
You will love it, i think :D
- Use this command to find help option, sudo torghostng -h

TorGhostNG – Help
- Now, use this command to start the tor services using the TorHostNg tool, sudo torghostng -s
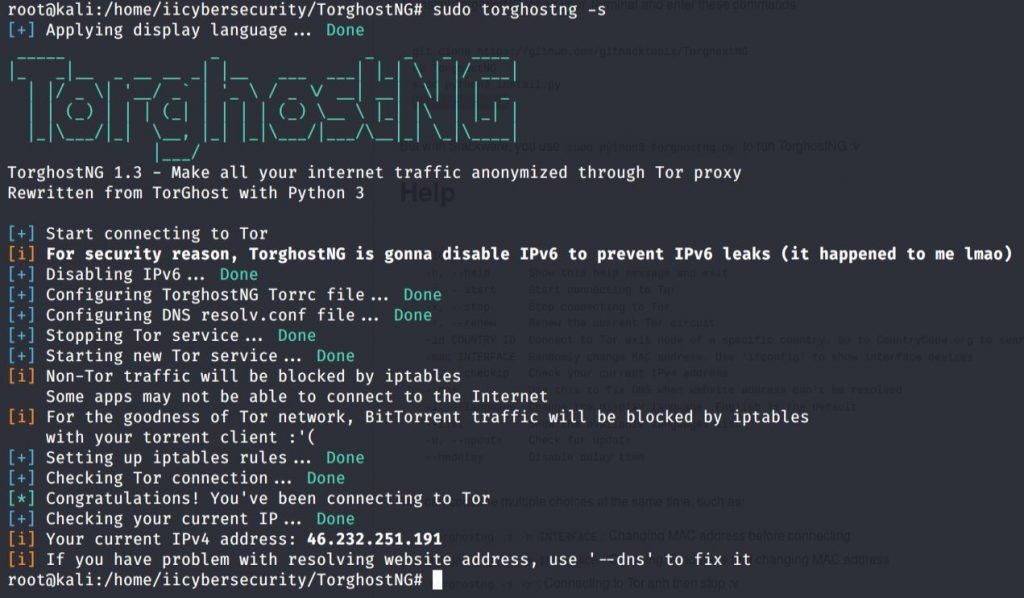
TorGhostNG – Start Tor Services
- Here, we successfully started Tor services.
- In the above picture we saw the IP address.
- Now, let’s verify the IP address by typing this ifconfig.me in the browser.
TorGhostNG – IP Address
- Successfully we got the same IP address.
Select the Proxy Server country
- Now you can make your internet traffic anonymized and use Proxy of any country of your choice .
- We can also change the TOR connection to different country, but before we will run sudo torghostng – c to check current TOR exit node IP.
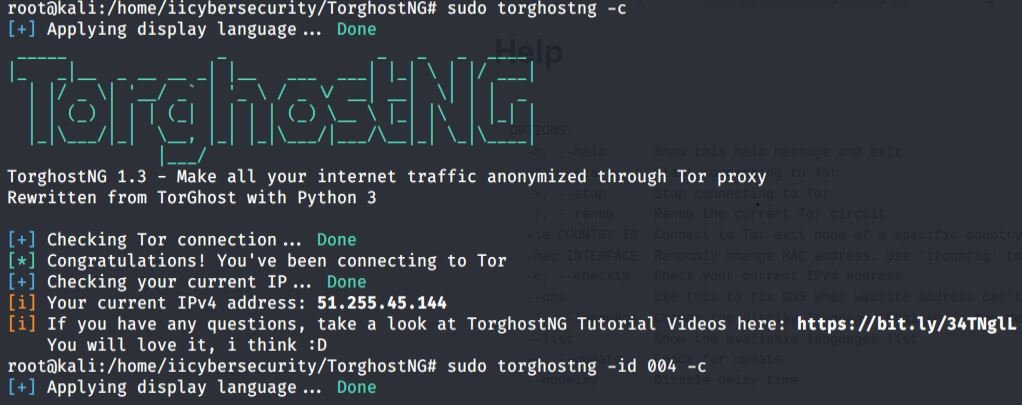
TorGhostNG – Renew the Circuit
- Now, we go to the new IP.
- Let’s try login to your Gmail account. As we know that when we try to login to any Gmail account, it will ask to authenticate ourself with operating system and location. Now, Let’s check the mobile phone.
TorGhostNg – Gmail Login
-
In the above picture we see gmail account is accessed from France .
-
We can also specify a particular country of our choice, by using country ISO country code. Click on this link for ISO Codes https://en.wikipedia.org/wiki/List_of_ISO_3166_country_codes
-
Use this command to connect the TOR services of a particular country. Sudo torghostng -id au -c
-
au is for Australia
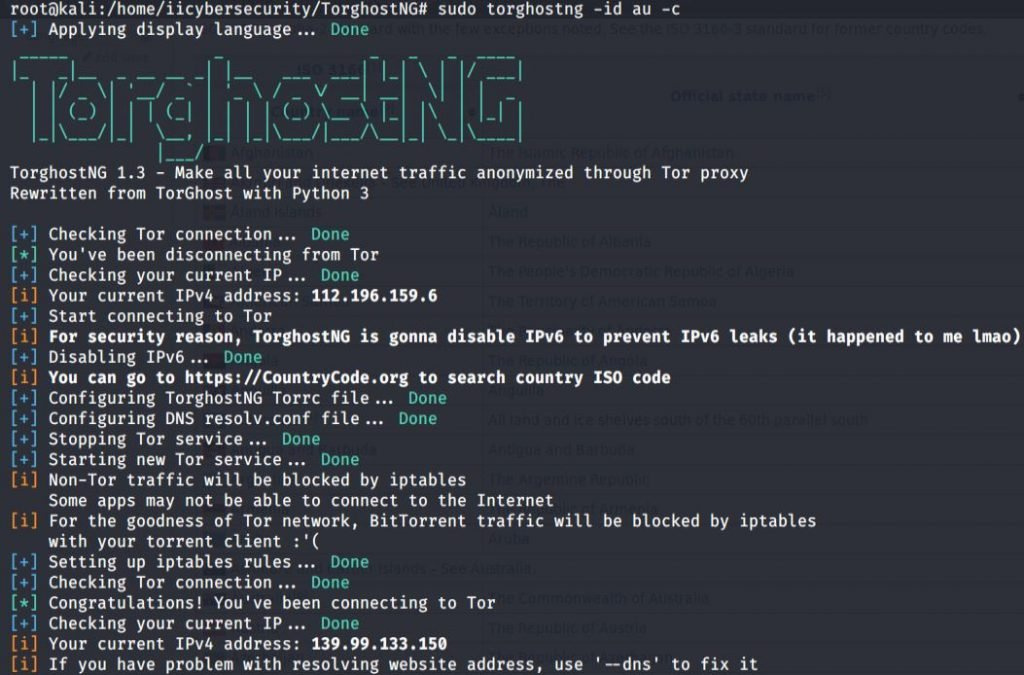
TorGhostNg – Connecting To Specify Country
- Here, we have connected to a particular country and we can also see check IP address.
- Now, use this command to verify the country
whois 139.99.133.150 This will display the complete details about the IP address.
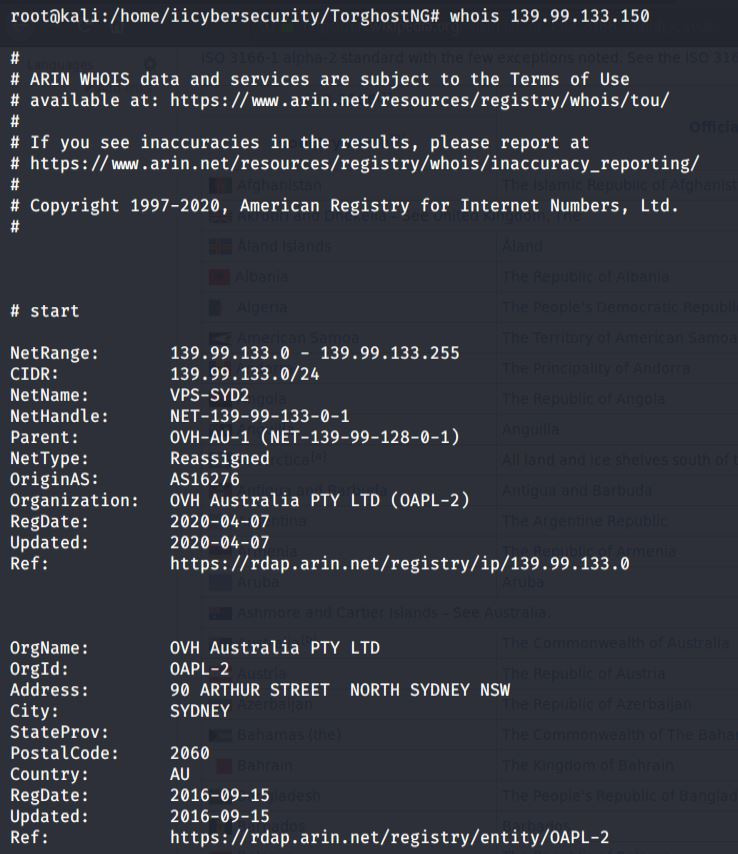
TorGhostNg – Connecting To Specify Country
- Successfully we got the details about the IP address and we proxy our traffic through Australia.
Conclusion
We saw how we connect the TOR services using this TorGhostNG tool. Many journalist and other profession people use TOR services to keep themselves safe on internet.
Source: securitynewspaper
enjoy folks!